Haudh Valandil
| Level: | 40 - 150 |
| Size: | Fellowship |
| Cluster: | Shadows of Angmar |
| Region: | Evendim |
| Area: | Tyl Annûn |
| Location: | [16.3S, 69.6W] |

Haudh Valandil (Sindarin for Valandil's Tomb) is a World Instance within Tyl Annûn, in Evendim. [16.3S, 69.6W]
This is the tomb of Valandil, youngest son of Isildur, grandson of Elendil himself, and once the third High King of Arnor. Now this place is overrun by horrors living and unliving, in the charge of Dolvaethor, an Angmarim sorcerer who will go as far as raising Valandil himself to achieve his goals.
The entrance is found down a set of stairs from northern Ariant, the great bridge connecting Annúminas to the island citadel of Tyl Annûn, nestled just below Ost Elendil.
Difficulty Level
This is a scaled instance, designed for a fellowship from level 40 and up.
It is available in the Instance Finder.
Haudh Valandil is the longest of the trio of instances within Annúminas and while it is very dark, the instance is not as maze-like as it first would appear. The braziers you need to light to proceed are clear due to the fact that the ones that are already lit will be blocked off entirely. Boss mechanics are fairly straight forward, just remember to position the first boss, Shingrinder, carefully so as to avoid falling to your death.
Estimated completion time is between 20 - 25 minutes.
Quests
.jpg)
Starting:
- [...] End Dolvaethor's Menace - Fellowship
- [...] Lights in Darkness - Fellowship
- [...] New Home for the Relics of Old - Fellowship
- [...] The Kergrim Stalk Haudh Valandil - Fellowship
- [150] Challenge: Valandil and Dolvaethor - Fellowship
Deeds
Known deeds for this instance (usually bestowed upon first entrance) include:
Mobs
These mobs are encountered within this instance:
Instance Overview
- First Boss:
 Shingrinder
 - Final Boss:
 Dolvaethor and
  Valandil of Arnor
Walk-through and Tactics
This instance has many fear and disease effects, Cave-claws, Kergrim, and Flashing Limrafn that will summon either three elites or an elite master if they get too close to anyone in the fellowship. Make good use of whatever Cure abilities you have available and deal with the Limrafn at range so as to avoid extra fights with the adds they spawn.
Haudh Valandil is a massive underground burial hall. In the middle is a large, central structure containing six rooms, three on either side. There is a wide, watery passageway leading around the structure. Within each of the building's six rooms there are braziers which need to be lit once the room has been cleared. At the dungeon entrance and the south gate, there is a line of 6 braziers that represent your progress in clearing the lower part of the instance. Once all 6 are lit you can proceed to the upper level. A random selection of two of the braziers will already be lit, and their corresponding rooms are blocked off from entry.
Begin by moving down the stairs, defeating the two patrolling Kergrim and Limrafn. All of the rooms are pretty much the same, with an Arnorian Knight who summons a group of Elite mobs, either Cave Claws, Limrafn, or Kergrim, or a combination. They have an attack that saps your power very fast, watch out for it. Pulling the Knight out of the room will cause the room to reset.
Once all the braziers in all of the rooms have been lit, a gate will open in the south of the instance. At the south end of the dungeon you will reach a room filled with Flashing Limrafn. Clear a path through them and enter the southern gate. Head up a few sets of stairs, carefully killing the Limrafn on the landings, and you will encounter Shingrinder on the bridge leading to the upper section of the central structure.
Watch out for knockback on the bridge, as a fall to the floor is fatal. After Shingrinder is defeated, head across the bridge, grabbing the chest as you pass it.
There you will see Dolvaethor standing behind a fiery inferno that is blocking your path, continuously spawning a single Burning Limrafn until you approach. Once you do, Dolvaethor will cause a rapidly increasing number of Burning Limrafn to spawn from the fire. Defeat them quickly or risk becoming overwhelmed. Since the Burning Limrafn have a buff that deals damage to melee as well as ranged attackers equal to the amount of damage received, the highest damage dealers will require a lot of healing. Focus damage on single targets, because AoE attacks will cause massive amounts of reflected damage at once. After the encounter, Dolvaethor will retreat farther back into the tomb, and the inferno blocking your path will be gone. (Leaving the area will cause the attacking Limrafn to reset.)
As you pursue Dolvaethor, you will encounter three elite Arnorian Wights and two Fiery Morelendil Guards mobs. The guards will not engage until the wights are defeated. Once you engage the wights, they will attempt run down the stairs on either side in order to aggro up to twelve additional wights. The best approach to this encounter is to have a Minstrel and/or Burglar crowd-control two of them as the rest of the fellowship pulls the middle wight down the steps. After the wights and any adds from the side areas are defeated, the two Fiery Morelendil Guards will engage. They are not tank-able, meaning they act like an enraged mob, and they have a knock-back attack that can spread people out. Have everyone move close together to prevent them from running back and forth, then burn them down one at a time. It is best to stand in the lower corner to the left or right of the stairs, as the knock-back can cause instant defeat if it knocks you to the bottom of the dungeon. Once the two guards are defeated, clear any wights in the side rooms.
Now you can approach Dolvaethor and Valandil of Arnor, the final boss encounter. Valandil has very high mitigation against most damage types, except Westernesse damage which will damage the creature normally.
After defeating Dolvaethor and Valandil, carry Valandil's remains to his coffin, and loot the chest.
Challenge
The challenge requires Dolvaethor and Valandil to be defeated within 10 seconds of one another. This is pretty straight forward and just makes the fight a bit more challenging as opposed to burning down Valandil before focusing on Dolvaethor. Instead, keep dps on both them steady and focus one or the other should the difference in their health values become too great.
Rewards
- For older (outdated) drops, see Dolvaethor.
| General |
|---|
| (Rare) Tracery (T2) |
| (Rare) Dextrous/Enduring/Resolute/Steadfast/Valorous Armour/Jewellery/Weapons |
Map

Gallery
-
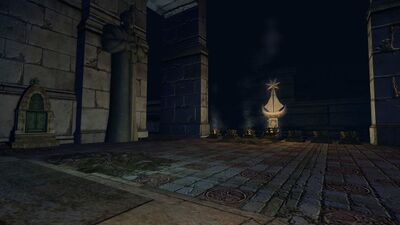 Beacons at the entry signal what must be done to proceed
 -
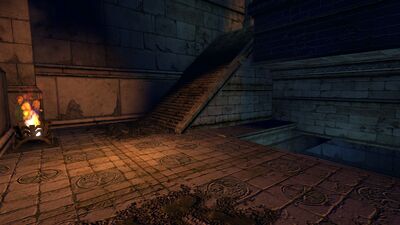
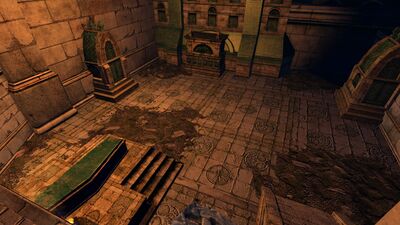
 The passages encasing the tombs are dark and damp
 -
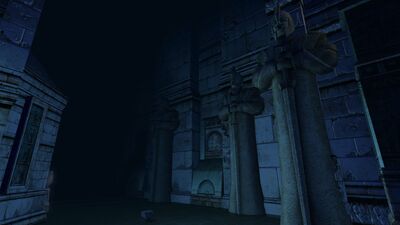 Towering statues line the walls of the main passages
 -
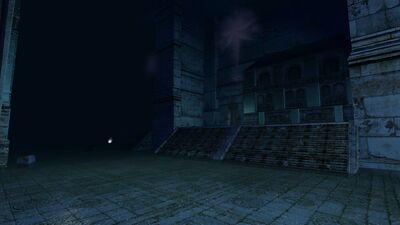
 Stairs leading to the upper crypts
 -
 Shingrinder guards the bridge to Dolvaethor
 -
 Tombs in upper Haudh Valandil
 -
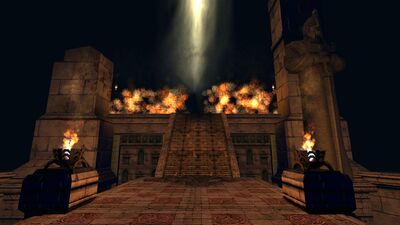 A wall of fire must be overcome to enter the deepest parts of the tomb


![[16.3S, 69.6W]](/wiki/File:Ann%C3%BAminas_map.jpg)
| Settlements and Landmarks of Annúminas and Tyl Annûn
| ||
|---|---|---|
| Settlements: | Echad Garthadir | |
| Landmarks: | Adannon • Ariant • Clorhir • Eastern Gate of Annúminas • Gaerannon • Gwaelband • Menelband • Minathranc • Port of Annúminas • Tirband | |
| Dungeons: | Amarthiel's Hope | |
| Instances: | Glinghant • Haudh Valandil • Ost Elendil | |