Beorning Gameplay
| Class Navigation | ||||||||||||
|---|---|---|---|---|---|---|---|---|---|---|---|---|
| Classes | ||||||||||||
| Skills | ||||||||||||
| Traits | ||||||||||||
| Effects | ||||||||||||
| Traceries | ||||||||||||
| Quests | ||||||||||||
| Deeds | ||||||||||||
| Guides | ||||||||||||
Gameplay
Beornings cycle between Forms to generate and expend Wrath in order to perform their specialization's role. They must time their strongest Wrath-consuming skills to have the greatest effect due to their long cooldowns and expensive costs. Beornings are tanky in every specialization, and don't have to worry as much about incoming damage. They have several strong debuffs available in all specializations, such as ![]() Armour Crush and
Armour Crush and ![]() Bee Swarm.
Bee Swarm.
- Blue-line (Tank): Beornings specializing in the Hide trait tree use
 Menacing Maul and
  Thunderous Roar to maintain aggro of enemies. Their incredibly high morale pool and passive healing makes up for their lack of minor cooldowns. Despite this, they can use
  Hurricane to drastically reduce damage for a decent duration. As tanks, they are best at maintaining AoE aggro, but must manage their Wrath carefully, or be left without the ability to save themselves from damage.
 - Red-line (Damage): Beornings specializing in the Claw trait tree use Wrath finisher skills like
 Final Strike and
  Execute to deal massive damage at the expense of consuming all Wrath.
  Thrash is used to rapidly restore Wrath. They are also responsible for keeping up multiple bleeds, like
  Bash and
  Serrated Edge.
 - Yellow-line (Healer) Beornings specializing in the Roar trait tree expend Wrath to heal the fellowship or raid via skills like
 Relentless Maul and
  Rejuvenating Bellow. They must carefully time their healing skills so that they do not run out of Wrath at the wrong time, and their biggest AoE heals have longer cooldowns. They also have several debuffs that require them to remain in melee range of their enemies while healing.
Despite the initial complexity of Wrath and Form-swapping, Beornings are fairly easy to play once learned. The notable exception to this is Yellow-line Beorning, which is the hardest healer to play in the game. The class is very strong if played well, but also has the potential to fall flat if the class isn't fully understood.
Wrath

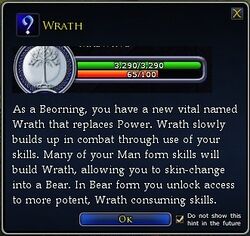
As a Beorning, you have a new vital named Wrath that replaces Power. Wrath builds up in combat through use of your skills. Many of your Man form skills will build wrath, allowing you to skin-change into a Bear. In Bear Form you unlock access to more potent, Wrath consuming skills. Wrath state is not maintained between logons so your character will always start with zero Wrath upon login.
Forms

When Beornings gather sufficient Wrath they can take the form of a great bear to unleash attacks on their foes.
Beornings are designed to be a dynamic skin-changer class. A Beorning can alternate back and forth between forms (or stances) almost at will, dependent only upon their level of Wrath. There are two ways to do so:
- Use the skill
 Bear-form or
  Man-form.
 - Use another skill that changes your form automatically (
 Thrash for Bear-form and
  Slash for Man-form).
A Beorning's basic skills emphasize the difference between Man and Bear Forms. There are skills available in three different ways -- those available in Man Form; those available in Bear Form; and those available in either form.
For more information, see Bear-form and Man-form.
| Beorning
| ||
|---|---|---|
| Gameplay • Skills • Traits • Effects • Traceries • Armour Sets • Armour • Jewellery Sets • Weapons • Items • Quests • Deeds • Guide |