Helegrod: Spider Wing
| Level: | 50 - 150 |
| Size: | 12-person Raid |
| Cluster: | Helegrod |
| Region: | Misty Mountains |
| Area: | Bruinen Source North |
| Location: | [17.9S, 2.2W] |

- "Helegrod... Once a dwarf-hold in the Misty Mountains, until the coming of a great dragon. Though the dragon has long since perished, and the ice of many long winters has engulfed the ruins, rumours out of the North speak of a terrible shadow returning to the frozen halls..."
Location
Helegrod is a raid instance intended for raid groups of 12 to 24 players from level 50 and up. The entrance is located at the top of the Bitter Stair, in the far northern reaches of the Misty Mountains. A Camp Site Fire with a Mustering Horn is found south-west of the stairs, at a camp where Sigrun provides raid quests. [19.1S, 2.9W]
Overview
Torech Mordeloth is large expanse of tunnels filled with spiders. It is recommended to bring at least a few Champions for this area, as their area-of-effect damage can be used to maximum effect. Hunters to cure the countless poisons are also a great help. The first few pulls are easy, so clear them until you reach a cavern with three groups of Hill-men and a large Spider-queen who patrols in between them. Although it is possible to take on the whole room at once, pulling the Hill-men groups one at a time makes it easier on the raid.
After this you may find yourself trapped by webbing. There are torches by campfires that can be used to burn down webs. Move cautiously through each room, as there are invisible spiders waiting in ambush. Attacking queens will pull all nearby spiders, so try to clear out as many of them as possible before engaging a queen. After a fight with 3 spider-lings, giant spiders, and an Angmarim, you will find yourself facing Breosal. At a certain morale threshold she will run off to the frozen lake that forms the boss room.
The fight with Zaudru requires a large amount of poison clearing, so bring plenty of pots. Your hunters may not be able to handle it all. Once you attack the 2 elites next to Breosal, and the fight begins. There are a lot of spiders in this encounter so have an off-tank ready to protect the healer if they slip by your MT. Also assign a ranged DPS to do the dismal job of attacking the little ones behind you, because they have a ranged attack, and will usually attack the healer. After the hill-men the silk-spinners attack 2 at a time, and summon a lot of spiders with them. Mezz one or both of them, and take care of the adds. Then kill the first hill-man. You may need to regenerate a little before proceeding to the second one. After the second hill-men is defeated the process repeats itself, until there are no silk-spinners left.
Then, Breosal attempts to get Zaudru to help her kill you. Zaudru devours Breosal, and moves on to the main course. You! She also tells her children that is is supper time. Pop a hope token. Have the offtank ready for action, if you MT can't handle 15 or more elites, and try to keep everybody alive. It is important to mezz the adds as they respawn as soon as you kill them. You will also need poison potions for Zaudru's many different attacks. If you get the lethal poison, GET IT OFF. It kills you in 15 seconds, like baleful eye in the Thorog fight. Since instead of putting on one person, Zaudru puts it on everyone, this is where the pots come in handy. With the adds mezzed (Rooting doesn't work because they also have potent ranged attacks) and the poison throughly taken care of, Zaudru should be no trouble.
Quests
Auto-bestowed
Notice that quest level depends on the level of the instance, here are listed the minimum levels
- [50] Challenge: Zaudru
- [50] Raid: An Evil Place, Crawling With Spiders
- [50] Raid: Spider Squasher
- [50] Raid: Zaudru's Brood
- [95] Helegrod Spider - Raid
Involving
Deeds
Mobs
Bosses
This instance is scalable; for stats, see each boss individually (and add missing data).
| Name | Difficulty | Species |
|---|---|---|
| Arch-nemesis | Man | |
| Arch-nemesis | Spiders and Insects |
Others
Lore
- In the distant north of the linked valleys of the Misty Mountains lie the frozen halls of Helegrod. Once it was a great Dwarf-hold, home to treasures dug from mountain mines, secure against cold winds and rancorous Orcs, but its glittering riches and mountaintop fires caught the eye of a Dragon called Thorog. It descended on Helegrod and laid claim to the fortress until the coming of Durin V, who led a company of Dwarves against the beast.
- Thorog perished, but his defeat cost the lives of many brave Dwarves, including Durin. The survivors, blood-stained and grieving, felt the shadow of Thorog was too great to ever forget. They emptied their treasuries and withdrew, abandoning Helegrod and the corpse of Thorog to the ice. After the flight of Durin’s Folk, Helegrod’s halls lay empty for countless long winters.
- The path to Helegrod is a steep and snowy stretch marked by Dwarf-made columns and known now as the Bitter Stair. The main gate of Helegrod is a true testimony of dwarven craftmanship. Here, blazing Dwarf-torches warn of the scarred and evil-tinged halls abandoned beyond. All the great gates of Helegrod bear carvings of the dragon Thorog, who slew so many here and was slain himself too.
Loot
Level 120
Jewellery![]()
![]()
Weapons![]()
Armour![]() Item:Leg-guards of Hope Rekindled (Level 85)Item:Shield of Deliberate Assault (Level 85)Item:Spaulders of the Desperate Charge (Level 85)
Item:Leg-guards of Hope Rekindled (Level 85)Item:Shield of Deliberate Assault (Level 85)Item:Spaulders of the Desperate Charge (Level 85)![]()
![]()
Weapons![]()
Jewellery![]()
![]()
![]()
Map

Gallery
-
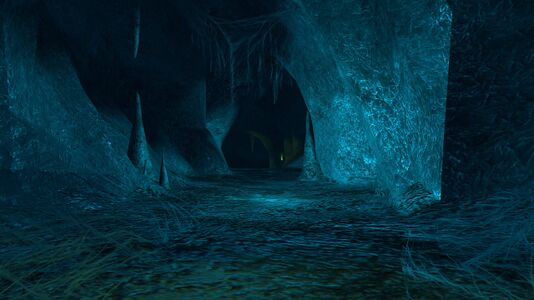 Entrance tunnel
 -
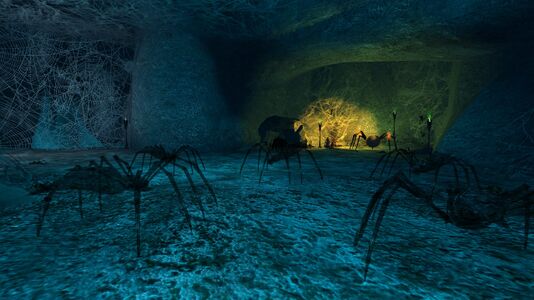 Shadow-brood ambushers
 -
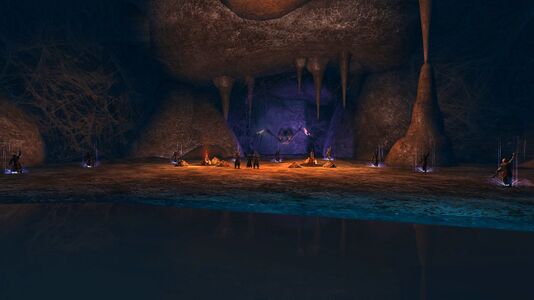 Breosal with her minions, and Zaudru


![[17.9S, 2.2W]](/wiki/File:Misty_Mountains_map.jpg)