Garth Agarwen: Barrows
| Level: | 32 |
| Size: | Small Fellowship |
| Cluster: | Shadows of Angmar |
| Region: | Lone-lands |
| Area: | Garth Agarwen |
| Location: | [27.7S, 24.5W] |

Garth Agarwen: Barrows is a World Instance within Garth Agarwen, in the Lone-lands. [27.7S, 24.5W]
An archway leading to these desecrated burial grounds can be found within Garth Agarwen in the northern part of the non-instanced fortress occupied by the hill-men. The dead shamble and stalk the ruins of these once great tombs, being guarded by a contingent of Créoth tribesmen. In the highest point of the barrows, Ivar the Blood-hand is conducting a dark ritual in service of Angmar.
Difficulty Level
This is designed for small fellowships (up to 3 players) around level 32.
It is available in the Instance Finder.
The barrows is between Arboretum and Fortress in terms of difficulty, though the difference is negligible assuming full groups for each. The first boss, Blogkritar, has nothing of interest to note and Ivar's mechanics are still basic given this is intended for level 32 players. The main thing to note is that wights spawn in a number of locations when stepped on by a player. Take caution to not cause too many wights to spawn and become overwhelmed.
Estimated completion time is between 10 - 20 minutes.
NPCs
Quests

Starting:
- [32] Challenge: Ivar - Small Fellowship
- [32] Oakheart's Plight - Small Fellowship
- [32] Optional Objective: Créoth – Small Fellowship
- [32] Optional Objective: Decayed – Small Fellowship
- [32] Optional Objective: Unnamed Tombs – Small Fellowship
- [32] Optional Objective: Wights - Small Fellowship
Involving:
- [32] Ivar the Blood-hand - Small Fellowship
- [35] Rings of Rhudaur - Fellowship
Mobs
These mobs are encountered within this instance:
Instance Overview
- First Boss:
 Blogkritar
 - Final Boss:
 Ivar the Blood-hand
Walk-through and Tactics
The instance begins in a more "fortress" like area, with Creoth abound. It is a square, so going left, or right is irrelevant. At the other side of the square there is a gate, going underneath this gate will cause a swarm of Twisted Arms to attack. After proceeding through these, you will head into the true barrows with wights, and you can go either straight or forward. Also take note before moving, that standing near a vertical tomb, with a closed stone arch, will cause a elite wight to spawn, and is not a good idea to do during combat. Going forward eventually leads to a dead end, but should probably be cleared out it you plan on completing the Sara Oakheart quest found later in the instance. Going right will lead you to the first tomb, and a tunnel. You may also notice the second tomb to the right of the tunnel, but getting to it usually involves stepping on a wight spawn zone, and spawning 3 wights.
After proceeding through the tunnel, or around it, you can go left, leading to the third tomb, right leading to the fourth tomb, or left leading to the gate to Ivar. After you have discovered any tombs, and have arrived at Ivar's gate you can either go to the far right or the far left. Going right will lead around Ivar's crypt, and eventually leads to Sarah Oakheart, who gives an escort quest to help her get back to the instance entrance. It takes a contrary route that leads to the dead end encountered earlier. Going left, however, lead to the fifth tomb, and at the other side Blogkritar. Blogkritar is a nasty elite mob, who, when nearly defeated, fully heals, and summons an elite wight to join him. He summons 2 adds, and must be burned down 3 times before being defeated, making him a brick wall without a primary healer. After his defeat the way to Ivar will be open.
Now you head back to Ivar's gate, and after walking up a short road will enter Ivar's crypt, and encounter Ivar the Blood-hand. In order to complete the challenge players must not defeat the banner-wights, which don't attack the players, but instead heal Ivar. He also continually summons archer adds, which will pull the fight further, and further out of control, if not taken care of.
Rewards
| Blogkritar |
|---|
| Ivar the Blood-hand |
|---|
Maps

Gallery
-
 Creoth encampment before the barrows
 -
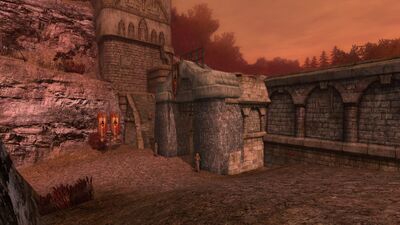 Gateway into the barrows
 -
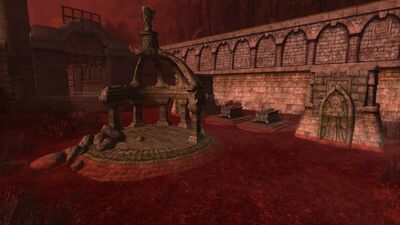
 Creoth flags in the barrows
 -
 Flooded tombs make for a perfect disease breeding ground
 -
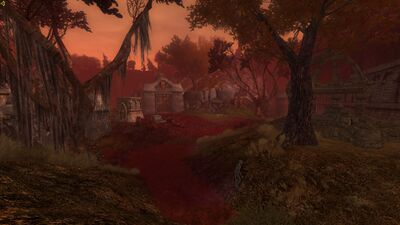
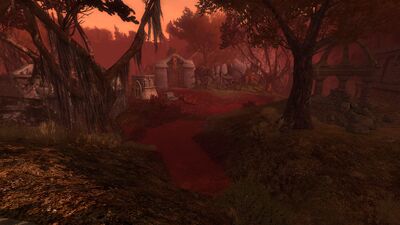 Southernmost barrows along a putrid stream
 -
 Central barrows & Blogkritar's arena
 -
 Ivar's Crypt, the highest point in the barrows


![[27.7S, 24.5W]](/wiki/File:Lone-lands_map.jpg)
| Settlements, Areas and Landmarks of the Lone-lands
| ||
|---|---|---|
| Areas: | Agamaur • Annunlos • Garth Agarwen • Haragmar • Harloeg • Minas Eriol • Nain Enidh • Talath Gaun • The Weather Hills | |
| Settlements: | The Forsaken Inn • Ost Guruth | |
| Landmarks: | Amon Ros • Barad Iachiant • Bleakrift • Candaith's Encampment • The Circle of Blood • Dol Vaeg • Echad Sûl • Eglain Camp • Garth Agarwen Gate • Glumhallow • Gondrinn • Ivar's Crypt • The Last Bridge • The Lornspan • Mitheithel • Mithrenost • Naerost • Nan Dhelu • Nindor • Ost Cyrn • Ost Haer • Ost Laden • The Outer Gates • Skirmish Camp • Spring of the Red Maid • Thandobel • Tornstones • Weatherfoot • Weathertop | |
| Interiors: | Barad Dhorn • The Forsaken Inn • The Lore-tower | |
| Dungeons: | Iorvinas | |
| Instances: | World: Arboretum • Barrows • Fortress • Inn of the Forsaken / Skirmish: Stand at Amon Sûl / Quest: A Burglar's Errand | |