Lost Temple
| Level: | 65 - 150 |
| Size: | Fellowship |
| Cluster: | In Their Absence |
| Region: | Trollshaws |
| Area: | Nan Tornaeth |
| Location: | [26.6S, 14.1W] |

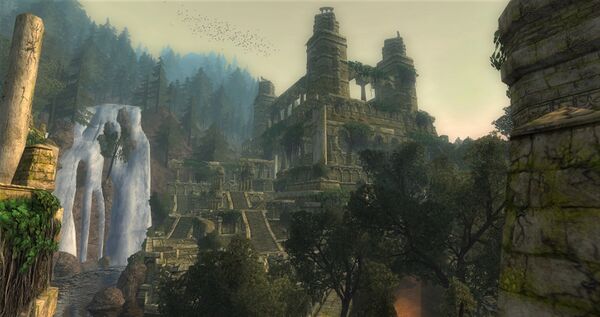
Lost Temple is a 6-man world instance in Nan Tornaeth, in the Trollshaws. [26.6S, 14.1W]

- "A band of mercenaries led by the Gaunt-lord Ferndur have begun looting hidden a Rhudauran temple, left in ruin since the fall of the Northern Kingdoms. What purpose does this servant of darkness have within?"
Though this old and once glorious temple is indeed towering high above the road between Ost Chall and Ost Brandras, there is no entrance from the path leading up the temple. Rather, the instance is entered through a back-door in western Ost Chall. The Lost Temple is a target location for the In Their Absence quests.
Travelling
- Mustering Horn [26.9S, 14.2W]
- Camp Site Fire [28.2S, 15.3W] — The camp site fire is located below Amon Varadh, then travel clockwise around the cliff formation through Amon Varadh, over the bridge past Minas Ciliant to Ost Chall.
Difficulty Level
This is a scaled instance, designed for a fellowship (6 players) from level 65 and up.
It is available in the Instance Finder.
Estimated completion time is between 30 - 45 minutes (Tier 1).
NPCs
Quests
Fellowship quests:
- [65] In Their Absence, Chapter 8
- [65] In Their Absence, Chapter 9
- [65] In Their Absence, Chapter 10
- [150] Challenge: The Lost Temple -- Clean Sweep
- [...] Instance: The Lost Temple
Deeds
Known deeds for this instance (usually bestowed upon first entrance) include:
Titles
Mobs
These mobs are encountered within this instance:
Instance Overview
Bosses
| Level | Name | Difficulty | Species | Tier |
|---|---|---|---|---|
| 67 | Nemesis | Angmarim | 1 | |
| 67 | Nemesis | Angmarim | 1 | |
| 66 | Elite Master | Wight | 1 | |
| 66 | Elite Master | Wight | 1 | |
| 66 | Elite Master | Troll | 1 | |
| 67 | Nemesis | Gaunt Lord | 1 |
Note: Values given are for a level 65 instance. These will be correspondingly higher for a higher instance level.
Walk-through and Tactics
Note: It's highly suggested that you install a plugin that assists with curables for this instance (e.g. BuffBars).
Tier I
Angaidh and Sidhág
| Name | Effect |
|---|---|
| The siblings gain the Warding Shadow buff when standing together | |
| +66% outgoing damage, -66% incoming damage | |
| Curable debuff, doubles incoming tactical damage | |
| Channeled damage over time; interrupt Sidhag to remove |
Have the tank grab aggro on Angaidh and pull him away while everyone else attacks Sidhág. The two of them gain a buff when together and a powerful AOE attack, so keep them separated. Sidhág has a channeled attack; there's no induction circle but it can be interrupted or broken by LoS. Sidhág doesn't move much so any time the two group up, have the tank pull Angaidh out of buff range again. This should be done on the ground floor, back and forth, with one of each of them on opposite ends of the room so everyone remains within healing range. Attack Sidhág down to 50% morale then switch to Angaidh and kill him. Switch back to Sidhág and finish her off.
- "Fear not, brother, you shall not fall!" - Sidhág is healing Angaidh, need to weaken her first
- "See to your wounds! I will deal with these fools!" - Sidhág has been weakened enough, switch to Angaidh
- "Shadows, protect me!" - Sidhág is healing herself, need to weaken Angaidh
- "How fare thee, brother?" - Sidhág runs over to Angaidh, pull him to the other side
- "Let me lend a hand!" - Angaidh runs over to Sidhág and drops aggro, taunt him back
- "Stand still worm" - Stun and induction for a large hit, interrupt the induction
- "I stand in the darkness!" - Heavy AoE damage when they stand together, run away
- "Are you afraid of the dark?" - Incoming tac damage debuff, cure it
Killing Sidhág and Angaidh within 10 seconds of each other will complete the Synchronized Slaughter deed and grant the Swift Executioner title.
Note: A minstrel is preferred on Sidhág and Angaidh (because of nuke heals), although a good rune-keeper can heal the fight.
Inner Temple Mobs
- Rot Maggot Larva will infect a player if they do not move away or interrupt its induction before it finishes. If the infection isn't cured a Rot Maggot will spawn. If cured, the larva will be expelled and will look for another target to infect.
- Rot Maggot will spawn a new Rot Maggot Larva if its induction is not interrupted.
- Pestilent Troll has a frontal AoE spit attack.
There are numerous curable diseases encountered in the inner temple, many of which you'll have to actually decide if, when and where you cure them. You can easily go through a full stack of pots after a few wipes, so plan accordingly.
| Name | Action | Effect |
|---|---|---|
| Cure | -75% Incoming healing, -75% Outgoing healing | |
| Ignore | +100% Power costs, removes a huge amount of power if cured | |
| Cure away from others | DoT, Drops a contagious cloud on the ground where it's cured | |
| Cure away from others | Slows movement and attack speed/Dizzyness. AoE stun on cure. | |
| Uncurable | +20% Incoming damage, +20% Tactical Damage (Stacks to 5) | |
| Uncurable | 917 Acid Damage every 3 seconds for 15 seconds | |
| Cure | Acid DoT, spawns a Rot Maggot if not cured |
Ferndúr the Virulent
Notice: This fight has been setup to be an endurance fight which requires patience, discipline and coordination to conquer. Hard DPS on Ferndúr will only push the fight further and further out of control. See below on why pacing damage and tactics.
At the start, let the main tank grab solid aggro on Ferndúr and then fight him in place.
At 250k morale, Ferndúr will start to put incurable eyes on players.
| Name | Appearance | Effect |
|---|---|---|
| Green eye | Incurable DoT that, on expiration, drops a damaging cloud on the ground and brings to life any corpse on the ground within the cloud's area. | |
| Red eye | +300% threat generated and lowered defense. Minimize attacking/healing and wait for it to expire. | |
| Red cloud | Does heavy DoT and instantly kills a player with the green eye (to prevent you from dropping all the clouds on top of each other). | |
| None | -75% Common Mitigation |
The frequency of these eyes is affected by how much damage (15-25k?) is dealt to him, or after a set period of time expires (1m?) if that damage amount hasn't been reached.
When the first yellow-green eye is applied, immediately stop all damage on him and have the tank kite him around the room. The healer should be prepared to keep this player healed while the eye does damage and everyone else should be ready to pick up the corpses that spawn.
Drop the cloud info: Your fellowship has the option to either:
- Drop the cloud in the center of the room. (Easier cloud placement towards the end of the fight.)
- Drop the cloud against the wall behind the troll on the right. (Less pressure mid fight with one less troll.)
From there, continue to drop clouds along the outer wall, in order, next to the last cloud that was dropped. It's very important to place these clouds in order so that when they clear up later, they will also clear up in order giving you a continuous area to work.
- Target Priority: Rot Maggots > Trolls > Wight Archers > Wights > Wight Captains > Ferndúr
If all adds are cleared and nobody has an eye, the tank can bring Ferndúr to the healer and everyone can attack him until the next eye is applied.
At 150k morale Ferndúr will spawn about 8-14 Rot Maggot Larva all at once. Either root/mez them and kill them separately or burn them all at once making sure to pot any infestations. Constantly moving to avoid infestation works extremely well.
Towards the end of the fight, there's usually an urge to do hard DPS. Resist this temptation, since you'll quickly run out of space to work with too many eye clouds to drop and not enough space to drop them. The clouds expire after a long timer giving you more room to work, so patience pays off in this fight.
Tier II
Challenge Mode: Spawn and kill all of the corpses in the final boss room prior to killing the boss (they reset if you wipe). The amount of damage Ferndúr will take between eyes is smaller than Tier 1. (5-15k?)
There is a time limit of 11 minutes before the boss fills the room with clouds, so clouds need to be placed strategically to hit as many corpses as possible. You need to steadily DPS Thadúr to generate enough eyes to raise all of the corpses and defeat Thadúr within the time limit, but also clear the adds quickly so you don't get overwhelmed by them.
Tank:
- Get aggro on Ferndúr and tank him in place until 250k morale.
- Kite tank after first yellow-green eye is applied and continue as long as there are adds up.
- Do as little damage on Ferndúr as possible while maintaining solid aggro.
- As you kite, run through the group and grab aggro on all loose adds if you can.
- If you need to be healed, be aware of where the healer is and make sure to kite in range.
- If there are no adds up and no one has an eye you can stop kiting and bring Ferndúr to the fellowship to fight until the next eye.
(Wardens constantly executing conviction on the run is very effective.)
DPS:
- Once the tank grabs solid aggro, attack Ferndúr until he's down to 250k morale, then no more damage on him until all corpses are cleared.
- Always watch over the healer and pull off any aggro immediately without hesitation. This is your primary duty. Even small interruptions in heals can easily result in a wipe.
- Fight all adds near the healer. Don't chase adds, let them come to you. It's your responsibility to be in range so that you can be healed and you will also be close to where to drop the next eye.
- Focus fire on targets is extremely important to survival. Always be attacking the DPS assist target unless you need to help the healer, pot a contagious disease, kite adds, or get an eye.
- If there are no adds up and no one has an eye, controlled attacks on Ferndúr are acceptable until the next eye is applied.
Healer:
- Stand between the spot where the next eye should drop and the middle of the room. Everyone other than the tank should be close to you so that if they get the eye they can drop it without running too far. It's their responsibility to be within your range to be healed so stand in place.
- Always facing the spot where the eye should drop makes it easier to notice when that person starts running toward it.
- Whenever someone gets an eye be sure to keep full heals on that person until the cloud drops.
- After a cloud drops, reposition yourself immediately to prepare everyone for the next eye.
Loot
Level 85 Loot (In Their Absence shared)
![]()
![]()
![]()
![]()
![]()
![]()
![]()
![]()
![]()
![]()
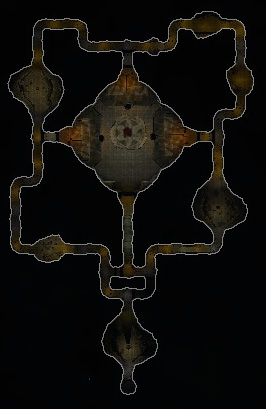
Map

