Sâri-surma
| Level: | 65 - 150 |
| Size: | Fellowship |
| Cluster: | In Their Absence |
| Region: | Forochel |
| Location: | [20.1N, 78.8W] |

- "An evil presence has descended upon the Ice Bay of Forochel, inhabiting a large glacial iceberg. Having sent several hunters to defeat the evil, the Lossoth have asked you to help them destroy this evil once and for all...."
Sâri-surma (Lossoth language for Island-death) is a World Instance, in Forochel. [20.1N, 78.8W]
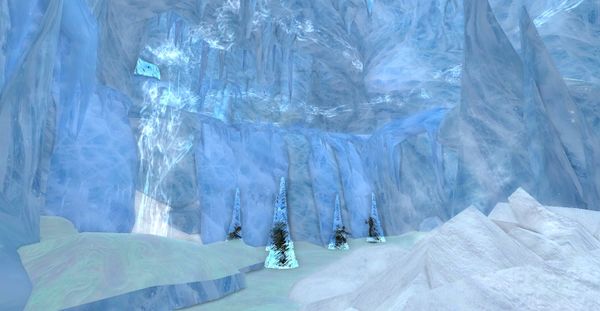
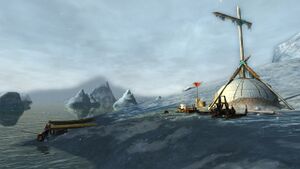
Sâri-surma is the largest iceberg in the Ice Bay. Apparently Drugoth the Death-monger was driven out of the Misty Mountains and was relocated to this icy location, where he has built himself a citadel from which he schemes against the southern lands of Arthedain.
This instance is also known as the "Glacier Fortress" and it provides In Their Absence quests.
In order to start the instance from the instance finder the Discoverer of Sâri-surma deed first needs to be completed.
Difficulty Level
This is a scaled instance, designed for a Fellowship (6 characters) from level 65 and up.
It is available in the Instance Finder.
Estimated completion time is between <x - y> minutes.
NPCs


Quests
Starting:
- [65] In Their Absence, Chapter 11 - Fellowship
- [65] In Their Absence, Chapter 12 - Fellowship
- [65] In Their Absence, Chapter 13 - Raid
- [65] Defenders of the Fortress - Fellowship
- [150] Challenge: Sâri-surma -- Survival - Fellowship - tier 2
Involving:
- [65] In Their Absence, Chapter 10 - Fellowship
- [...] Year 3 Trifles: This Time with Feeling I - Anniversary
Deeds
Known deeds for this instance (usually bestowed upon first entrance) include:
Titles
Mobs
These mobs are encountered within this instance:
Bosses
| Level | Name | Difficulty | Species | Dread | Morale |
|---|---|---|---|---|---|
| 67 | Nemesis | Bear | 115,885 | ||
| 67 | Nemesis | Bear | 115,885 | ||
| 67 | Nemesis | Giant-kind | 172,900 | ||
| 67 | Nemesis | Gaunt Lord | 271,700 |
Instance Overview
Most creatures and bosses are more susceptible to fire than other types. Be sure to bring ample wound and fear pots for this instance.
There are steam vents spread throughout the instance that will apply a 1-hour Warding Warmth buff that protects from some minor frost effects if standing within their Invigorating Warmth for 10 seconds.
Three types of mobs lie in wait on the way to Coldbear the Wight:
- Snowbear-wight Matron and Snowbear-wight Cubs aggro in groups of three, one Matron and two Cubs. Like other bear cubs, these cubs are neutral but will attack if they come close to characters. While alive, the matron provides a +50% damage buff to her cubs and receives a +200% damage buff for each of her cubs that die. After being defeated, a Matron ghost will spawn but not aggro unless attacked. The spirit of the Snowbear-wight Matron will despawn after a minute or two. If defeating the cubs while the matron is mesmerized by a Lore-master, she shouldn't get the damage buffs.
- Brumal Grims, like other grims, are tough, AoE-dealing creatures, but require little more than a simple tank and spank. There will be a main grim and a minion grim. Pull these away from other mobs and there should be no problem.
- Frozen Wights start frozen in ice, but will break out and attack at certain intervals along the way. If there are bears near wights encased in ice, pull the bears first from a distance. The wights die very quickly, but apply an effect on anyone they touch, Covered in Wight. Each stack increases melee damage by 300% but reduces ranged and tactical damage and outgoing healing to zero. This effect lasts 20 seconds and explodes upon expiration, causing heavy, non-removable wounds on fellows within 10 meters.
Drugoth has resurrected Coldbear as a wight. This fight takes place in three phases – two phases fighting Coldbear the Wight and one fighting the Spirit of Coldbear.
See Coldbear the Wight for more information
- When a character approaches, Coldbear will begin to talk and a gate will rise behind the character while another gate will rise across the room to the right. The fight resets if Coldbear reaches the entrance gate. Take note of the four groups of wights around the room.
- The first phase introduces Retaliation, a buff he applies to himself which reflects 90% of all damage directed toward him for 10 seconds so make sure all characters stop attacking during this time. He puts up this shield at the beginning of the first two phases and in roughly 30 second intervals.
- Coldbear also applies a heavy non-removable wound effect after saying, "Let the frost embrace you", which upon expiration does heavy damage to nearby fellows. The healer and possibly a back-up should focus on healing the afflicted fellows, while moving into a safe zone away from the rest of the fellowship. With practice, a Rune-keeper may be able to time his Do Not Fall to Winter skill to prevent this DoT.
- Coldbear will also apply other minor effects such as Coldbear's Revenge (reducing Block, Evade and Parry to zero), Coldbear's Dish (reducing movement speed by 75%), and Ice Shards (a frost wound DoT).
See Spirit of Coldbear for more information
- After Coldbear the Wight has been defeated, his spirit is released and the battle quickly continues. The Ghost of Coldbear uses many of the same attacks as before along with new attacks. However, from now on he will not use Retaliation, his damage-reflecting shield.
- In this phase, Frozen Wights around the room will activate if characters get too close and apply Covered in Wight to those they touch which reduces healing, ranged and tactical damage to zero, and adds 300% melee damage and heavily damages others nearby upon expiration. A skilled melee attacker such as a Champion may be able to intentionally activate the wights for the extra damage, while making sure to move away from the group as the effect expires.
- In addition, the Ghost of Coldbear has a few new attacks. When he says, "I need more power, <name>!" he charges that character and steals its power. Coldbear can also use an attack which will stun all characters nearby him. Occasionally he will make the room shake for one minute applying a minor frost DoT on everyone.
- Red Glowing Shield — Retaliation buff — Stop attacking — Negates 90% damage and reflects 90% damage
- "This scurrying around must stop" or "Stand still" — (Only when standing on back legs) — Run away immediately — Huge damage plus applying Coldbear's Dish (slowing movement by 75% for 30s)
- "Let the frost embrace you" (Blue aura) — Ice Shards — If getting it, quickly move to an area away from everyone — Healer must keep this person alive until expiration — On expiration AoE damage and spreads to nearby characters
Before reaching Osan, there are 4 patrolling mobs and 2 static mobs to clear.
- Fanatics (x2) - The fanatics are goblin who summon a whirlwind that can kick characters. The Fanatic also has a damaging frost aura that extends about 5 meters.
- Legionnaires (x4) - A Legionnaire is a Giant wight that throws boulders and can apply a bleed, stun or kick. When it pauses to raise its arms, move behind it to avoid its special attacks.
See Osan for more information
- Osan is the second of Drugoth's lieutenants and must be defeated before facing Drugoth the Death-monger himself.
- To start the fight, activate the pedestal in the middle of the pit and Osan will walk up and smash it. Characters must not stand too close or they'll get a nasty bleed for one minute.
- During the fight, Osan will summon waves of adds. At spaced intervals, elite Legionnaires and Fanatics will spawn, one at a time. At greater intervals, the named Captains will drop in. Osan will also summon wights to aid him with different buffs, up to 4 total:
- The red buff grants Osan an AoE attack that will apply a non-removable bleed to everyone in range
- The blue buff allows him to cast a slow-movement
- The green buff allows him to heal himself or the adds
- The yellow buff doesn't seem to do much; characters may get a removable disease late in the fight, but this seems to come from one of the Captains
- For each add that the group defeats, Osan adds one tier to his revenge meter. When the meter reaches tier 5, Osan will say "Now you will all die!" and raise his arms above his head for about 3 seconds. He will then pound the ground 3-4 times, causing 1 - 6 k frost damage per hit. Osan may delay this attack for a short time after the revenge meter hits tier 5.
- Occasionally, one character will get a blue eye above his head. To get rid of it, someone must remove the corruption on Osan. If not removed, 15 seconds later it will expire and remove 100% of morale from that character (which equals defeated).
Tier II
To progress in the tier II challenge, all four of Osan's Captains must be defeated before Osan falls. When a Captain is defeated, Osan will be able to use that captain's ability at will.
Drugoth is the final boss.
- Drugoth the Death-monger begins with knock-back skills so characters do better stand inside of him so they won't fly off the edge. It is possible to avoid the knock back by moving away from him when he gives his cue. To be safe, characters always keep their back to the door or to the left side of the platform – that side is twice as long as the right side.
- "You are not worthy to be near me" or "Get away from me!" — Knock back in melee range
- For the second part, Drugoth will cast AoE frost effects, so when he says anything about hiding, the Fellowship should hide behind one of the stone pillars.
- "Begone, mortal!" or "Begone from my sight!" or "Run and hide if you can!" — Hide behind a stone
- "Come over here!" or "To me!" — Drugoth will pull a character in the air towards him
- In the final stretch, Drugoth will summon a spirit (two spirits on T2) that stuns a single party member and transfers the stunned member's abilities to him; defeat the spirit quickly to clear the stun and skill transfer. (For instance, Burglar spirits will riddle, Captain spirits will cast a fear, and Guardian spirits will cast a reflect 90% damage buff.) For his other attacks, hide behind a stone until he is finished.
- "Lend me your strength, <name>!" - Spirit is summoned and class based skills are transferred to Drugoth
- "Those I see shall remain where they are" - Hide behind a stone
- "Freeze, quivering mortals!" - Freezes the entire inner area with ice shards — Hide behind a stone
Tier II
If successful in defeating all of Osan's Captains, the Caeryg will enter combat when the Fellowship engage Drugoth the Death-monger. They can apply a removable poison DoT, do melee frost damage, and knock-back. Drugoth will never move from his original spot, but he has a nasty ranged attack he will use if any characters are out of melee range.
The Tier 2 Challenge requires keeping both Caeryg alive for the Challenge.
If not dealt with quickly, the Caeryg will attack the tank or healer, potentially knocking them off the edge, causing a wipe. There are a couple ways to deal with them to ensure a successful win. Periodically, the Caeryg will do a knock-back on their target if they are within melee range, or a pull if their target is out of melee range. It is better to be on the opposite side of the area and have them pull characters toward them so they are not knocked off of the edge.
Loot
Level 85 Loot (In Their Absence shared)
![]()
![]()
![]()
![]()
![]()
![]()
![]()
![]()
![]()
![]()
| Settlements, Areas and Landmarks of Forochel
| ||
|---|---|---|
| Areas: | Itä-mâ • Jä-kuru • Jä-rannit • Länsi-mâ • Talvi-mûri • Taur Orthon | |
| Settlements: | Kauppa-kohta • Kuru-leiri • Pynti-peldot • Sûri-kylä • Zigilgund | |
| Landmarks: | 4th Dwarf Channel • 7th Dwarf Channel • 10th Dwarf Channel • Barad Gaurhoth • Hammastus-pesä • Hylje-leiri • The Ironspan • Jotunstath • Jä-reitti • Jänis-leiri • Karhu-leiri • Kibilzahar • Kissa-sari • Korkea-järvi • Leijona-kotin • The Lonesome Stones • Metsästä-sija • Norsu-hauta • Norsu-leiri • Pynti-leiri • Reodh Fuil • Skirmish Camp • Tûli-mäit • Vesi-paistâ • Voi-teltta | |
| Interiors: | Great Lodge of Sûri-kylä • Näky-kolo | |
| Dungeons: | Icereave Mines • Peikko Den | |
| Instances: | World Instances: Agoroth, the Narrowdelve • Sâri-surma / Skirmish: The Icy Crevasse / Quest Instances: Bregmor's Den • Halla-kolo • Kolo-hampât | |
