Remmorchant
- This page is about the 12-man instance. For the landmark in Imlad Morgul, see The Remmorchant. For the deed, see Remmorchant, the Net of Darkness.
| Level: | 130 |
| Size: | 12-person Raid |
| Cluster: | Minas Morgul |
| Region: | Morgul Vale |
| Area: | Torech Ungol |
| Location: | [34.6N, 14.0E] |

Description
- This 12 person raid is part of the Minas Morgul Instance Cluster. It was released in Update 25.4.
- In the shadow of the Ephel Dúath, where the jagged peaks of Mordor meet the haunted vales of Minas Morgul, lies Torech Ungol — a cavernous abyss shrouded in webs and gloom. Far beneath its deepest reaches sprawls Remmorchant, the Net of Darkness, a lair woven from shadow so thick that only the fabled Light of Eärendil might pierce it. Here, in the Third Age after Sauron's fall in T.A. 3019, the last echoes of an ancient evil stir.
- Long ago, Ungoliant, the great spider of darkness, fled the ruin of Beleriand, her insatiable hunger sated only by the light she devoured. Her spawn scattered across Middle-earth, and in the depths of Torech Ungol, Ungwetári — her final daughter — endured. Known as Shelob to the Orcs of Cirith Ungol, she grew vast and cunning, her webs a snare for any who dared the pass. But in the wake of the War of the Ring, a new threat arose.Rûkhor the Pale Herald, a sorcerer of the Gúrzyul, Sauron's undying lieutenants, bent Shelob's brood to his will, twisting them with foul magics into abominations of venom and rage.
- Now, Remmorchant teems with her corrupted offspring. Bratha Tasakh, the Lady of Many Venoms, commands the vanguard, her claws dripping with poison. The air hums with the skittering of spiderlings and the groans of cocooned prey — fell beasts and trolls bound in silk, awaiting release. Deeper still, Shelob broods, her massive form shrouded in a haze of malice, her hunger sharpened by Rûkhor's sorcery. The caverns tremble with her presence, their walls slick with ichor, their silence broken by the distant shrieks of her children.
- The Net of Darkness stands as a final bastion of shadow in a world reclaiming light, its depths a gauntlet of terror poised to ensnare any who descend.
- It is available in the Instance Finder after completing Discovery: Remmorchant - the Net of Darkness. You will need to have started or completed the quest Into the Spider's Den to access Torech Ungol.
Difficulty Level
- This is a non-scaled instance, designed for a Raid (12 players) level 130 and up.
- Estimated completion time is between 2 - 4 hours.
Raid Locks
This raid has raid locks for different tiers:
- Tier 1 — resets three times per week:
- Monday at 6:00 a.m. server time
- Thursday at 6:00 a.m. server time
- Saturday at 6:00 a.m. server time
- Tier 2 — resets weekly on Thursday at 6:00 a.m. server time
Quests
Deeds
Known Deeds for this instance (usually bestowed upon first entrance) include:
Creatures
These mobs are encountered within Remmorchant:
- Click [+] to expand a list of creatures.
Instance Overview
- First Boss: Bratha Tasakh, Lady of Many Venoms [17.6N, 136.0W]
- Second Boss: Thossulun the Massive [20.8N, 139.2W]
- Third Boss: Rûkhor the Pale Herald and Zabothak [22.3N, 137.6W]
- Fourth Boss: Shelob the Great, Last Child of Ungoliant [26.3N, 137.6W]
- Sidebosses: The Queensbrood:
Note that the sidebosses are unlocked after defeating boss 1, Bratha Tasakh, Lady of Many Venoms.
Walk-through and Tactics
Note: there may be mistakes in the following. Please correct.
Bratha Tasakh goes through 2 phases, out of acid, lightning and fire, which vary each week in a 6 week cycle.
| Week | Phase 1 | Phase 2 |
|---|---|---|
| 1 | Acid | Lightning |
| 2 | Acid | Fire |
| 3 | Fire | Lightning |
| 4 | Fire | Acid |
| 5 | Lightning | Acid |
| 6 | Lightning | Fire |
Lightning phase
Just tank and spank boss. If needed perform a tank-swap to reduce the ![]() Static Charge debuff. Occasionally, a random player will get an
Static Charge debuff. Occasionally, a random player will get an ![]() Arcing Lightning debuff which will envelop their character in a blue bubble aura. Players who get this debuff must immediately run away from groupmates as it is stacking and contagious and will cause damage to all affected.
Arcing Lightning debuff which will envelop their character in a blue bubble aura. Players who get this debuff must immediately run away from groupmates as it is stacking and contagious and will cause damage to all affected. ![]() Surging Charge is a distributed damage on expire debuff, so group up to reduce damage.
Surging Charge is a distributed damage on expire debuff, so group up to reduce damage.
This is the easiest of all three phases.
Fire phase
Tank and spank boss, preferably in a corner near the entrance with the group hugging the wall and the spider facing the entrance. Once in a while, spiderling adds will will spawn from the back of the room and move towards the entrance in lanes. The spiderling in the lane that crosses the group's position hugging the wall must be killed ASAP because the spiderlings will 1-shot kill any players who get in melee range. When spiderlings spawn, ranged DPS must run to the back and kill the spiderling that is incoming along the lane of the group's position.
Every so often, the boss will give players a ![]() Cascading Heat debuff that tiers up. This may be healed by the healer at low tiers, but once it reaches high tiers, it will be impossible to heal. To get rid of the "cascading heat" debuff, players must stand next to the random teammate who gets the
Cascading Heat debuff that tiers up. This may be healed by the healer at low tiers, but once it reaches high tiers, it will be impossible to heal. To get rid of the "cascading heat" debuff, players must stand next to the random teammate who gets the ![]() Smouldering Wrath debuff. Because of this, ideally all players must stand on once spot, preferably in melee range of the boss. The boss does no AOE damage so it is safe for ranged players to stand in melee range.
Smouldering Wrath debuff. Because of this, ideally all players must stand on once spot, preferably in melee range of the boss. The boss does no AOE damage so it is safe for ranged players to stand in melee range.
The trickiest part of the fire phase is that once in a while, a random player will get a ![]() Fiery Combustion debuff. The player who gets "combustion" must immediately run away from the group (ideally towards the entrance), because when it expires, it will drop a burning puddle that causes damage and throws any player caught in it in the direction they are facing. It is very important to run away from the group when you get the "combustion" debuff as this may bounce teammates into incoming spiderling adds, killing them, or simply kill them with the damage that the dropped puddle causes.
Fiery Combustion debuff. The player who gets "combustion" must immediately run away from the group (ideally towards the entrance), because when it expires, it will drop a burning puddle that causes damage and throws any player caught in it in the direction they are facing. It is very important to run away from the group when you get the "combustion" debuff as this may bounce teammates into incoming spiderling adds, killing them, or simply kill them with the damage that the dropped puddle causes.
Poison phase
Ranged player (incl Healers) should start in the middle of the southern part of the room. The tank should pick up the boss, and kite her circular around the ranged group (putting slows on the boss, and speedbuff on the tank will help). The tank will receive the ![]() Clinging Acid debuff (due this debuff it's adviced to tank-swap on higher tiers). Melee classes can run behind the boss and DPS her that way. By doing so puddles will be dropped due to
Clinging Acid debuff (due this debuff it's adviced to tank-swap on higher tiers). Melee classes can run behind the boss and DPS her that way. By doing so puddles will be dropped due to ![]() Dripping Ichor. The kiting tank should not run through these puddles, because they do the most damage while running into them (standing still in puddles will be fine (up to 3 stacks).
Dripping Ichor. The kiting tank should not run through these puddles, because they do the most damage while running into them (standing still in puddles will be fine (up to 3 stacks).
Once in a while the boss will summon a spider applying ![]() Fixated on a player for 50s (he will get a red eye). It's advised for this player to kite this spider in the northern part of the room (away from the tanking zone), because she will drop acid puddles. Don't let the spider reach you, because you'll get one-shotted, and an other member of your group will be targeted.
Fixated on a player for 50s (he will get a red eye). It's advised for this player to kite this spider in the northern part of the room (away from the tanking zone), because she will drop acid puddles. Don't let the spider reach you, because you'll get one-shotted, and an other member of your group will be targeted.
Upon starting the boss fight, a random player may die instantly. Not sure how to avoid the random 1-shot.
A large daughter gredbyg miniboss will then spawn to the left of the boss, making the mother taking no damage.
When daughter comes near to mother, daughter gets a buff, so keep it away from the mother.
When the daughter dies, it creates a field making the mother taking more damage, so try to kill the daughter nearby the mother.
Flying winged gredbyg adds will come, as well as beetles that may explode and kill group members caught in the blast. There are many tactics to this boss fight, some do it with 1 tank, some do it with 2, with the off-tank kiting the beetles. If the main boss is not DPSed fast enough, a 2nd daughter will spawn to its right, making life very difficult. Step out of acid pools.
More details on tactics to follow.
Phase 1
Kill Uruk-hai boss Zabothak. Every so often he will do a spinning "rend" AOE attack that may kill people in melee range if not debuffed by a burglar or LM. This may cause a "Rend" bleed on all who are hit, which must be cleared immediately. The boss says "Bleed by Morgul Steel!" before he does the rend attack. Ocassionally, the boss will also say "You weaklings cannot defeat ME!" or "Show me your strength! HA HA!" and put up spinning shields which reflect damage. All DPS must stop when he puts up shields, or DPSers may end up killing themselves. Bleeds/DOTs on the boss will reflect on DPSers. The boss putting up shields may be avoided by a burglar who does conjunctions just as the boss says the thing he says before he puts up shields.
Ads will come in periodically, Bloodless Warriors. If killed, Zabothak will get a +20% damage debuff. Plan out the cc.
Phase 2
Rukhor arrives. Players will destroy large squirming cocoons containing either the fell beast, troll and then Sûlok*. The Sûlok has an induction attack that may 1-shot kill players caught in its AOE, so it must be DPSed fast before it is able to do this attack. Afterwards, players must destroy cocoons which drop puddles which give debuffs called "necrotic ooze". Players must refresh the green necrotic ooze debuff on them at all times by stepping in the puddle dropped by a destroyed cocoon, because if the boss finishes inducting and a player does not have the green necrotic ooze debuff, he will heal. The necrotic ooze debuff must be refreshed by stepping out and then back in the puddle because it will not refresh on a player already standing in a cocoon puddle. These puddles will eventually expire, so players must move on to the next cocoon and pop it to drop new necrotic ooze debuff puddles. This is a DPS race, because eventually the raid will run out of cocoons to pop and create puddles from.
Boss 4 Shelob [26.3N, 137.6W]
Tank and spank Shelob. Once in a while, she will encase a random player within a web cocoon and the player will not be able to do anything, so teammates must destroy the cocoon around the player ASAP. Once in a while, a player will also get a poison debuff. The player must then move away from the group as he/she will drop webs on the ground that slow (and damage?) when the debuff expires. At a certain point, there will be a ![]() phial of light on the floor of the map, and the player who picks it up may use it to cause Shelob to be knocked down and become vulnerable (during which the team must DPS hard). The phial may be used every (1 min 30 secs?) If the player holding the phial dies, the phial will drop on the ground and another player may pick it up. At a certain point, Shelob will move into the ceiling and "Spawner" spiders will appear on the map. The team must immediately search for the spawners and kill them as they will summon adds. There will be 4 spawners. After the 4th spawner is killed, Shelob will once again drop onto the floor, and the tanking and spanking resumes. She will then go back into the ceiling at a certain point, and the spawner cycle begins again. Rinse, repeat until Shelob is defeated.
phial of light on the floor of the map, and the player who picks it up may use it to cause Shelob to be knocked down and become vulnerable (during which the team must DPS hard). The phial may be used every (1 min 30 secs?) If the player holding the phial dies, the phial will drop on the ground and another player may pick it up. At a certain point, Shelob will move into the ceiling and "Spawner" spiders will appear on the map. The team must immediately search for the spawners and kill them as they will summon adds. There will be 4 spawners. After the 4th spawner is killed, Shelob will once again drop onto the floor, and the tanking and spanking resumes. She will then go back into the ceiling at a certain point, and the spawner cycle begins again. Rinse, repeat until Shelob is defeated.
Side bosses
Side boss 1 (Gragarag) [20.0N, 135.9W]
Do not remove poison. Every so often the boss will disappear and the entire group will be covered by a sticky web. Destroy the web ASAP, and the boss will return. Rinse, repeat.
Side boss 2 (Guruthang) [19.9N, 137.7W]
Do not remove poison. Decide on a point to stand on and all stand there except for tank. Do not move.
Side boss 3 (Gamnagol) [20.7N, 137.4W]
Remove poison ASAP. If you get a yellow eye above your head, move away from group.
Tips
< General tips for all levels >
When the group reaches Boss 3, people who join the raid or die and respawn at the entrance may type "/stuck" to teleport right next to the boss room. The same may be done for boss 4.
Rewards
Tier 1
On tier 1, the boss chests give one random, class-appropriate item (sometimes more) from the sets below for each character. The side-boss chests give a chance of a random item from the sets below. For the side-bosses the set selection is random and not dependent on the character's class. The chests reset three times per week:
- Monday at 3:00 a.m. server time
- Thursday at 3:00 a.m. server time
- Saturday at 3:00 a.m. server time
Tier 2
On tier 2, the boss chests give one random, class-appropriate item (sometimes more) from the tier 1 gear list above for each character. The side-boss chests gives a lower chance of a random item from the tier 2+ raid gear sets below. For the side-bosses the set selection is random and not dependent on the character's class. The chests reset once per week on Thursday at 3:00 a.m. server time.
Completing Tier 2 also unlocks access to the following Remmorchant Armour Traders;
- Remmorchant Quartermaster (Light Armour Trader)
- Remmorchant Quartermaster (Medium Armour Trader)
- Remmorchant Quartermaster (Heavy Armour Trader)
Tier 3
On tier 3, the chest for boss 4, Shelob, gives one random, class-appropriate item from the tier 2+ raid gear sets above. The other boss chests give one random, class-appropriate item (sometimes more) from the tier 1 gear list above for each character. The side-boss chests gives a lower chance of a random item from the tier 2+ raid gear sets below. For the side-bosses the set selection is random and not dependent on the character's class. The chests reset once per week on Thursday at 3:00 a.m. server time.
Maps
-
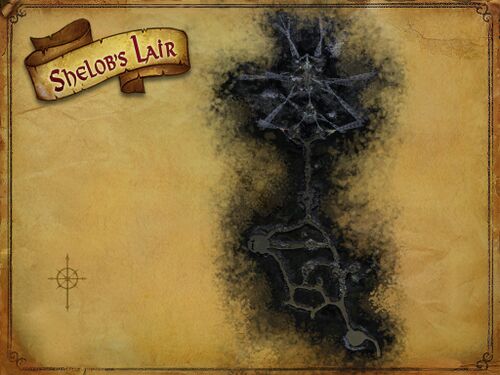 Map of Remmorchant, the Net of Darkness
 -
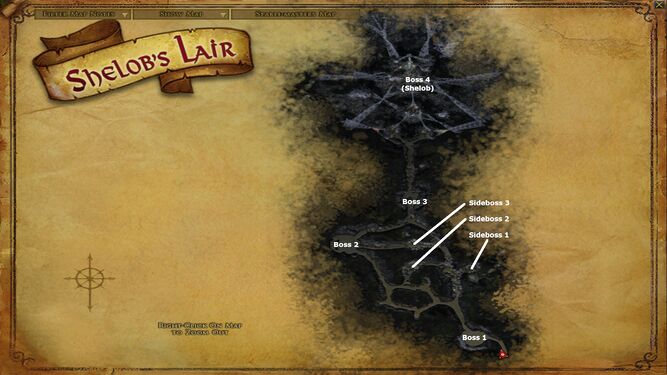 Boss locations


Gallery
-
 Bratha Tasakh's chamber
 -
 Thossulun's chamber
 -
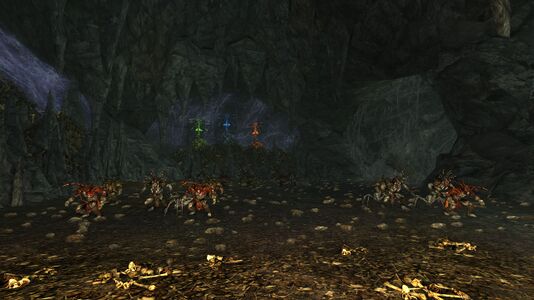
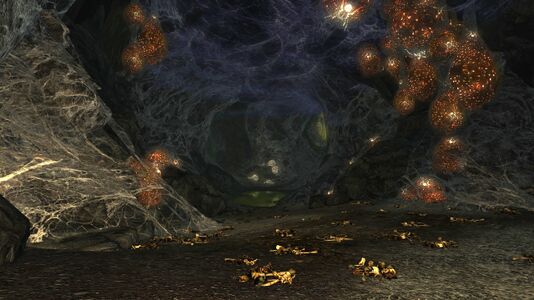 the infested tunnels
 -
 Rûkhor's chamber
 -
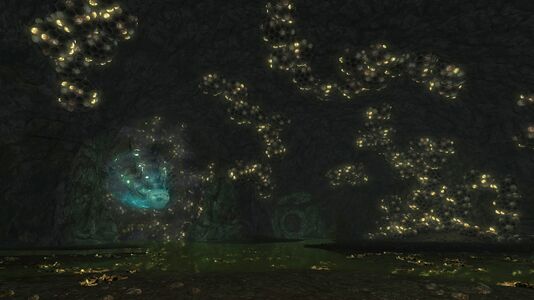
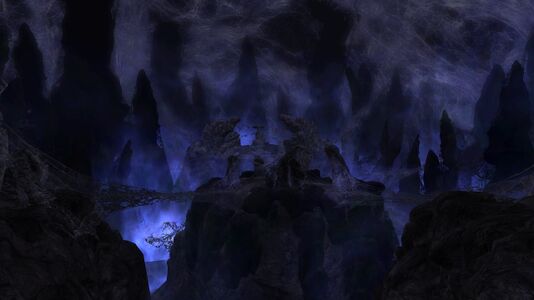 Shelob's inner sanctum
 -
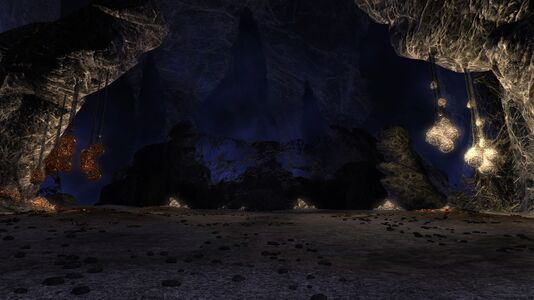 Shelob's arena


![[34.6N, 14.0E]](/wiki/File:Torech_Ungol_map.jpg)
Links
- Raid Guide: Remmorchant Boss 1 by Dadi's LOTRO Guides
- Raid Guide: Remmorchant Side Bosses by Dadi's LOTRO Guides
- Raid Guide: Remmorchant Bosses 3 and 4 by Silverrider
- U25.4.3 Release Notes including raid loot details
| Minas Morgul Instances
| ||
|---|---|---|
| Small fellowship: | Eithel Gwaur • Gath Daeroval • Gorthad Nûr • The Harrowing of Morgul | |
| Fellowship: | Bâr Nírnaeth • Ghashan-kútot • The Fallen Kings | |
| Raid: | Remmorchant | |
- Morgul Vale Instances
- Minas Morgul Instances
- Raids
- Server operations at 6:00 a.m. on Monday
- Server operations at 6:00 a.m. on Thursday
- Server operations at 6:00 a.m. on Saturday
- Server operations at 3:00 a.m. on Monday
- Server operations at 3:00 a.m. on Thursday
- Server operations at 3:00 a.m. on Saturday
- Remmorchant Instance