The Fall of Khazad-dûm
| Level: | 130 |
| Size: | 12-person Raid |
| Cluster: | War of Three Peaks |
| Region: | Azanulbizar, T.A. 2799 |
| Location: | [67.6N, 137.4W] |

Location
- This 12 person raid is part of the War of Three Peaks Instance Cluster. It was released in Update 30.
- In T.A. 1981, Khazad-dûm, the once-mighty Dwarven kingdom beneath the Misty Mountains, teetered on the edge of oblivion. A year prior, Durin VI, king of Durin’s Folk, had fallen to a Balrog —a fiery remnant of Morgoth's corruption—unleashed from the deep by the Dwarves' relentless mining for mithril. Now, Náin I, Durin's son and successor, reigned over a fractured realm, its grandeur reduced to ash and shadow.
- The Second Hall, a vast chamber of hewn pillars and soaring bridges, bore the scars of the Balrog's rampage — cracked stone and smoldering fissures marked the site of Durin's doom. Náin I, determined to reclaim his birthright or avenge his father, confronted the creature known as Durin's Bane in this ruined heart of Moria. The Balrog towered over the hall, its form wreathed in flame, its whip cracking like thunder, a living shadow of the ancient evil that once served Morgoth.
- The battle was brief and merciless. Náin I, clad in the finest Dwarven armor and wielding the craft of his people, stood no chance against the Balrog's primordial might. The creature's fire consumed the air, its blade sundered stone, and within moments, Náin fell — his reign extinguished after a single year. With his death, the last flicker of resistance in Khazad-dûm faded. The surviving Dwarves, broken and leaderless, fled their ancestral halls, leaving them to silence and darkness.
- Khazad-dûm became Moria, a name whispered in sorrow, its Second Hall a monument to Náin's final, futile stand. The Balrog, unchallenged, claimed the depths, its presence a curse that would linger into the Third Age.
- It is available in the Instance Finder after completing Discovery: The Fall of Khazad-dûm.
Difficulty Level
- This is a non-scaled instance, designed for a Raid (12 players) level 130 and up.
- Estimated completion time is between <20 - ??> minutes.
Quests
Starting
Involving
Deeds
Known Deeds for this instance (usually bestowed upon first entrance) include:
Creatures
These mobs are encountered within The Fall of Khazad-dûm:
- Click [+] to expand a list of creatures.
Instance Overview
- Boss: Durin's Bane
Walk-through and Tactics
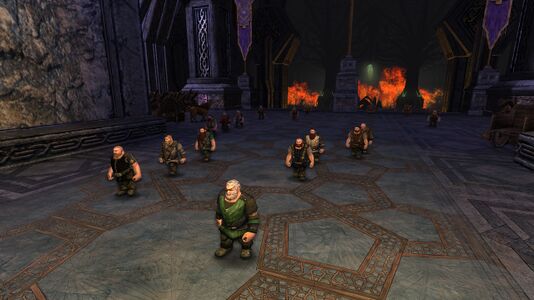
The fight starts at the west side of the hall with King Náin I and his Longbeard Soldiers and a couple of add waves running down the stairs. Note that the dwarfs cannot die, but the enemies spawned at this stage have a healing buff, so they will not die to the dwarves alone. After clearing the adds there is a role play sequence, Durin's Bane spawns between the stairs and kills almost all the dwarves, so the group will be on their own during the boss fight. There is a smoke wall behind the boss, that is moving with him every phase further into the the room, being inside the wall or behind it damages the player. After dealing 10% damage to the boss, it does a gray induction attack called Arial Smash, which is a huge AOE kick. Players need to start running from the boss, because after the attack the boss walks further east into the room, and the smoke wall follows. Depending on the tier of the raid, the boss can gain additional skill each phase, thus making each phase of the fight harder. The fight is over after getting the boss down to 50%, the group runs trough the bridge and gets to loot the chest on the other side.
Tier 1
After completing the second phase (80% morale), the boss will gain a gray induction attack Ground Smash. He will usually cast it as a first attack after phasing. This attack targets random 3 people and spawns a falling rubble on them. Right after the induction ends rectangles will show on the ground the location where the rubble will spawn, giving players a couple seconds time to move out. Players caught in the rubble will be hit and stunned for a short while. Returning to the rubble too soon may cause a stun on you too.
During the last phase the boss leaves his position in the middle, will be able to move around and also occasionally kick the tank around. He will also gain a debuff that decrease his taken damage.
If the individual with aggro (most likely the tank) moves out melee range, the boss will execute a ![]() Flame Whip skill, pulls them toward the boss and inflicts a fire Damage Over Time effect.
Flame Whip skill, pulls them toward the boss and inflicts a fire Damage Over Time effect.
The balrog can hit random players with a frontal attack and give them a fire damage DOT called ![]() Apocalypse. This debuff can be applied multiple times.
Apocalypse. This debuff can be applied multiple times.
Tier 2
On top of mechanics from tier 1, there will now be passive fire dot called ![]() Suffocating Smoke - 1 on all players over time. This dot will be tiering up during fight and reset during phasing.
Suffocating Smoke - 1 on all players over time. This dot will be tiering up during fight and reset during phasing.
After first phasing, Chasing Darkness will spawn, dropping shadow puddles every couple seconds. It is an untargetable entity that will follow the player with an eye and ![]() Mark of Shadow debuff. It will kill the player on touch so it has to be kited. The shadow puddles on this tier provide high fire mitigation but also an -100% incoming healing debuff -
Mark of Shadow debuff. It will kill the player on touch so it has to be kited. The shadow puddles on this tier provide high fire mitigation but also an -100% incoming healing debuff - ![]() Shadow Zone
Shadow Zone
After the fourth stage, the boss will gain another gray induction attack called Fulmination. This is an very high fire attack, in order to survive it most of the players must stand it the shadow puddles granting them additional fire mitigations, which result in avoiding all of the damage.
After the fifth stage, the boss will get a decreasing damage buff called ![]() Molten. Having
Molten. Having ![]() Oathbreaker's Shame, and
Oathbreaker's Shame, and ![]() The Best Defence ready for this phase would be a good idea.
The Best Defence ready for this phase would be a good idea.
An other mechanic to take in account is the ![]() Building Flames - 1. The debuff is a Damage Over Time (DOT) effect that tiers up every 30 seconds, stacking from Tier 1 to a maximum of Tier 6. It only increases in tier if the player remains in the second-highest aggro position. If aggro shifts, the tiering pauses until the player regains that position.
Once Building Flames reaches Tier 6, it triggers Combustion. This causes significant fire damage to the affected player and applies a
Building Flames - 1. The debuff is a Damage Over Time (DOT) effect that tiers up every 30 seconds, stacking from Tier 1 to a maximum of Tier 6. It only increases in tier if the player remains in the second-highest aggro position. If aggro shifts, the tiering pauses until the player regains that position.
Once Building Flames reaches Tier 6, it triggers Combustion. This causes significant fire damage to the affected player and applies a ![]() Scorched debuff, which reduces fire damage mitigation for a duration (typically 1 minute). The Combustion also deals area-of-effect damage, impacting nearby players within a certain radius (around 5-6 meters).
Scorched debuff, which reduces fire damage mitigation for a duration (typically 1 minute). The Combustion also deals area-of-effect damage, impacting nearby players within a certain radius (around 5-6 meters).
To manage this debuff, the raid relies on two tanks—typically a main tank and an off-tank—swapping aggro. The process starts with the main tank taking aggro briefly (5-10 seconds), followed by the off-tank taking over, and then swapping back. This initial quick swap prevents the debuff from landing on a DPS player early on. After this, the off-tank usually lets Building Flames build to Tier 3 or 4 before taking aggro from the main tank. When the debuff nears its expiration (about 5 seconds before Tier 3 or 4 ends), the tank with aggro moves away from the group to avoid splashing Combustion damage. The other tank then takes aggro, and the cycle repeats.
When Combustion is imminent (signaled by a red eye icon), the affected tank must step aside—ideally 5 meters or more from others—to minimize collateral damage. Some strategies suggest positioning in a shadow puddle for extra fire mitigation, though this comes with trade-offs like reduced healing.
Tier 3
Same as tiers above, the boss have an extra gray induction attack called Explosive Line. It will spawn an orb in the middle or either side, after a couple seconds the orb detonate and spawn fire puddles in a line all the way to next stage of the fight. The boss will cast this skill right when the previous fire line is going to disappear, making always one fire line present.
The shadow puddles are now doing shadow damage over time.
The rubbles are now an objects that will continuously spawn more adds until killed.
Tips
Pay attention to the skills and mechanics during clearing the adds before boss - same mechanics will be used later in the boss fight.
Classes using AOE attacks need to stand quite far inside the boss circle to hit them.
It is possible to stand between the boss and smoke wall, allowing the tank to stand there and turn the boss's back to the group.
This is the first raid using new revive mechanic. There is a buff on every player, tracking the number of revives available either with a number as ![]() Revives Available: x or as
Revives Available: x or as ![]() Revives Exhausted
Revives Exhausted
Rewards
The higher tiers can usually drop all the items listed in lower tiers.
Most of the items can be bartered for ![]() Motes of Enchantment with the Quartermaster at Amdân, if you have completed the corresponding tier of the raid.
Motes of Enchantment with the Quartermaster at Amdân, if you have completed the corresponding tier of the raid.
Tier 5
A legendary, class-appropriate tracery.
Tier 4
An incomparable Enhancement Rune.
Tier 3
An incomparable, class-appropriate tracery.
Set Boots
![]()
![]()
![]()
![]()
![]()
![]()
![]()
![]()
![]()
![]()
![]()
Tier 2
An incomparable, class-appropriate tracery.
Set Gloves
![]()
![]()
![]()
![]()
![]()
![]()
![]()
![]()
![]()
![]()
![]()
Set Cloaks
![]()
![]()
![]()
![]()
![]()
![]()
![]()
![]()
![]()
![]()
![]()
Essence
![]()
![]()
![]()
![]()
![]()
Cosmetics and Furniture
![]()
![]()
![]()
![]()
![]()
Tier 1
A rare, class-appropriate tracery.
Heavy Armour
![]()
![]()
![]()
![]()
![]()
![]()
![]()
![]()
Medium Armour
![]()
![]()
![]()
![]()
![]()
![]()
![]()
![]()
Light Armour
![]()
![]()
![]()
![]()
![]()
![]()
![]()
![]()
Essence
![]()
Cosmetics and Furniture
![]()
![]()
![]()
![]()
![]()
Other
![]()
![]()
![]()
![]()
![]()
Map

Gallery
-
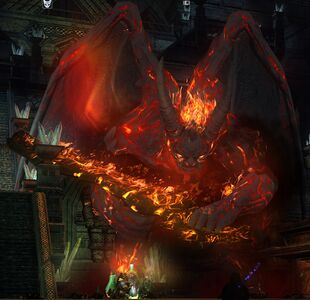 Durin's Bane at the Start of the Raid
 -
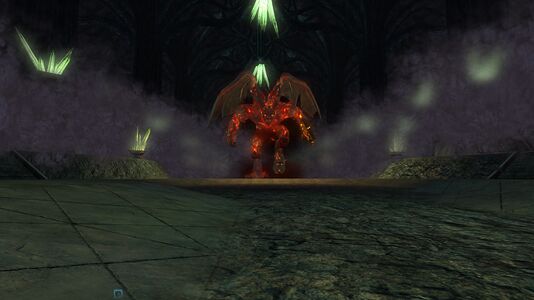 Durin's Bane chasing the raid
 -
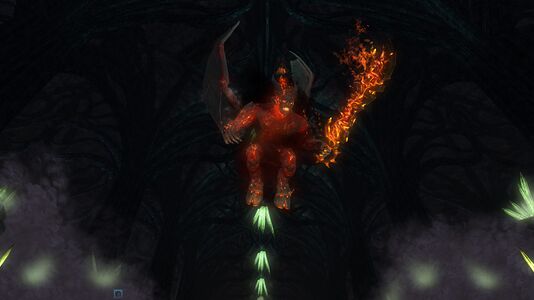 Durin's Bane doing Arial Smash attack
 -
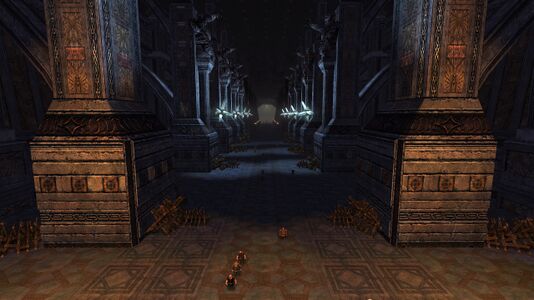
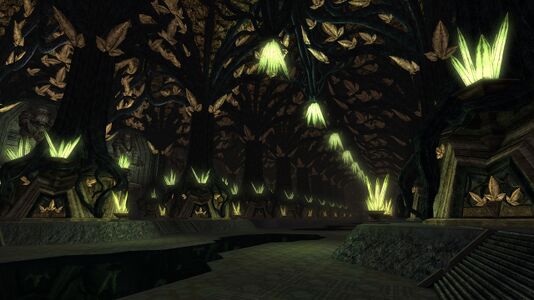 The Second Hall
 -
 Khadar-zarâm
 -
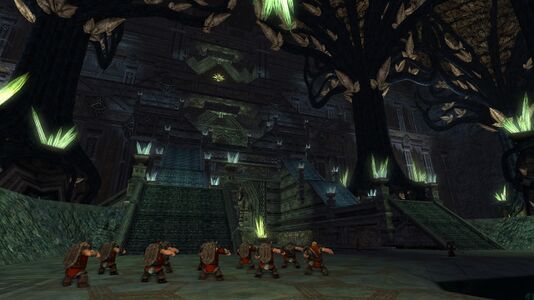
 Dwarves evacuating the Dwarrowdelf
 -
 The First Hall, viewing fleeing dwarves


![[67.6N, 137.4W]](/wiki/File:Azanulbizar,_T.A._2799_map.jpg)
Links
| War of Three Peaks Instances
| ||
|---|---|---|
| Small fellowship: | Woe of the Willow • Agoroth, the Narrowdelve | |
| Fellowship: | Shakalush, the Stair Battle | |
| Raid: | Amdân Dammul, the Bloody Threshold • The Fall of Khazad-dûm | |
| Settlements and Landmarks of Azanulbizar, T.A. 2799
| ||
|---|---|---|
| Settlements: | Amdân, the Threshold | |
| Landmarks: | Anlakh-zeleg • Ashmargathâl • Atrad-zarakh • Durinul'aban • Dursh Hûl • Gabilthurkhu • Gadh Ujáf • Kamaz-kala • Kheled-zâram • Kibil-nâla • Khur Azan • Labam-gairu • Muru Azog • Nud-mekhem • Rung-shakam • Târ-kútoz • Tharkh Baraz • Tharkh Shathur • Tharkh Zigil • Zaghûth • Zirakazhâr |
|
| Interiors: | Zagâf Muzug | |
| Instances: | The Fall of Khazad-dûm | |