The Battle of Rhunendin
| Region: | Angmar |
| Area: | Rhunendin |

- "There is a chance to bring security to Aughaire, for at least a little while, but it will require courage of the greatest magnitude. The armies of Angmar must be met upon their own land... they must be defeated at Rhunendin...."
Location
The Battle for Rhunendin (Sindarin for Eastern Pass) is a repeatable quest instance that can be accessed once a server has completed the Battle Before the Rammas Deluon 20 times. Once this has been accomplished, speak with Tordoron outside of Gath Forthnír by the Stable-master. He will give you the quest The Battle of Rhunendin. Talk to him again to enter the instance.
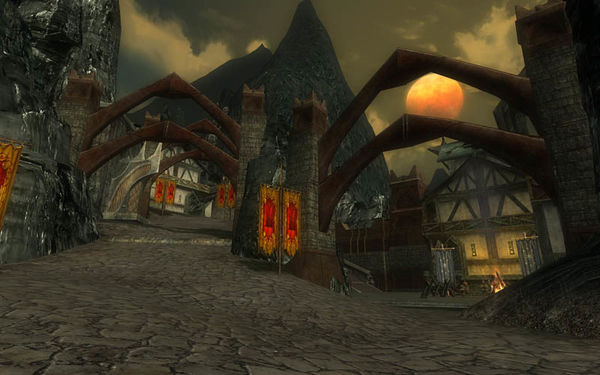
The instance occurs in Rhunendin, as the forces fight their way up through the town.
- Southern Bulwark
- Northern Bulwark
- Orc Encampment
- Uruk Encampment
- Morroval Encampment
- Gate of Shadows
Quests
Instance Overview
Now that the attacks on Aughaire have halted, and the Rammas Deluon can be traversed once more, the time has come to make a final push in order to drive back the Enemy's forces, hopefully for good. The Battle of Rhunendin takes between 45 minutes and one hour, and it is quite possibly the most difficult instance to date. A full, well-prepared fellowship is required, and some form of voice chat helps a lot as well. Everyone will need to be on their game and paying close attention to what is going on, because a single defeat usually means restarting the instance from scratch.
This time around there are only two positions that need to be defended - the Northern and Southern Bulwarks. If all defending NPCs at one of the Bulwarks or Tordoron are defeated, the instance will fail and players will be brought back outside Gath Forthnír. When the encounter begins, random waves of mobs quite similar to those in the other two battle instances will spawn every two to three minutes near a Bulwark and assault it. For more details on the waves of mobs, see the section below. Occasionally, a Nemesis-difficulty Warlord of Angmar will spawn instead of a wave.
There are four Encampments controlled by the Enemy that need to be claimed within one hour. In order to claim an Encampment, all mobs defending it need to be defeated. The Encampments are all found north of the Northern Bulwark, and their positions described below are all relative to the courtyard with the large green water fountain defended by a group of spiders:
- The Gate of Shadow
- West of the fountain, through the bulwark guarded by a Gorthorog Champion and up the ramp.
- Defended by an Angmarim High Sorcerer, 2 Gorthorog Warriors and 4 Angmarim Scouts.
- Orc Encampment
- South-west of the fountain, on the left when coming up the ramp from the south.
- Defended by an Ongbûrz Chief, 2 Ongbûrz Warriors and 2 Ongbûrz Skirmishers.
- Uruk Encampment
- Directly north of the fountain.
- Defended by 3 Uruk warriors and 1 Uruk captain.
- Morroval Encampment
- Down the road to the north of the fountain.
- Defended by a Morroval Blood-mistress and more.
There are two different ways that the fellowship can be split up into offense-defense groups: three-three or four-two. The first approach takes longer to complete the instance and may run out of time, but ensures an almost unbreakable defense. The second can claim the encampments with over 15 minutes left, though the defense may be a little hard-pressed to keep up at times. Only the four-two approach will be detailed in the strategy below, though it can be adapted to a three-three by simply moving a damage-dealing or crowd-control class from offense over to defense.
Defending the Bulwarks

Note: Although it may be possible to defend with a Champion tank or Captain/Lore-master healer, it is not recommended as this strategy already compromises on an additional player for defense.
Your duty as a defender is to prevent the waves of enemies from defeating all NPCs at the Northern or Southern Bulwark. There are six Signature defenders (including two Healers) at the Northern Bulwark, and seven Signature defenders (including a Healer and Tordoron) at the Southern Bulwark. The Healers and Tordoron will also heal players, but should not be relied upon.
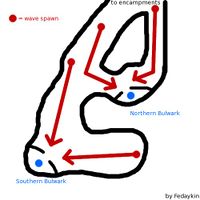
As seen in the image to the right, waves of mobs attacking the Northern Bulwark will spawn at the top of the ramp north of the bulwark and at the doorway along the road west of the bulwark. The Southern Bulwark will be attacked by mobs spawning on the road to the north and the doorway to the east. Due to the close proximity of the two Bulwarks, it is recommended to aggro both groups in a wave before they reach a bulwark and to pull them through both bulwarks, thereby taking down each pull much faster. If holding aggro on the mobs is a problem while the defenders are attacking them, take some time to defeat the weaker mobs at one bulwark and then pull the rest over to the second. Using this tactic you should be able to take down a wave in time before another spawns, so the challenge is just staying alive and keeping the defenders up as well.
Claiming the Encampments
- 1 Tank (Guardian/Champion)
- 1 Healer (Minstrel or Captain and Lore-master)
- 1 Crowd-control (Burglar or Lore-master)
- 1 DPS (Hunter/Champion)
Although offense is somewhat simpler than defense, since you can plan your pulls ahead of time, it is nonetheless important. Once the instance is started, head up along the road north until you reach the first group of mobs. Speed is essential, so do not wait long between pulls. Most of the groups contain an Elite Master, several Elites and some more Normal mobs. Have the crowd-controller keep the Elite Master incapacitated while the tank picks up the Elites and the Champion/Hunter takes down the rest. Take the Elites next, and then take down the Elite Master. Any other groups should be easy to deal with.
Once you reach the courtyard with the green water fountain, you have the option to choose which encampments to assault and in what order. The order you claim them in does not matter, and so far there has been no conclusive evidence that claiming a camp with a certain type of mob (such as Gorthorog or Morroval) will prevent that mob type from assaulting a bulwark. If all goes well, all of the encampments should be claimed with a few minutes left on the clock, which will cause all enemies assaulting the bulwarks to retreat, thus completing the instance. Note that when you take too long to take a camp, reinforcements will arrive in the form of a nemesis Angmarim Warlord. This means the camp will be quite a bit more difficult to take and valuable time will be lost.
The quest is on a one-week cooldown, which means that players may only complete it once per week, per character. However, if someone else in the fellowship has the quest and enters the instance first, players who do not have it may still enter and participate.
NPCs
- Tordoron
- Gállorg Archer
- Gállorg Hunter
- Gállorg Healer
- Elf-archer
- Elf-champion
- Elf-healer
- Dwarf-warrior
Mobs
For the mobs defending their encampments, see the pages for those listed above. The mobs defending the central plaza are drawn from those listed below.
Mob Groups: The attacking waves are generated from one of these groups:
Orcs:
Spiders:
Gertheryg:
Uruks:
Duvárdain:
Merrevail:
Goblins:
Loot
Most mobs have a chance to drop the following:
