Gorthad Nûr
- This page is about the instance. For the location, see Gorthad Nûr, the Deep-barrow.
| Level: | 121 - 150 |
| Size: | Solo/Duo, Small Fellowship(3) |
| Cluster: | Minas Morgul |
| Region: | Morgul Vale |
| Area: | Rath Dúath |
| Location: | [68.8S, 3.5E] |

Location
- This instance is part of the Minas Morgul Instance Cluster.
Shalgoth, the leader of the kergrim bone worshipers, hides far within Gorthad Nûr, the Deep-barrow. He and his followers seek to complete some dark ritual of necromancy, and must be stopped.
Difficulty Level
- This is a scaled instance, designed for a Solo / Duo or Small fellowship (3 players) level 121 and up.
- It is available in the Instance Finder after completing Discovery: Gorthad Nûr, the Deep-barrow.
- Estimated completion time is between 30-60 minutes.
Quests
Deeds
Known Deeds for this instance (usually bestowed upon first entrance) include:
Creatures
These mobs are encountered within Gorthad Nûr:
- Click [+] to expand a list of creatures.
Instance Overview
Walk-through and Tactics
Shalgoth - Pull him with some kind of defensive skill active as the first thing he does is a rather hard hitting AoE attack placing a removable DoT effect on everyone. After that first hit, he never does it again however. He calls for adds every so often, you'll want to kill them one at a time as the boss can empower himself temporarily as soon as one of them dies, and this buff can be stacked on him. Our approach is to just kill one add, then wait for the buff to run out (doing next to no damage), and afterwards kill the next one or do damage to the boss if there's no add left standing. Rinse, repeat until he is dead.
Gurzhorn - As soon as you clear out all undead in the final room, the boss activates almost instantly. You can avoid that by standing up the stairs or right where you'd drop down if you were to run forward down the platform when first entering the room (right up to the wall). He does a group-wide AoE attack all 15s that hits rather hard and that you have to survive and heal back up until he does the next one, and there's three groups of two undead each spawning in the corners of the room. Surviving his AoE and killing the undead fast, if you happen to activate them, is key to this fight.
- Tier 1
- Tier 2
- Tier 3
Tips
< General tips for all levels >
- There's bone piles spawning skeletons, there's kergrim, there's different kinds of undead roaming around, and there are small worm-like things.
- For the bone piles, you can pretty much ignore them as killing them does not stop skeleton spawn, and they do pretty much nothing else but control doors opening up inside the instance. The little skeletons they spawn, however, you want to avoid standing too near to them if possible as they do a 360° AoE attack that can certainly hurt, depending on gear and class. Kergrim, they can mess with aggro, stun, and summon skeletons (you'll want to interrupt this one). Other than that, they're not that bad. Then there's the undead, for ritualists, nothing too bad other than, when they die they drop a puddle draining your power, you should move out of them if at all possible. The archers, they do AoE damage as soon as they spawn, afterwards they are pretty much harmless. The shamblings, they stack corruptions (remove them fast), cast disarm/silence at random and are, in general, just total jerks. The arms accompanying them slow down you attacks, so you might want to kill the arms, then the shamblings. For me, these are top priority to kill whenever there's a fight with them coming up. In addition, spikes will come up through the floor in areas with black holes. They can seriously hurt you if you are in combat or lightly geared, but if you watch the floor you should be fine. Note that these can not damage mobs that walk over them, but the animation does play.
Challenge
<Describe any challenge mode>
Rewards
Solo/Duo
Shalgoth's Chest
![]()
![]()
![]()
![]()
An uncommon Enhancement Rune.
Gurzhorn's Chest
![]()
![]()
![]()
![]()
A rare, class appropriate tracery.
Tier 1
Shalgoth's Silver Chest
An uncommon Enhancement Rune and a piece of uncommon armour or jewellery.
Gurzhorn's Silver Chest
![]()
![]()
![]()
A rare, class appropriate tracery and a piece of uncommon armour or jewellery.
Tier 2
Shalgoth's Gold Chest
A rare Enhancement Rune and a piece of rare or uncommon armour or jewellery.
Gurzhorn's Gold Chest
![]()
![]()
A rare, class appropriate tracery and a piece of uncommon armour or jewellery.
Tier 3
Shalgoth's Mithril Chest
An incomparable Enhancement Rune and a piece of rare armour or jewellery.
Gurzhorn's Mithril Chest
![]()
![]()
An incomparable, class appropriate tracery and a piece of incomparable or rare armour or jewellery.
Map

Gallery
-
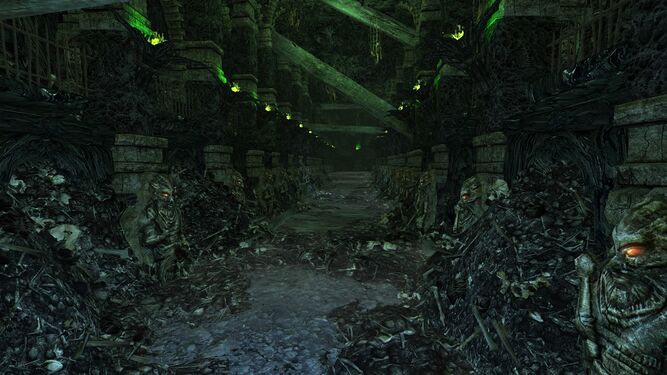 A haunted corridor
 -
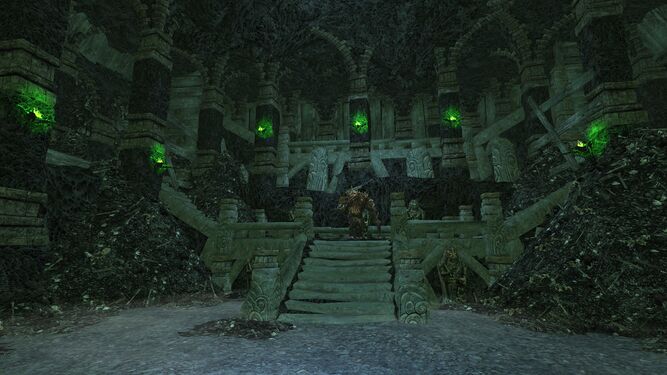 Shalgoth's Chamber
 -
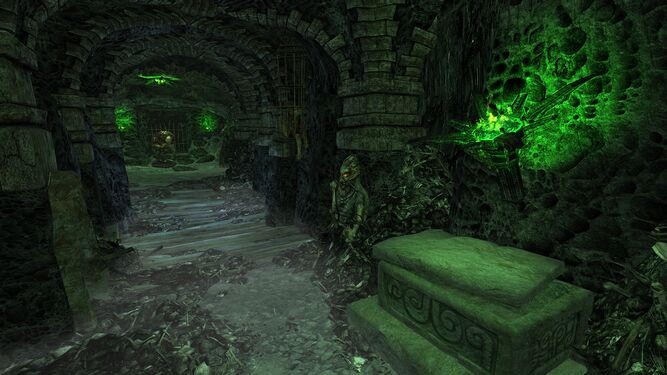 One of many junctions
 -
 Bâr Daenath, the House of Bones


![[68.8S, 3.5E]](/wiki/File:Morgul_Vale_map.jpg)
| Minas Morgul Instances
| ||
|---|---|---|
| Small fellowship: | Eithel Gwaur • Gath Daeroval • Gorthad Nûr • The Harrowing of Morgul | |
| Fellowship: | Bâr Nírnaeth • Ghashan-kútot • The Fallen Kings | |
| Raid: | Remmorchant | |