The Temple of Utug-bûr - Inner Sanctum
| Level: | 150 |
| Size: | 12-person Raid |
| Cluster: | Legacy of Morgoth |
| Region: | The Valley of Ikorbân |
| Area: | Urash Dâr |

- "As you step through the sanctum's threshold, the ground groans in disapproval, and an odorous, chilling wind rubs your bones. The wind carries mournful wails, whispers, and laughter from the dancing shadows at the edge of your vision. Within the heart of the sanctum a frenetic thrum begins, as if the shadow comes alive and echoes the rapid beating of your heart. Something in the darkness is aware of your presence."
Instance Overview
Level Range
This is a non-scaled raid with a minimum level of 150. The instance is available at level 150.
Location
This raid is part of the Legacy of Morgoth Instance Cluster. It is the third of three raid wings within The Temple of Utug-bûr.
The raid is available in the Instance Finder.
Difficulty
Enemy stats are altered depending on the tier of the instance:
 Enhancement -- Tier 1 in Tier 1.
 Enhancement -- Tier 2 in Tier 2.
 Enhancement -- Tier 3 in Tier 3.
Note that Tier II Modifiers are the same as previous Tier III Modifiers, and Tier III Modifiers are the same as previous Tier V Modifiers.
Estimated Duration
This raid usually takes about 30 minutes to complete on any tier, assuming that the group doesn't wipe on any boss.
Enemies
- Boss 1: Azagath Sea-shadow
- Boss 2: Gârash, the Emptiness
Rewards
| Boss 1 - Azagath Sea-shadow | |||
|---|---|---|---|
| Armour/Jewellery/Offhands | Light Drop |
Medium Drop |
Heavy Drop |
| x | |||
| x | |||
| x | |||
| x | |||
| x | |||
| x | |||
| x | |||
| x | |||
| x | x | x | |
| x | x | x | |
| Barter Tokens | |||
| Essences | |||
| Legendary Item Advancement | T1 | T2 | T3 |
| x | x | ||
| x | |||
| Random Incomparable Tracery | x | x | x |
| x | x | ||
| Boss 2 - Gârash, the Emptiness | |||
|---|---|---|---|
| Armour/Jewellery | Light Drop |
Medium Drop |
Heavy Drop |
| x | |||
| x | |||
| x | |||
| x | |||
| x | |||
| x | |||
| x | |||
| x | x | x | |
| x | x | x | |
| x | x | x | |
| x | x | x | |
| Rare Drops | |||
| Rare Gold Drops (Tier 3 Only) | |||
| Barter Tokens | |||
| Essences | |||
| Legendary Item Advancement | T1 | T2 | T3 |
| x | |||
| x | |||
| x | |||
| Random Incomparable Tracery | x | x | |
| x | x | ||
| x | x | ||
| x | x | ||
Deeds
Quests
Strategy Overview
Boss 1 - Azagath Sea-shadow
This fight takes place over two phases. In the first phase, Azagath summons his three figments (Cunning, Malice, and Mettle). When all three figments have been defeated, Azagath becomes vulnerable to damage, entering phase two. The fight ends when Azagath reaches 10% morale.
The priority order for phase 1 is as follows:
This order is based on the severity of each enemy's mechanics on the higher tiers. In Tier 1, none of them are particularly dangerous.
In phase 2, the boss will spawn Gifts of the Thardúth, which mez players while channeling. Make sure to interrupt them when you see them inducting. The Tanks take higher damage in this phase, so make sure to use your cooldowns more frequently.
Tier 2
In phase 1, the Boss will apply ![]() Expose to Shadow to the Tank. This is an extremely potent mitigation debuff; when granted, the other tank should then AoE taunt. All of Azagath's figments apply additional removable effects. Use cleanse skills off cooldown. Azagath's Cunning will occasionally target a Player to hit several times in a row, applying stacks of
Expose to Shadow to the Tank. This is an extremely potent mitigation debuff; when granted, the other tank should then AoE taunt. All of Azagath's figments apply additional removable effects. Use cleanse skills off cooldown. Azagath's Cunning will occasionally target a Player to hit several times in a row, applying stacks of ![]() Festering Poison. Healers should focus heal the target of this ability. Azagath's Malice drops
Festering Poison. Healers should focus heal the target of this ability. Azagath's Malice drops ![]() Icy Grasp puddles; dodge out of them when they spawn.
Icy Grasp puddles; dodge out of them when they spawn.
Throughout the fight, the boss spawns several Azagath's Wills, up to three in phase 1 and one in phase 2. These enemies repeatedly cast Will of the Sea-shadow, which heals all nearby enemies. The Guardian Tank can usually get most of them, and can call for back-ups. Because the number of Wills that can spawn is finite, the group should defeat all of them before entering Phase 2. Thus, they should be targeted when both the Cunning and Malice are defeated, and before defeating the Mettle. This also allows any revives to come off cooldown to prepare for Phase 2.
Only one Azagath's Will spawns in Phase 2. The Tanks can take care of all the inductions. The boss will deal huge tank damage and there's little that can be done to save the Tanks. If a Tank is defeated, quickly revive them.
Tier 3
Azagath's Malice applies an effect to the Tank that causes Azagath to target them with ![]() Shatter Bone. This effect needs to be quickly cleansed, as it prevents the Tank from using any abilities. Azagath's Mettle has an interruptible induction, Concuss, that causes Azagath to defeat the targeted Player.
Shatter Bone. This effect needs to be quickly cleansed, as it prevents the Tank from using any abilities. Azagath's Mettle has an interruptible induction, Concuss, that causes Azagath to defeat the targeted Player.
In phase 2, the Boss summons new figments. He will periodically spawn either Cunning, Malice, or Mettle, and additional Azagath's Wills. This phase is a DPS race to defeat the Boss before he summons too many enemies. Before this phase begins, pull the Boss to a corner of the room. This will cause the Wills to be grouped up closer so that they will be easier to interrupt. At the beginning, Tanks can get interrupts, but as more Wills spawn, the group will need to help out.
Trash
The trash comes in four waves, with little time to rest in-between. If any Players are defeated, make sure you quickly revive them out-of-combat between waves. The priority order is as follows:
- 1: Sages
- 2: Bow-masters
- 3: Sorcerers
- 4: Wardens
Start each pack on one side of the arena, and defeat the ranged mobs (Sages, Bow-masters, Sorcerers). Once they are defeated, drag the Wardens to the other side and defeat the ranged mobs there.
There are a lot of cleanseable debuffs in these waves. Use your cleanse skills off cooldown. The most important debuff is ![]() Sloughing Disease, which is applied to the Tank. If not cleansed, a Poisonous Nodule is spawned, which grants even more debuffs.
Sloughing Disease, which is applied to the Tank. If not cleansed, a Poisonous Nodule is spawned, which grants even more debuffs.
In higher tiers, more Players will be granted ![]() Sloughing Disease, and in Tier 3, Players can be granted
Sloughing Disease, and in Tier 3, Players can be granted ![]() Arrow of Death. They must then be healed to full, otherwise they will be defeated.
Arrow of Death. They must then be healed to full, otherwise they will be defeated.
During this fight, the ![]() Glorfindel's Aid skill is available in the bottom left corner of the arena, near Glorfindel. One Player can gain this skill, and use it periodically to help the raid. Using the skill removes all tiering debuffs on Players, and kills any spawned Blisters or Fragments. Assign one Player, usually a ranged DPS, to stay in the corner and use the skill off cooldown.
Glorfindel's Aid skill is available in the bottom left corner of the arena, near Glorfindel. One Player can gain this skill, and use it periodically to help the raid. Using the skill removes all tiering debuffs on Players, and kills any spawned Blisters or Fragments. Assign one Player, usually a ranged DPS, to stay in the corner and use the skill off cooldown.
Throughout this phase, Gârash, the Emptiness is floating around the arena. Start with the Bosses on the left side of the arena, where Gârash does not start. It is very important that the Bosses do not get too close to Gandalf or Glorfindel, as this will cause the instance to reset.
Dodge the Blisters of Despair and Blisters of Dread as they spawn. They tier up the ![]() True Despair and
True Despair and ![]() Thanatophobia debuffs respectively. Also make sure to cleanse
Thanatophobia debuffs respectively. Also make sure to cleanse ![]() Enveloping Shadows if you are granted it.
Enveloping Shadows if you are granted it.
If you are granted the ![]() Plaguestorm or
Plaguestorm or ![]() Umbrastorm effects, run out of group to let them expire, as they summon more Plaguestorms and Umbrastorms.
Umbrastorm effects, run out of group to let them expire, as they summon more Plaguestorms and Umbrastorms.
Thahar periodically does a green line hit against the Tank. Any Players hit by this cast spawn a Blister nearby, so dodge this hit. Also, the Tank will spawn Plaguestorms underneath them, which deal distributed damage. These can be ignored.
Defeat Sagush first, then Thahar.
Intermission - Fragments and Nodules
During this phase, a number of green squares appear near the door to the arena. Step in a puddle to gain the ![]() For Middle-earth! skill. Using this skill defeats any nearby Fragments of Despair and Fragments of Dread. If these enemies are not defeated, they transform into blisters.
For Middle-earth! skill. Using this skill defeats any nearby Fragments of Despair and Fragments of Dread. If these enemies are not defeated, they transform into blisters.
Midway through the phase, a number of Nodules will spawn in the center of the arena. These enemies track towards the nearest Blister or Fragment. When they reach it, they will detonate, stunning any nearby players and damaging the entire raid.
Boss 2 - Gârash, the Emptiness
During this fight, the ![]() Gandalf's Aid skill is available in the bottom left corner of the arena, near Gandalf. One Player can gain this skill, and use it periodically to help the raid. Using the skill removes all tiering debuffs on Players, and grants all Players the
Gandalf's Aid skill is available in the bottom left corner of the arena, near Gandalf. One Player can gain this skill, and use it periodically to help the raid. Using the skill removes all tiering debuffs on Players, and grants all Players the ![]() Radiant Hope buff. Assign one Player, usually a ranged DPS, to stay in the corner and use the skill off cooldown.
Radiant Hope buff. Assign one Player, usually a ranged DPS, to stay in the corner and use the skill off cooldown.
This fight is all about dodging the mechanics as they happen. Below are the mechanics:
- Mushrooms periodically spawn underneath 3 Players. On Tier 1 the Mushrooms may be ignored, however, on higher tiers Players will need to avoid the Mushrooms.
- The Boss creates 8 purple lines that need to be dodged. Being hit removes
 Radiant Hope and applies
  Drain Reason. The lines spawn at the four cardinal directions (N, S, E, W) and/or at the four diagonals between them (NE, NW, SE, SW). There can be significant variation in which lines spawn.
 - Blisters occasionally pop up under a Player. Move away from them. Players standing within approximately 5m of the Boss will not spawn Blisters. Players that are approximately 6m-25m from the Boss will spawn Blisters, and these Blisters will spawn on Players in melee range. Ranged Players who cannot fight close to the Boss should be more than approximately 25m away from the Boss, and should also take care not to stand too close to the Player using the
 Gandalf's Aid skill.
 - Run out of group to let
 Plaguestorm and
  Umbrastorm expire, taking care not to drop the Plaguestorms and Umbrastorms by the Player using the Gandalf's Aid skill.
When the Boss begins casting Consume to Emptiness, he will defeat all of the Blisters remaining in the arena to gain stacks of ![]() Emptiness. Remove the corruptions quickly to spawn several Fragments and Nodules nearby. Everyone with a
Emptiness. Remove the corruptions quickly to spawn several Fragments and Nodules nearby. Everyone with a ![]() For Middle-earth! should watch to defeat the Fragments before the Nodules reach them. Focus the Nodules in this phase.
For Middle-earth! should watch to defeat the Fragments before the Nodules reach them. Focus the Nodules in this phase.
The strategy for this fight to have everyone stay close to the Boss, with one Player in the corner for ![]() Gandalf's Aid. The fight ends when the boss reaches 10% morale.
Gandalf's Aid. The fight ends when the boss reaches 10% morale.
Tier 2
The strategy for this fight is roughly the same; stay in melee range, except for one designated Player. This is because the Boss will spawn Blisters and Plague/Umbrastorms under ranged Players if possible, so in this way, you can have the ranged Player curate where the Blisters should be placed. Removing these mechanics from the group's mind is helpful to assist in dodging.
The dodge mechanics for this tier become more difficult:
- Mushrooms spawn underneath 4 Players instead of 3
- Purple lines no longer target all at once, and happen more frequently. Players hit by lines spawn a nearby Fragment, Nodule, and Plague Vortex
Plague Vortices spawn red lines that need to be dodged. Tanks also need to taunt these enemies, or they may defeat players. Beware the vortices, as they deal severe damage.
The Boss' ability Purge the Hopeless now spawns Nodules. Nodules always spawn to the left of the targeted players. Because the ![]() Gandalf's Aid skill is on the right side of the arena, the Nodules should be spawned in the left side, which allows players extra time to defeat them. It is thus important that the group always faces the altar, including the Tank! Don't worry, the Boss doesn't do significant frontal damage. Purge the Hopeless summons additional enemies if players don't have
Gandalf's Aid skill is on the right side of the arena, the Nodules should be spawned in the left side, which allows players extra time to defeat them. It is thus important that the group always faces the altar, including the Tank! Don't worry, the Boss doesn't do significant frontal damage. Purge the Hopeless summons additional enemies if players don't have ![]() Radiant Hope, so being hit by a line can cause a chain effect that potentially can lead to a wipe.
Radiant Hope, so being hit by a line can cause a chain effect that potentially can lead to a wipe.
Tier 3
Have the ranged players spread out around the Boss. There are more Mushrooms and lines in this tier, so spreading out makes it easier to dodge them. Melee Players on the Boss should stack together so that Mushrooms and lines are in-sync and easier to dodge. Ranged should drop Plaguestorms and Umbrastorms along the edges of the room. A tanky support player should use ![]() Gandalf's Aid throughout this fight.
Gandalf's Aid throughout this fight.
When the Boss casts Purge the Hopeless, four Nodules will spawn around the room based on player position. Nodules always spawn about 10m to the left of Players. Thus, whenever the boss casts this, everyone (melees included) must move to 10m away from the boss and have their left hand face the boss. This way, they can be cleaved before they move to detonate at Blisters.
The usual group composition for this Boss is one tank and three or more healers. Another class with a taunt, like a Beorning or Captain, needs to taunt the boss sometimes to make sure the tank doesn't get too many stacks of ![]() Shred Hope.
Shred Hope.
If anyone gets hit with a line, a Plague Vortex and Shadow Vortex are summoned, which is almost certainly a wipe. The highest priority for everyone in this fight is to never get hit by a line.
When the Boss reaches 25% Morale, he summons Thahar and Sagush. At 20% Morale, ![]() Gandalf's Aid becomes unusable and no more lines spawn. At this point, the fight becomes a DPS race to finish it as fast as possible. The Regmyl will spawn more Blisters, so Nodules become more dangerous in this phase.
Gandalf's Aid becomes unusable and no more lines spawn. At this point, the fight becomes a DPS race to finish it as fast as possible. The Regmyl will spawn more Blisters, so Nodules become more dangerous in this phase.
Gallery
-
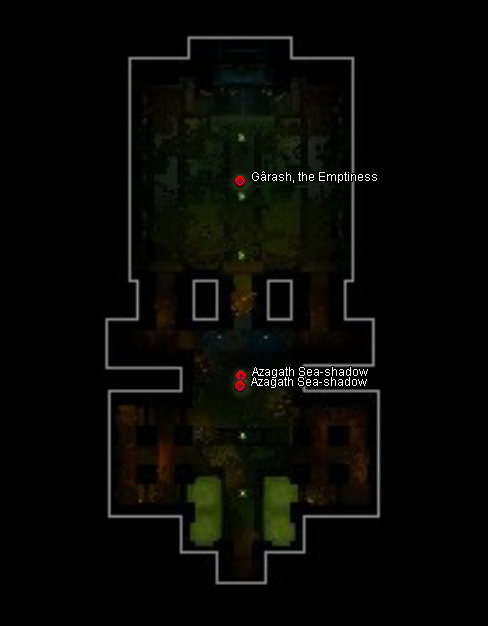 Map, including boss encounters

-
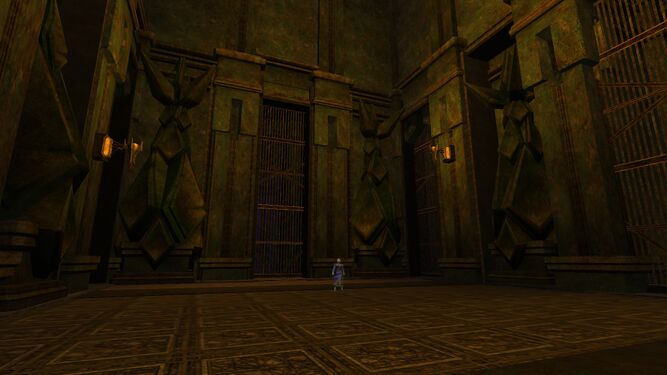 Boss 1
 -
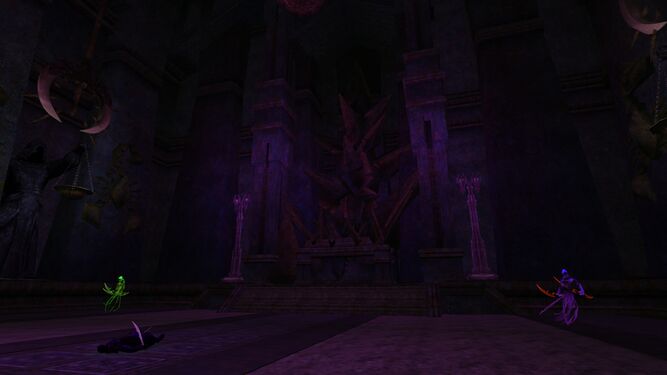 Boss 2
