The Temple of Utug-bûr - Dhórgruth
| Level: | 150 |
| Size: | 12-person Raid |
| Cluster: | Legacy of Morgoth |
| Region: | The Valley of Ikorbân |
| Area: | Urash Dâr |

- "Utug-bûr is home long-hidden vaults delved deep into the stone, hidden by sorcery since the end of the First Age. The Thardúth, one of Morgoth's powerful agents, bred the great Elder Orcs known as the Utûgi. Its denizens have remained in a sorcerous slumber for millennia, but have now awakened, and their lair opened anew with the passing of the threat of Sauron."
Instance Overview
Level Range
This is a non-scaled raid with a minimum level of 150. The instance is available at level 150.
Location
This raid is part of the Legacy of Morgoth Instance Cluster. It is the first of three raid wings within The Temple of Utug-bûr.
The raid is available in the Instance Finder.
Difficulty
Enemy stats are altered depending on the tier of the instance:
 Enhancement -- Tier 1 in Tier 1.
 Enhancement -- Tier 2 in Tier 2.
 Enhancement -- Tier 3 in Tier 3.
Note that Tier II Modifiers are the same as previous Tier III Modifiers, and Tier III Modifiers are the same as previous Tier V Modifiers.
Estimated Duration
This raid usually takes between 20-30 minutes to complete on any tier, assuming that the group doesn't wipe on any boss.
Enemies
- Boss 1: Kulkorth
- Boss 2: Maluchon, the Pale Brother
Rewards
| Boss 1 - Kulkorth | |||
|---|---|---|---|
| Armour/Jewellery | Light Drop |
Medium Drop |
Heavy Drop |
| x | |||
| x | |||
| x | |||
| x | x | x | |
| Barter Tokens | |||
| Essences | |||
| Legendary Item Advancement | T1 | T2 | T3 |
| x | x | ||
| x | |||
| Random Incomparable Tracery | x | x | x |
| x | x | ||
| Boss 2 - Maluchon, the Pale Brother | |||
|---|---|---|---|
| Armour/Jewellery | Light Drop |
Medium Drop |
Heavy Drop |
| x | |||
| x | |||
| x | |||
| x | |||
| x | x | x | |
| x | x | x | |
| x | x | x | |
| x | x | x | |
| x | x | x | |
| Rare Drops | |||
| Rare Gold Drops (Tier 3 Only) | |||
| Barter Tokens | |||
| Essences | |||
| Legendary Item Advancement | T1 | T2 | T3 |
| x | |||
| x | |||
| x | |||
| Random Incomparable Tracery | x | x | |
| x | x | ||
| x | x | ||
| x | x | ||
Deeds
Quests
Strategy Overview
Orc-kind Trash
The trash at the beginning of the raid consists of a few packs of orc-kind enemies. These enemies can easily be cleaved down without much thought. Target the Urâshi Captains first, as they summon additional enemies. After the Captains are defeated, target any Utûgi Slaughterers, as they apply ![]() Bleeding Strike, a potent non-removable Wound, to the group.
Bleeding Strike, a potent non-removable Wound, to the group.
Boss 1 - Kulkorth
The boss summons two animal companions shortly into the fight: Bashâru and Tamâkh. Over the course of the fight, the Boss and companions take turns being invulnerable to damage. When one of the enemies gains ![]() Perfect Defence, swap to another target. Make sure that you have a target assist for this fight.
Perfect Defence, swap to another target. Make sure that you have a target assist for this fight.
Watch out for the ![]() Cursed Ground Puddles that the Boss drops. He calls out which player he's dropping it under, so have a Tank call out which player is dropping the Puddle so that they can run out of group.
Cursed Ground Puddles that the Boss drops. He calls out which player he's dropping it under, so have a Tank call out which player is dropping the Puddle so that they can run out of group.
The strategy for this fight is to stack up all three enemies in one spot, and simply kill the rotating vulnerable targets.
Tier 2
The Boss applies a potent bleed, ![]() Burning Up!, on all players, and upon expiration, all players drop an
Burning Up!, on all players, and upon expiration, all players drop an ![]() Aflame Puddle. Make sure that the Boss has all possible damage debuffs on him so that the bleed doesn't tick as hard. If needed, cycle raid cooldowns like
Aflame Puddle. Make sure that the Boss has all possible damage debuffs on him so that the bleed doesn't tick as hard. If needed, cycle raid cooldowns like ![]() Guided by the Stars,
Guided by the Stars, ![]() One for All, and
One for All, and ![]() Warding Knowledge around healer cooldowns. Players should choose a spot in the room to all drop their puddles; this way, the rest of the arena remains cleared of puddles.
Warding Knowledge around healer cooldowns. Players should choose a spot in the room to all drop their puddles; this way, the rest of the arena remains cleared of puddles.
Bashâru and Tamâkh each have a different aura. Bashâru reduces the incoming damage of nearby enemies (![]() Aura of the Great Lion), and Tamâkh increases the outgoing damage of nearby enemies (
Aura of the Great Lion), and Tamâkh increases the outgoing damage of nearby enemies (![]() Aura of the Great Jackal). It is recommended to have two tanks on this fight: one to hold Kulkorth, and the other to hold Bashâru and Tamâkh. This way, the Boss does not have his damage buffed for when he applies
Aura of the Great Jackal). It is recommended to have two tanks on this fight: one to hold Kulkorth, and the other to hold Bashâru and Tamâkh. This way, the Boss does not have his damage buffed for when he applies ![]() Burning Up!. If the Tanks take too much damage, they should swap which enemies they have aggro of, so tank debuffs begin to expire.
Burning Up!. If the Tanks take too much damage, they should swap which enemies they have aggro of, so tank debuffs begin to expire.
Players should be wary of damage from the animal companions. Tamâkh applies ![]() Hunted on a player and attacks them for a short duration, and Bashâru can apply the potent
Hunted on a player and attacks them for a short duration, and Bashâru can apply the potent ![]() Grievous Wound on a player. Healers should watch for these debuffs and direct healing to the players that receive them.
Grievous Wound on a player. Healers should watch for these debuffs and direct healing to the players that receive them.
Additionally, the Boss drops ![]() Circle of Rage Puddles underneath him. Make sure not to stand too long in this Puddle, as it deals potent damage.
Circle of Rage Puddles underneath him. Make sure not to stand too long in this Puddle, as it deals potent damage.
Tier 3
Instead of dropping a ![]() Cursed Ground puddle, Cursed Arrow now applies
Cursed Ground puddle, Cursed Arrow now applies ![]() Under Fire, and becomes an AoE hit with a small radius. The player targeted by the boss' cast should run out of group. However, in Tier 3, the Boss will follow up with Dreadful Arrow, which does a distributed hit around the player. Make sure that your supports follow the targeted player to help soak the hit. It is important that the entire raid isn't inflicted with
Under Fire, and becomes an AoE hit with a small radius. The player targeted by the boss' cast should run out of group. However, in Tier 3, the Boss will follow up with Dreadful Arrow, which does a distributed hit around the player. Make sure that your supports follow the targeted player to help soak the hit. It is important that the entire raid isn't inflicted with ![]() Under Fire, as it will make dodging
Under Fire, as it will make dodging ![]() Aflame puddles much harder.
Aflame puddles much harder.
Kulkorth and Tamâkh have severe tank hits in this tier, so it's important that the tanks don't get too high on tank debuffs. Also, Bashâru's Aura significantly decreases the incoming damage of nearby enemies. ![]() Burning Up! is highly potent in this tier, so Tamâkh can never be close to the Boss.
Burning Up! is highly potent in this tier, so Tamâkh can never be close to the Boss.
There are two commonly used strats for this fight, based on the above mechanics:
- 1: 2 tanks; 1 tank holds Kulkorth, and the other holds Tamâkh. Swap enemies when tank stacks get high. Make sure Bashâru is away from the kill target.
- 2: 3 tanks; 1 tank holds each enemy; rotate enemies when tank stacks get high.
Kulkorth gains ![]() Uncontrollable Rage while standing in a
Uncontrollable Rage while standing in a ![]() Circle of Rage puddle. Make sure to quickly move away from the puddle when the boss drops it.
Circle of Rage puddle. Make sure to quickly move away from the puddle when the boss drops it.
Undead Trash
In Tier 1, this Trash is fairly straightforward. Kill any wights before spirits.
In Tier 2+, the trash becomes a bit more complicated. The Utug-bûr Crypt-champions gain a stack of ![]() Power of the Dead for every nearby enemy, and
Power of the Dead for every nearby enemy, and ![]() Power of the Living for every nearby player. To counter this mechanic, have one tank taunt out Champions individually, so that they can be damaged. Additionally, make sure that no one besides the tank is in melee range of the Champion. When they have too many stacks, they can one-shot Tanks, virtually ensuring a wipe. Once all Champions in an add wave (maximum of 2) are defeated, the group can then kill the rest of the enemies. Focus on any outlying Utug-bûr Crypt-sentinels first, as they deal heavy damage on the group.
Power of the Living for every nearby player. To counter this mechanic, have one tank taunt out Champions individually, so that they can be damaged. Additionally, make sure that no one besides the tank is in melee range of the Champion. When they have too many stacks, they can one-shot Tanks, virtually ensuring a wipe. Once all Champions in an add wave (maximum of 2) are defeated, the group can then kill the rest of the enemies. Focus on any outlying Utug-bûr Crypt-sentinels first, as they deal heavy damage on the group.
Have the main add tank call out when the Wretched Utug-bûr Spirits cast Release. This induction deals heavy AoE damage. Have supports watch out for when Dreadful Utug-bûr Spirits cast Enervation. Make sure to stun them when they do this, as the cast heals them and damages a chosen player. Watch out for any Risen Arms that the Dreadfuls summon. If this happens, run away from them, as they are very slow-moving.
In Tier 3, the Wretched Utug-bûr Spirits cast Cursed to Die after being alive for too long, which will almost surely kill the Tank. The strat on this tier is best reversed, where the group kills the spirits before swapping to the Champions out-of-group.
Boss 2 - Maluchon, the Pale Brother
This Boss has a few phases. First, he summons an undead companion, Kanâshu. During this phase, the Boss takes no damage. Kill Kanâshu on top of the Boss. When he dies, he drops the ![]() Unbound Spirit Puddle, which allows the Boss to be damaged. Once Kanâshu dies, the Boss begins inducting Breaking Bonds. This cast deals AoE damage, so healers should be prepared to heal the group for this phase.
Unbound Spirit Puddle, which allows the Boss to be damaged. Once Kanâshu dies, the Boss begins inducting Breaking Bonds. This cast deals AoE damage, so healers should be prepared to heal the group for this phase.
Once Breaking Bonds is done, the Boss will summon a few add waves, consisting of Wretched Utug-bûr Spirits and Dreadful Utug-bûr Spirits. Make sure the boss has aggro of these enemies, and keep damage focus on the Boss. Once the adds have spawned in, there will be a large Puddle that spawns in the center of the arena, called ![]() Winds of Death. When this happens, move out of the center and continue killing the Boss.
Winds of Death. When this happens, move out of the center and continue killing the Boss.
Throughout the fight, the Boss will apply ![]() Will o' the Wisp on random players, which upon expiration, drops a
Will o' the Wisp on random players, which upon expiration, drops a ![]() Dead Calling Puddle. If you see that you have this debuff, run out of group to drop the Puddle.
Dead Calling Puddle. If you see that you have this debuff, run out of group to drop the Puddle.
Tier 2
Kanâshu spawns several Risen Arms while being damaged. These enemies can deal a great amount of damage on the group if not controlled. Have the tanks cycle their AoE taunts to make sure that all Risen Arms are targeted on them. These arms also heal Kanâshu and the Boss upon death, so make sure that they die before Breaking Bonds begins. This will usually happen naturally from high AoE DPS, but depending on the group makeup, you may need to target them before Kanâshu dies.
This fight is essentially a DPS race. As such, you should use your biggest cooldowns when Breaking Bonds is inducting, as ![]() Unbound Spirit increases the Boss' taken damage during this period.
Unbound Spirit increases the Boss' taken damage during this period.
During the first phase, one of the tanks will be granted ![]() Lingering Fear, which can be cleansed to drop a
Lingering Fear, which can be cleansed to drop a ![]() Resolution Puddle. This Puddle drastically reduces the damage taken from Breaking Bonds, which on this tier, does very high damage. When Kanâshu dies, have the tank cleanse this effect on top of the group. DO NOT pre-emptively cleanse the effect from the tank!
Resolution Puddle. This Puddle drastically reduces the damage taken from Breaking Bonds, which on this tier, does very high damage. When Kanâshu dies, have the tank cleanse this effect on top of the group. DO NOT pre-emptively cleanse the effect from the tank!
Wretched Utug-bûr Spirits apply ![]() Aura of Malice on all nearby enemies. During this phase, the Boss has an AoE hit ability. If three of more Wretched Spirits are near the boss when he uses this ability, the hit will likely kill players. An add tank should take aggro of the Wretched Spirits as they spawn and keep them away from the Boss. The Spirits deal an incredibly high amount of damage, so when all of the adds have been spawned in, the group should use all defensive cooldowns on the add tank to help them survive. The easiest strategy for this phase is to have the boss tank taunt the Wretcheds one-by-one, with a maximum of 2 Wretcheds near the boss at any given time. The group should swap to kill the Spirits near the boss, while AoE-ing the Boss. Once only 1-2 Wretcheds remain alive on the add tank, return to killing the Boss.
Aura of Malice on all nearby enemies. During this phase, the Boss has an AoE hit ability. If three of more Wretched Spirits are near the boss when he uses this ability, the hit will likely kill players. An add tank should take aggro of the Wretched Spirits as they spawn and keep them away from the Boss. The Spirits deal an incredibly high amount of damage, so when all of the adds have been spawned in, the group should use all defensive cooldowns on the add tank to help them survive. The easiest strategy for this phase is to have the boss tank taunt the Wretcheds one-by-one, with a maximum of 2 Wretcheds near the boss at any given time. The group should swap to kill the Spirits near the boss, while AoE-ing the Boss. Once only 1-2 Wretcheds remain alive on the add tank, return to killing the Boss.
The Dreadful Utug-bûr Spirits spawn Risen Arms if they aren't aggroed on a tank. Make sure that the tanks maintain full aggro of them. Also make sure to interrupt their Enervation casts. This cast applies ![]() Doomed to the chosen player, so healers should grant extra protection to this player. Note that these spirits can not be perma-mezzed, as they have the
Doomed to the chosen player, so healers should grant extra protection to this player. Note that these spirits can not be perma-mezzed, as they have the ![]() Dread Determination permanent buff.
Dread Determination permanent buff.
Tier 3
The Risen Arms now have frontals. Tanks should closely coordinate their taunt abilities so that the group doesn't get hit too much. These arms also apply ![]() Frozen with Fear, which increases the damage taken from Breaking Bonds. Tanks also take heavy damage here that can not be BPE'd, so be ready to use incoming damage cooldowns here.
Frozen with Fear, which increases the damage taken from Breaking Bonds. Tanks also take heavy damage here that can not be BPE'd, so be ready to use incoming damage cooldowns here.
The Boss grants ![]() Contagious Fear to random players throughout the fight. This fear does heavy damage, so should be cleansed as soon as possible. However, when cleansed, any nearby players also gain
Contagious Fear to random players throughout the fight. This fear does heavy damage, so should be cleansed as soon as possible. However, when cleansed, any nearby players also gain ![]() Contagious Fear and take heavy damage. If this effect is potted in group, it will almost certainly cause a wipe. Be aware that a player dying counts as cleansing the bleed, as well as entering a
Contagious Fear and take heavy damage. If this effect is potted in group, it will almost certainly cause a wipe. Be aware that a player dying counts as cleansing the bleed, as well as entering a ![]() Dead Calling puddle.
Dead Calling puddle.
The Wretched Utug-bûr Spirits are very difficult to deal with in this tier. They cast Cursed to Die after 45s and kill both themselves and the tank, and due to the pacing of the fight, it is near-impossible to kill all of them and the boss before time runs out. Also, as the fight goes on, players get stacks of ![]() Frostbite, which increases the boss' damage of the Deathly Chill AoE hit. The best way to counter the spirits is to stack incoming damage buffs on top of a strong cooldown like
Frostbite, which increases the boss' damage of the Deathly Chill AoE hit. The best way to counter the spirits is to stack incoming damage buffs on top of a strong cooldown like ![]() Unbreakable or
Unbreakable or ![]() Thickened Hide on the add tank so that they survive Cursed to Die. A third tank is strongly recommended to help wrangle up all of the adds and cycle cooldowns.
Thickened Hide on the add tank so that they survive Cursed to Die. A third tank is strongly recommended to help wrangle up all of the adds and cycle cooldowns.
The Dreadful Utug-bûr Spirits gain new abilities based on what class they target with Enervation. If a Captain or Beorning player is targeted, the Spirit gains ![]() Essence of the Commander, which allows them to heal the Boss. The way to counter this is to either not bring Captains or Beornings, or swap to kill Dreadful Spirits quickly if they become Commanders. If a Hunter player is targeted, the Spirit gains
Essence of the Commander, which allows them to heal the Boss. The way to counter this is to either not bring Captains or Beornings, or swap to kill Dreadful Spirits quickly if they become Commanders. If a Hunter player is targeted, the Spirit gains ![]() Essence of the Tracker, which allows them to deal huge damage to random players. Do not bring any Hunters into this fight. In this tier, the Dreadful Spirits cause more
Essence of the Tracker, which allows them to deal huge damage to random players. Do not bring any Hunters into this fight. In this tier, the Dreadful Spirits cause more ![]() Dead Calling puddles to be dropped, apply
Dead Calling puddles to be dropped, apply ![]() Chilled to random players, and deal AoE damage.
Chilled to random players, and deal AoE damage.
Kill the Dreadful Utug-bûr Spirits ASAP while maintaining boss damage. Make sure that they are never too close to the Wretched Utug-bûr Spirits, as this will buff their damage to likely one-shot players with their casts.
Gallery
-
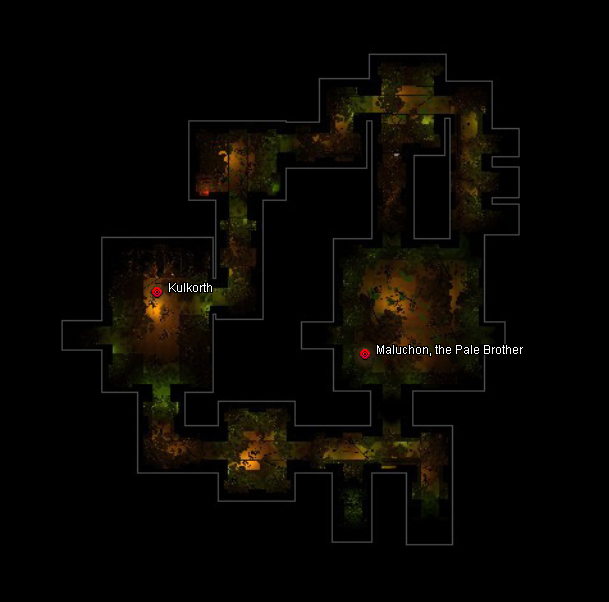 Map, including boss encounters

-
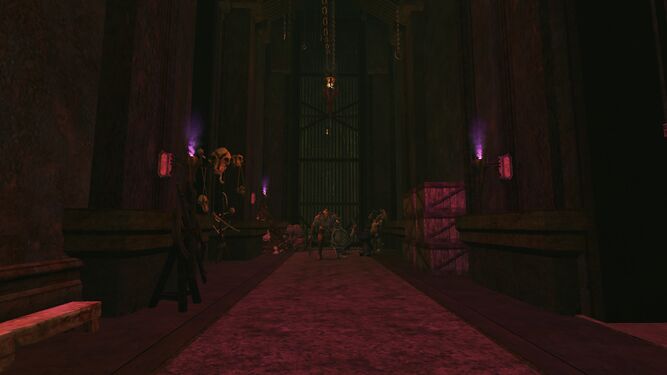 Entrance
 -
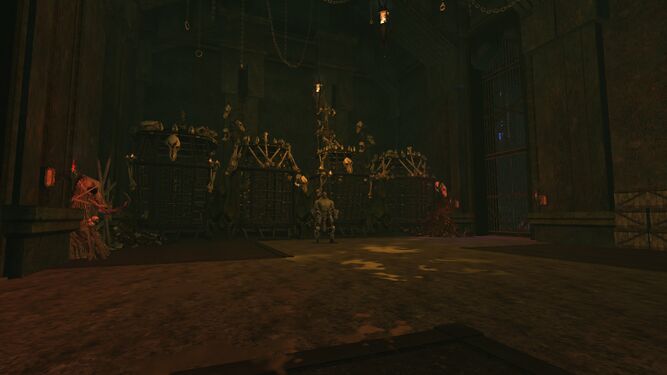 Boss 1
 -
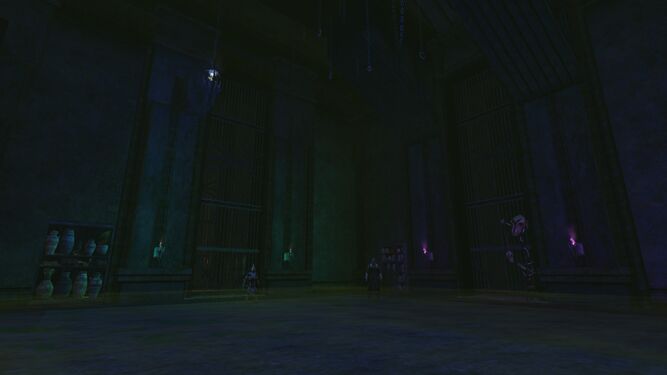
 The Dead
 -
 Boss 2


