The Temple of Utug-bûr - Thûr Hin
| Level: | 150 |
| Size: | 12-person Raid |
| Cluster: | Legacy of Morgoth |
| Region: | The Valley of Ikorbân |
| Area: | Urash Dâr |

- "As you enter Thûr Hin, the Lair of the Children, the smell hits you. Dust and copper, like blood in your mouth. A dozen wars were born here, along with thousands of soldiers. In the distance, you can hear two Utûgi arguing amongst themselves, their voices echoing through the musty hall."
Instance Overview
Level Range
This is a non-scaled raid with a minimum level of 150. The instance is available at level 150.
Location
This raid is part of the Legacy of Morgoth Instance Cluster. It is the second of three raid wings within The Temple of Utug-bûr.
The raid is available in the Instance Finder.
Difficulty
Enemy stats are altered depending on the tier of the instance:
 Enhancement -- Tier 1 in Tier 1.
 Enhancement -- Tier 2 in Tier 2.
 Enhancement -- Tier 3 in Tier 3.
Note that Tier II Modifiers are the same as previous Tier III Modifiers, and Tier III Modifiers are the same as previous Tier V Modifiers.
Estimated Duration
This raid usually takes between 20-30 minutes to complete on any tier, assuming that the group doesn't wipe on any boss.
Enemies
- Boss 1: Heal Legolas (Khablag and Daikhag)
- Boss 2: Kormoltur, Lord of Terror
- Side Boss: Rumók the Blood-spiller
Rewards
| Boss 1 - Khablag and Daikhag | |||
|---|---|---|---|
| Armour/Jewellery | Light Drop |
Medium Drop |
Heavy Drop |
| x | |||
| x | |||
| x | |||
| x | x | x | |
| x | x | x | |
| Barter Tokens | |||
| Essences | |||
| Legendary Item Advancement | T1 | T2 | T3 |
| x | x | ||
| x | |||
| Random Incomparable Tracery | x | x | x |
| x | x | ||
| Boss 2 - Kormoltur, Lord of Terror | |||
|---|---|---|---|
| Armour/Jewellery | Light Drop |
Medium Drop |
Heavy Drop |
| x | |||
| x | |||
| x | |||
| x | |||
| x | x | x | |
| x | x | x | |
| x | x | x | |
| x | x | x | |
| x | x | x | |
| Rare Drops | |||
| Rare Gold Drops (Tier 3 Only) | |||
| Barter Tokens | |||
| Essences | |||
| Legendary Item Advancement | T1 | T2 | T3 |
| x | |||
| x | |||
| x | |||
| Random Incomparable Tracery | x | x | |
| x | x | ||
| x | x | ||
| x | x | ||
Deeds
Quests
Strategy Overview
Trash
The Orc-kind trash at the beginning of the raid consists of a few packs of orc-kind enemies. These enemies can easily be cleaved down without much thought. Target the Urâshi Captains first, as they summon additional enemies. Tanks should ensure that Utûgi Demolishers are always aggroed on them, as they have big damaging frontals.
The Sere trash is also not very dangerous. Kill the Sere Huntsmen and Sere Champions first, as they deal the most damage, then kill the rest. In Tier 3, players may be inflicted with ![]() Arrow of Death, in which case they need to be fully healed.
Arrow of Death, in which case they need to be fully healed.
This fight takes part in two phases. In the first phase, the group fights Khablag. Khablag applies ![]() Eruption to random players, which drops the
Eruption to random players, which drops the ![]() Erupting Earth puddle. This puddle is extremely potent, so watch your feet to make sure you don't stand in it. Khablag additionally summons Orc Adds throughout the fight, even after death. Kill Khablag before swapping to the Adds.
Erupting Earth puddle. This puddle is extremely potent, so watch your feet to make sure you don't stand in it. Khablag additionally summons Orc Adds throughout the fight, even after death. Kill Khablag before swapping to the Adds.
Once Khablag dies and after a brief intermission while Adds are alive, the second phase begins. In this phase, Legolas must be healed up to full health by the group's healers. Healers should focus exclusively on Legolas. There are 4 Elven Menders that spawn around the room, who help to heal the group. Stand in the green puddles (![]() Healing Vapours) to get healed by the Menders. The DPS, Tanks, and Supports should focus on controlling and killing the Adds, as they will attempt to kill the Menders. If all 4 Elven Menders die, the players lose the fight. When Legolas reaches 50% Health, Daikhag spawns in. You don't need to kill Daikhag to end the fight, so have the Tank take the Boss away from the group. The fight ends when Legolas is healed to full.
Healing Vapours) to get healed by the Menders. The DPS, Tanks, and Supports should focus on controlling and killing the Adds, as they will attempt to kill the Menders. If all 4 Elven Menders die, the players lose the fight. When Legolas reaches 50% Health, Daikhag spawns in. You don't need to kill Daikhag to end the fight, so have the Tank take the Boss away from the group. The fight ends when Legolas is healed to full.
Tier 2
In this tier, the Adds spawn in greater quantities and at a faster rate. The group DPS must thus be higher so that the Elven Menders are not killed. Because the fight ends when Legolas is healed, it is acceptable to have 3 or even 4 healers for this fight. Beware that for every healer the group adds, the first phase will become harder.
Khablag periodically gains a large number of ![]() Stolen Strength Corruptions, which massively buffs the boss' damage. The Tank should use a cooldown whenever he gains them, and the group should quickly use their Corruption removal skills.
Stolen Strength Corruptions, which massively buffs the boss' damage. The Tank should use a cooldown whenever he gains them, and the group should quickly use their Corruption removal skills.
Once Khablag dies, the group should swap to killing adds. The kill order is as follows:
- 1 - Utûgi Hunters (2 max at any time)
- 2 - Urâshi Captain (1 max at any time)
- 3 - Urâshi Archer and Urâshi Defiler (1 max of each at any time)
- 4 - Urâshi Assassins (6 max at any time)
- 5 - Urâshi Blood-spillers (2 max at any time)
- 6 - Utûgi Demolisher (1 max at any time)
- 7 - Utûgi Shatterer (2 max at any time)
The Tanks should spend this phase attempting to maintain aggro over all enemies. It is especially important that the Demolisher, Shatterers, and Daikhag (when he spawns in) are aggroed on the tanks. Supports should keep selected Assassins perma-dazed. Assassins will attempt to kill the Elven Menders, so removing as many as possible from the fight will increase the time that healers have to heal Legolas.
Elven Menders are difficult to keep alive on this tier. Have the group select one Mender to protect at all costs - healers should swap to heal this Mender if they are getting low on health.
Daikhag periodically grants the tank ![]() Dismissal, and runs away to hit an Elven Mender. The tank simply needs to taunt again. Because of this debuff, the tank controlling Daikhag should not be responsible for controlling other enemies.
Dismissal, and runs away to hit an Elven Mender. The tank simply needs to taunt again. Because of this debuff, the tank controlling Daikhag should not be responsible for controlling other enemies.
Tier 3
Enemies rapidly gain stacks of ![]() Orkish Fury throughout the fight. When tiered up high enough, their abilities will begin killing players and Elven Menders. It is important that adds are killed before they reach 8+ stacks. There are a lot of adds, however, and they spawn in faster in this tier. The kill order specified above is still applicable in this tier, but the group will need to monitor Fury stacks and swap to enemies that are too high.
Orkish Fury throughout the fight. When tiered up high enough, their abilities will begin killing players and Elven Menders. It is important that adds are killed before they reach 8+ stacks. There are a lot of adds, however, and they spawn in faster in this tier. The kill order specified above is still applicable in this tier, but the group will need to monitor Fury stacks and swap to enemies that are too high.
Urâshi Assassins have a new ability called Kill Legolas. Throughout the fight, they will run to Legolas in an attempt to deal severe damage. If Legolas dies in either phase, the fight resets, and any damage against Legolas in phase 2 will lengthen the duration of the fight. The Assassins also have an induction that grants them ![]() Hidden in Plain Sight, and heals them. The Assassins will always run to Legolas; when they reach him, CC them and quickly kill them before they can gain their buff.
Hidden in Plain Sight, and heals them. The Assassins will always run to Legolas; when they reach him, CC them and quickly kill them before they can gain their buff.
Dodge the ![]() Infernal Mark puddles from the Urâshi Defilers, as they deal significantly higher damage in this tier.
Infernal Mark puddles from the Urâshi Defilers, as they deal significantly higher damage in this tier.
The best strategy for this tier is to permanently daze the Utûgi Hunters and the Urâshi Captain. Enrage in the Utûgi Shatterers and stack together near the center altar to burn down the Shatterers, Blood-spillers, Defiler, and Demolisher. Fear the Urâshi Archer away from the Utûgi Hunter to kill it without waking up dazed enemies. Kill the Assassins when they reach the middle.
Boss 2 - Kormoltur, Lord of Terror
Before fighting the Boss, he summons a few Add waves, which can easily be killed. Beware of the Utûgi Demolisher Warlords, as they have a knockback ability. If a player falls into the green liquid in the arena, they immediately die, so make sure your back is never too near to the edge. Once the first two add waves are dead, the Boss becomes active, and the actual fight begins.
You may notice in this fight that you deal more damage than normal. This is because the Boss grants all players the ![]() Gifted Strength buff. Although this buff is incredibly strong, it only lasts for 5 minutes, and is removed if the player dies. This effect serves as a soft enrage timer of sorts, as the group will almost certainly wipe if too many DPS players die, or if the fight lasts longer than 5 minutes.
Gifted Strength buff. Although this buff is incredibly strong, it only lasts for 5 minutes, and is removed if the player dies. This effect serves as a soft enrage timer of sorts, as the group will almost certainly wipe if too many DPS players die, or if the fight lasts longer than 5 minutes.
Every 30s, the Boss will cast Whisper of Blood, which deals big damage to the raid. Additionally, by the statue of Kormoltur in the corner of the room, there will be a shield puddle that spawns periodically throughout the fight. When a player enters this puddle, they are temporarily granted the skill:
This skill temporarily protects the raid from Whisper of Blood. Before the fight starts, designate a player to run to the shield puddle and use the skill with every Whisper of Blood cast. While this ability will not directly wipe the raid, it can compound with other events to cause deaths. The skill and applied effect have a limited duration, so only grab and use the skill when the boss is about to cast his ability.
Throughout the fight, the Boss summons more Utûgi Adds from different locations in the arena. Have the Tank taunt the adds as they come in so that they don't kill the group. It helps to have the group stack up together. Also, the group will need to dodge two different Puddles that spawn. First, there are the ![]() Whisper of Fire Puddles that rotate around the arena, that deal damage to the group. Second, there are the Whisper of Storm Puddles, that apply
Whisper of Fire Puddles that rotate around the arena, that deal damage to the group. Second, there are the Whisper of Storm Puddles, that apply ![]() Stunned. If you get stunned by one these puddles, it is incredibly important that you DO NOT USE your stun break!! This is because the Utûgi Shatterer Warlords apply
Stunned. If you get stunned by one these puddles, it is incredibly important that you DO NOT USE your stun break!! This is because the Utûgi Shatterer Warlords apply ![]() Dazed to random players, lasting for 30 seconds. Unless the group has a loremaster with
Dazed to random players, lasting for 30 seconds. Unless the group has a loremaster with ![]() Sign of Power: Righteousness slotted, you will be unable to do anything for 30 seconds if you previously used your stun break.
Sign of Power: Righteousness slotted, you will be unable to do anything for 30 seconds if you previously used your stun break.
Players should be aware of when they are slowed by ![]() Whispered Weakness. While slowed, it will be harder to dodge puddles and run to the Shield of Blood Puddle. Look for the glowing yellow puddles: these puddles will remove the effect, restoring your movement speed.
Whispered Weakness. While slowed, it will be harder to dodge puddles and run to the Shield of Blood Puddle. Look for the glowing yellow puddles: these puddles will remove the effect, restoring your movement speed.
Tier 2
The ![]() Shield of Blood skill now has a longer cooldown, so two players will need to rotate to get the skill. It is best for the two supports to alternate getting this skill. Watch out for
Shield of Blood skill now has a longer cooldown, so two players will need to rotate to get the skill. It is best for the two supports to alternate getting this skill. Watch out for ![]() Quivering Hate, which the Boss will apply on random players. This effect deals AoE damage on expiration, so the player with this effect should briefly step out of group when it's about to expire.
Quivering Hate, which the Boss will apply on random players. This effect deals AoE damage on expiration, so the player with this effect should briefly step out of group when it's about to expire.
The Adds spawn in slightly faster in this tier. Have one of the tanks pick up the Adds as they come in, and bring them over to the Boss. The group should cleave the Adds down while staying focused on the Boss. When the tank gains ![]() Shadowed Lance, they should use a cooldown so that the Adds don't kill them.
Shadowed Lance, they should use a cooldown so that the Adds don't kill them.
It is recommended to fight the enemies on the edge of the room by the exit gate. Fighting at this location makes it easy to see the Puddles as they spawn in.
Tier 3
The boss has the ![]() Ancient Power buff for the entire fight, meaning that the fight duration will be much longer than on lower tiers. Over the course of the fight, the boss gets stacks of
Ancient Power buff for the entire fight, meaning that the fight duration will be much longer than on lower tiers. Over the course of the fight, the boss gets stacks of ![]() Resonant Strength, gradually increasing his damage. This fight is a tight DPS race as eventually, the boss will begin killing people with his Whispered Weakness AoE hit.
Resonant Strength, gradually increasing his damage. This fight is a tight DPS race as eventually, the boss will begin killing people with his Whispered Weakness AoE hit.
The ![]() Shield of Blood skill has an even longer cooldown, so three players will need to rotate to get the skill. The duration of the applied effect is only 4 seconds in this tier, which is the same duration as the boss' induction, so the skill must be used AFTER the boss begins casting.
Shield of Blood skill has an even longer cooldown, so three players will need to rotate to get the skill. The duration of the applied effect is only 4 seconds in this tier, which is the same duration as the boss' induction, so the skill must be used AFTER the boss begins casting.
Players throughout the fight will be targeted by ![]() Whispered Death. The effect can be removed by being healed to full; otherwise, the player dies. Players affected by this effect should use pots and other personal heals, as there is a lot of damage in this fight.
Whispered Death. The effect can be removed by being healed to full; otherwise, the player dies. Players affected by this effect should use pots and other personal heals, as there is a lot of damage in this fight.
Adds spawn slightly faster in this tier, and gain more dangerous abilities. Utûgi Shatterer Warlords apply ![]() Tainted Blood to players, which adds an extra component of damage to the fight. Utûgi Bulwark Warlords cast Aim for the Heart, which will one-shot squishier players like healers or DPS. Supports should watch out for this cast and stun/daze them while inducting. At low health, the Bulwarks can gain
Tainted Blood to players, which adds an extra component of damage to the fight. Utûgi Bulwark Warlords cast Aim for the Heart, which will one-shot squishier players like healers or DPS. Supports should watch out for this cast and stun/daze them while inducting. At low health, the Bulwarks can gain ![]() Dying Rage, which decreases their induction time. Supports should be extra careful here.
Dying Rage, which decreases their induction time. Supports should be extra careful here.
Gallery
-
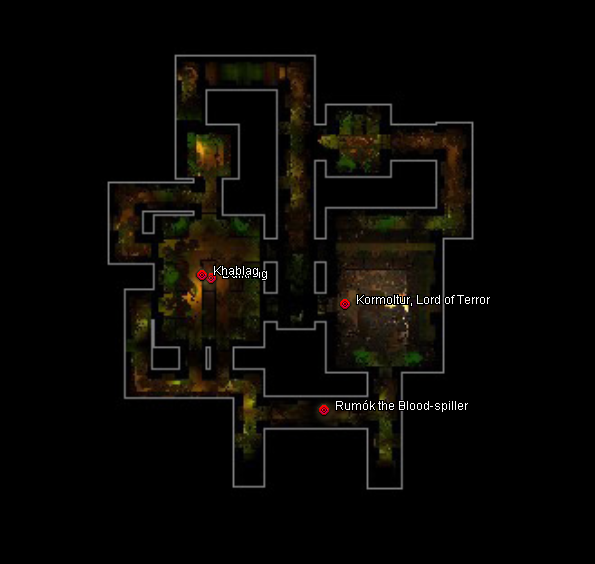 Map, including boss encounters

-
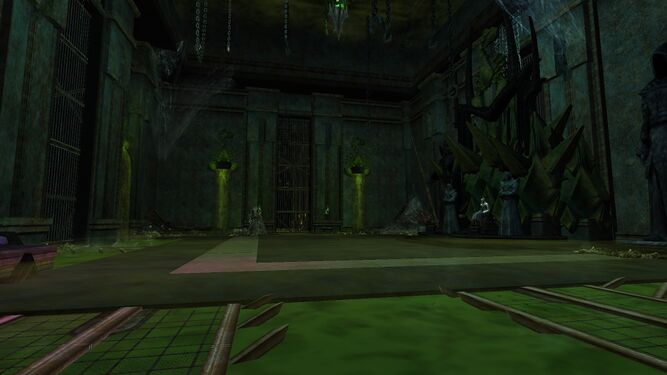
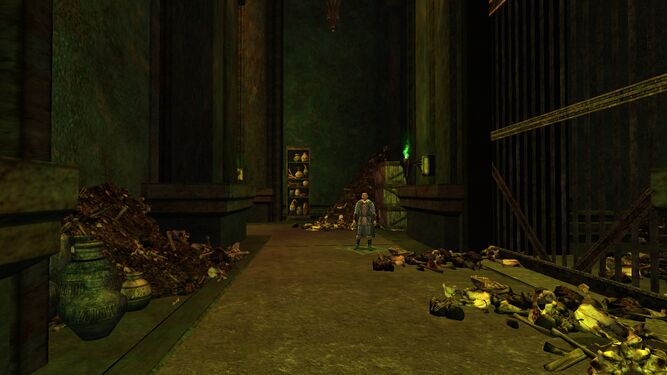 Entrance
 -
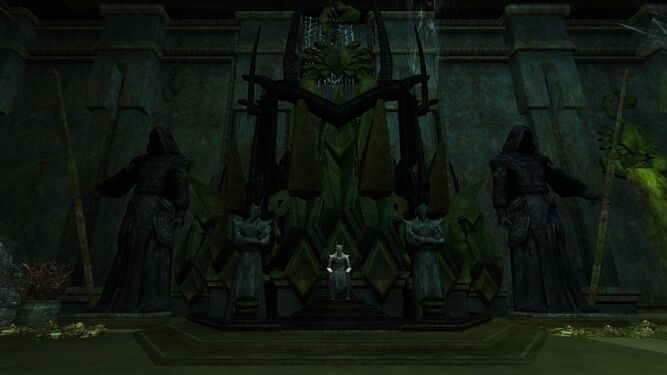
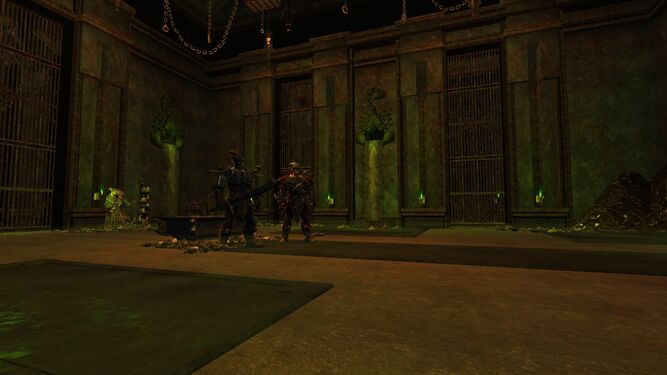 Boss 1
 -
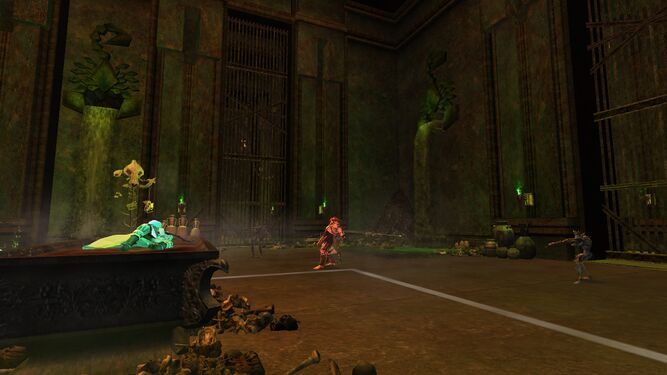 Heal Legolas!
 -
 Boss 2 Arena
 -
 Boss 2


