Ashunûg, the Fane of the Accursed
| Level: | 150 |
| Size: | Small Fellowship |
| Cluster: | Legacy of Morgoth |
| Region: | The Valley of Ikorbân |
| Area: | Ambarûl |

- "We have discovered a dangerous cult of Usan-kûni worshippers hiding in our own back-yard. They call themselves Anâkhi, and have made their home inside Ashunûg, a salt mine in northern Ambarûl that has long been abandoned. We are only recently freed of Sauron, the All-Seeing, and must not allow this new cult to take hold. The Anâkhi scorpion worshippers must be driven from our lands."
Location
This instance is part of the Legacy of Morgoth Instance Cluster.
It is available in the Instance Finder.
Difficulty Level
This is a scaling instance with a minimum level of 150, designed for a solo, duo and small fellowship.
Estimated completion time is between 5–10 minutes solo or on tier 1 in a group, and about 20-30 minutes on tiers 2-3.
Enemy stats are altered depending on the tier of the instance:
 Enhancement -- Solo/Duo in Solo/Duo.
 Enhancement -- Tier 1 in Tier 1.
 Enhancement -- Tier 2 in Tier 2.
 Enhancement -- Tier 3 in Tier 3.
Note that Tier II Modifiers are the same as previous Tier III Modifiers, and Tier III Modifiers are the same as previous Tier V Modifiers.
Quests
Deeds
Creatures
These mobs are encountered within Ashunûg, the Fane of the Accursed:
- Click [+] to expand a list of creatures.
Instance Overview
- Boss 1: Eshêgur the Reaper
- Boss 2: The Anâkhi Ensemble (Hashûga, Sharâtu, and Kizurdâl)
- Boss 3: Nâkhugir
Walk-through and Tactics
Trash
Each trash pack comes as a group of 3 enemies. The Tank can pull multiple of these packs on Tier 1 and possibly Tier 2, but should be more cautious on Tier 3. The kill order is as follows:
- 1: Anâkhi Brawlers and Vicious Scorpions (T3: Prowling Scorpions)
- 2: Everything else
The Brawlers and Vicious Scorpions should be the first to kill because of the large amount of tank damage they can inflict. Assuming the Tank keeps aggro of everything, the other group members shouldn't take much damage. On Tier 3 difficulty, most of the effects become Non-Removable, meaning that the Tank should be more cautious of mass-pulling. Additionally on Tier 3, Prowling Scorpions do randomly targeted hits, so if the group has squishier DPS classes, they should kill these enemies first.
Boss 1 - Eshêgur the Reaper
This Boss' main mechanic is ![]() Blood Lust. He will say, No Escape!, and grant a random player the
Blood Lust. He will say, No Escape!, and grant a random player the ![]() Reveal Weakness effect. The player who gets this debuff must kite the Boss around the arena for roughly 15 seconds or risk being killed by the severe hit the Boss will do if he reaches the player. Most tanks have an ability that can reduce an ally's incoming damage, so one strategy for this mechanic is to use this ability to prevent the player from dying to the hit, and not kiting and just tanking the hit. Alternatively, if the kiting class has a movement speed buff, you should be able to avoid the Boss' hit.
Reveal Weakness effect. The player who gets this debuff must kite the Boss around the arena for roughly 15 seconds or risk being killed by the severe hit the Boss will do if he reaches the player. Most tanks have an ability that can reduce an ally's incoming damage, so one strategy for this mechanic is to use this ability to prevent the player from dying to the hit, and not kiting and just tanking the hit. Alternatively, if the kiting class has a movement speed buff, you should be able to avoid the Boss' hit.
The Boss has a hit called Thunderous Stomp, which deals damage and stuns players in melee range. So, ranged DPS should stand away from the Boss to avoid this hit. The Boss also has a frontal hit called Brutal Swing, and the Tank should simply sidestep this hit.
Boss 2 - The Anâkhi Ensemble
The second Boss fight includes three distinct bosses, as follows from left to right: Hashûga, Sharâtu, and Kizurdâl. Kizurdâl will also spawn a number of Vicious Scorpions and Prowling Scorpions at the beginning of the fight, and will summon additional scorpions on tiers 1 and 2.
Because the tank damage dealt in this fight is so great, especially from the summoned Scorpions, a kiting strategy is strongly recommended to beat the fight, especially on Tier 3. The Tank should stand close to the Bosses at the beginning of fight to generate initial aggro, and only begin kiting once Kizurdâl summons the additional Scorpions, and all enemies are under taunt control. While kiting, the Tank should watch out for the ![]() Toxic Fumes Puddle, applied by Sharâtu. Upon standing too long in this Puddle, you tier up the
Toxic Fumes Puddle, applied by Sharâtu. Upon standing too long in this Puddle, you tier up the ![]() Toxic Cloud bleed, which is non-removable on Tier 3.
Toxic Cloud bleed, which is non-removable on Tier 3.
The recommended kill order for this fight is:
Sharâtu is the most dangerous enemy for two reasons. First, she is the Boss that spawns the ![]() Toxic Fumes Puddle, which applies the most dangerous Bleed to the Tank. Second, she will apply
Toxic Fumes Puddle, which applies the most dangerous Bleed to the Tank. Second, she will apply ![]() Fatal Toxin to a random player, which usually kills DPS players. She also has the least amount of Morale between the Bosses, so she can be killed within 15 seconds of the fight starting.
Fatal Toxin to a random player, which usually kills DPS players. She also has the least amount of Morale between the Bosses, so she can be killed within 15 seconds of the fight starting.
Kizurdâl is not particularly dangerous, but he will heal Hashûga if you choose to kill him first. The heal is very potent, and can not be prevented on Tier 3. On lower tiers, he will summon additional Scorpions, so the Tank should be on the watch to taunt the summoned enemies while kiting.
Hashûga has a frontal ability (the same as in Boss 1), which will almost certainly kill the Tank on Tier 3. For this reason, and due to the severe damage the Scorpions inflict, they should be kited around the arena. Also on Tier 3, he will apply ![]() Ire to a random player, and chase them similarly to Boss 1. Normally, this hit should not kill the player, but it may if the Boss has the
Ire to a random player, and chase them similarly to Boss 1. Normally, this hit should not kill the player, but it may if the Boss has the ![]() Battle Cry effect. This mechanic should be treated similarly to Boss 1, where the group decides to either try and survive the hit by using defensives, or out-run the Boss.
Battle Cry effect. This mechanic should be treated similarly to Boss 1, where the group decides to either try and survive the hit by using defensives, or out-run the Boss.
The best way to beat this fight is to do so quickly, which means taking 2 DPS players and 1 Tank. It may take a couple of attempts to make sure none of the DPS players die early into the fight to Sharâtu or Hashûga's ![]() Ire.
Ire.
Small Scorpions (Curdling Shadow)
In the hallways leading up to the final Boss, you will find sections with small scorpions, inflicting ![]() Curdling Shadow while standing on them. Using Torches will remove this effect by bestowing
Curdling Shadow while standing on them. Using Torches will remove this effect by bestowing ![]() Torch Bearer, which will be active for 40s. Any nearby members of the fellowship are also protected from the scorpions, gaining the
Torch Bearer, which will be active for 40s. Any nearby members of the fellowship are also protected from the scorpions, gaining the ![]() Torch Light effect. Players with this effect inflict
Torch Light effect. Players with this effect inflict ![]() Torch Light to enemy targets. On Tier 3, the duration of the Torch is reduced down to 20 seconds.
Torch Light to enemy targets. On Tier 3, the duration of the Torch is reduced down to 20 seconds.
Boss 3 - Nâkhugir
The main mechanic of the last Boss is that the entire arena is filled with small scorpions, and there are 4 Torches around the arena, 1 in each corner. While fighting the Boss, the group must rotate around the space so that someone can pick up a torch every 40/20 seconds, depending on the instance tier. The recommended role to pick up this effect is a DPS player, as they are the most likely to die in this fight as a result of moving out of range of the Torch Bearer.
The other major mechanic is that the Tank gains ![]() Foul Excretion throughout the fight, which causes them to drop a
Foul Excretion throughout the fight, which causes them to drop a ![]() Toxic Fumes Puddle. To prevent massive additional damage, the Tank must move out of the Puddle quickly, and also position themselves for the Puddle drop so that it doesn't hit the other players. It won't apply the bleed immediately, but they may not move out in time to avoid getting it. Due to the punishing nature of this fight, it is recommended that you bring 1 Tank, 1 Healer, and 1 DPS to this fight on Tier 3. On Tiers 1 and 2, 1 Tank and 2 DPS should be able to clear it.
Toxic Fumes Puddle. To prevent massive additional damage, the Tank must move out of the Puddle quickly, and also position themselves for the Puddle drop so that it doesn't hit the other players. It won't apply the bleed immediately, but they may not move out in time to avoid getting it. Due to the punishing nature of this fight, it is recommended that you bring 1 Tank, 1 Healer, and 1 DPS to this fight on Tier 3. On Tiers 1 and 2, 1 Tank and 2 DPS should be able to clear it.
When the Boss reaches 1% Morale, the Boss goes underground and summons 10 Usan-kûni Scorplings. These enemies slowly approach the middle, where they disappear underground to heal the Boss. Once all Scorplings have reached the middle or been killed, the Boss returns, and the fight repeats. The fight ends when all Scorplings have been killed. In this intermission phase, it is important to remember that you must still have a ![]() Torch Bearer in the group. On Tier 3, the Torch should be refreshed by the Tank while the DPS is killing the Scorplings. It's also important that the Torch Bearer stands on top of their target to ensure that
Torch Bearer in the group. On Tier 3, the Torch should be refreshed by the Tank while the DPS is killing the Scorplings. It's also important that the Torch Bearer stands on top of their target to ensure that ![]() Wreathed in Shadow is removed from the enemy.
Wreathed in Shadow is removed from the enemy.
When the Boss re-surfaces after this phase, it will have wiped its aggro table, meaning that the Tank has to start over with generating aggro. Use a few force attack skills to ensure the Boss doesn't hit a DPS player.
Rewards
| Cloaks |
|---|
| Jewelry | |||
|---|---|---|---|
| Item | Light Drop |
Medium Drop |
Heavy Drop |
| x | x | ||
| x | |||
| x | |||
| x | |||
| x | |||
| x | |||
| x | x | ||
| x | |||
| x | |||
| x | |||
| x | |||
| x | x | ||
| x | x | ||
| x | |||
| x | |||
| x | |||
| x | |||
| x | |||
| x | |||
| x | x | ||
| x | x | ||
| x | x | ||
| x | |||
| x | x | x | |
| x | |||
| x | |||
| x | x | x | |
| x | x | x | |
| x | x | x | |
| x | x | x | |
| Weapons | |||
|---|---|---|---|
| Item | Light Drop |
Medium Drop |
Heavy Drop |
| x | x | ||
| x | x | ||
| x | x | ||
| x | |||
| x | |||
| x | x | ||
| x | |||
| x | |||
| x | |||
| Essences | ||||
|---|---|---|---|---|
| Item | Solo/Duo | Tier 1 | Tier 2 | Tier 3 |
| x | x | x | ||
| x | x | |||
| x | x | |||
| Barter Items | ||||
|---|---|---|---|---|
| Item | Solo/Duo | Tier 1 | Tier 2 | Tier 3 |
| x | x | x | x | |
| x | x | x | ||
| x | x | x | ||
| x | x | x | ||
| x | x | |||
| Legendary Item Advancement | ||||
|---|---|---|---|---|
| Item | Solo/Duo | Tier 1 | Tier 2 | Tier 3 |
| x | x | |||
| x | x | |||
| x | x | x | x | |
| x | x | |||
| x | ||||
| Random Incomparable Tracery | x | x | x | |
| x | x | |||
| x | x | |||
| x | x | |||
| Housing Items |
|---|
Gallery
-
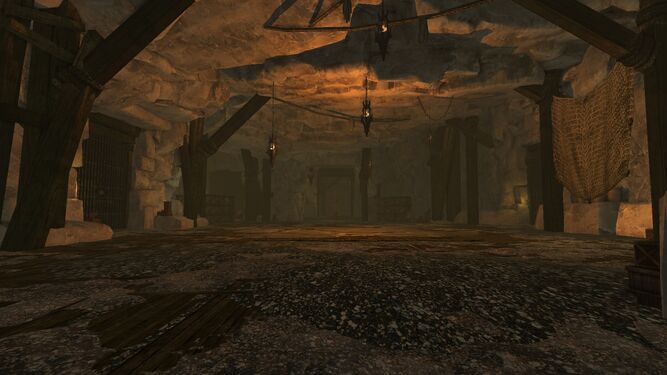
Boss 1 Arena
-
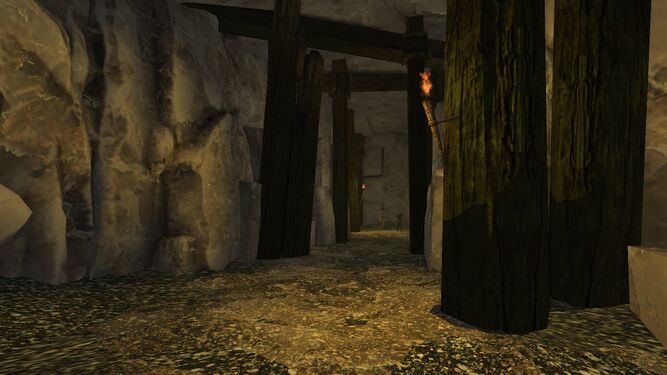
Tunnels in the Fane
-
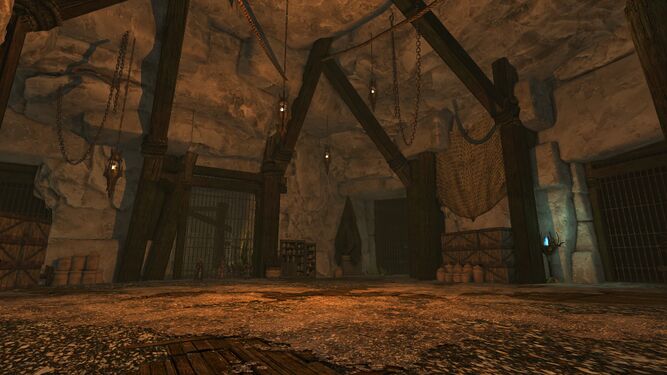
Boss 2 Arena


