The Water Wheels: Nalâ-dûm
| Level: | 58 |
| Size: | Small Fellowship |
| Cluster: | Scourge of Khazad-dûm |
| Region: | Moria |
| Area: | The Water-works |
| Location: | [14.2S, 112.7W] |
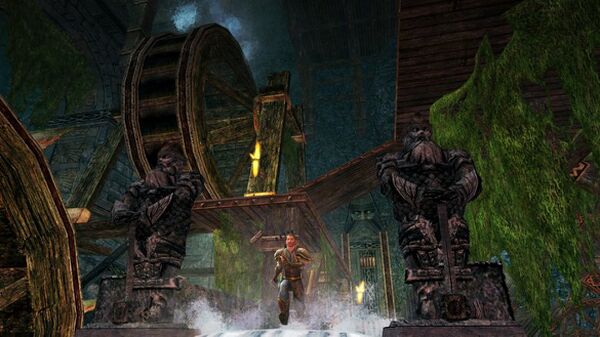
Nalâ-dûm (Khuzdul for Path-halls) is a series of water-powered wheels deep underground in Moria.
"Deep in the abysses of Moria, the dwarves had once crafted a great waterway to bring water in from the mountains. Something now blocks the great wheels from turning, causing the Iron Garrison concern."
Location
"Imagine (...) the ceaseless hum of water-powered wheels, spinning ever to power the forges and systems, allowing the dwarves to achieve impossible deeds with their great powers of crafting. Lumul-nar was the Hall of Mirrors, and Nalâ-dûm was the deep place where the water wheels turned. These two systems now lie dormant, and I surmise from this that evil has settled there, as with many of the once-fair places of this world." --Celeborn, in a letter to Hrólfur.
The entrance to Nalâ-dûm is located in the Water-works at [14.2S, 112.7W]. There is a summoning horn available to summon your fellows.
Description how to get there:
- From the Rotting Cellar:
- Head out north from the Rotting Cellar, using the tunnel. Follow the road to the west and cross the first bridge you see. The door you bump into after that is the entrance to the instance.
- From the Twenty-first Hall:
- Take a swift horse to Dolven-view, go to the Vault of Durin and enter The Deep Way. When you enter The Water-works, follow the road west and cross the bridge.
Overview
This 3-man instance will take about one hour if you know how to do it. It can be completed in all group combinations, but as most 3-man instances, it is easiest with a tank, a healer and a nuker. You will need a lot of poison pots or poison resistance gear/virtues.
You will need to use levers to proceed in this instance. Once you are down you can choose to do hard mode or easy mode. For hard mode you have to clear the western or southern room. These rooms contain caeryg. For the final boss you have to jump down from the east room. This boss is a huge caerog in a room with stamping pillars and two levers.
Quests
- Note that this area is also part of the Epic quest line: Chapter 4: A Relic in Nalâ-dûm
Deeds
Walkthrough
There are a number of wheels and levers which may be turned/flipped to advance through the instance. Explanations will be given in the appropriate sections.
Entrance
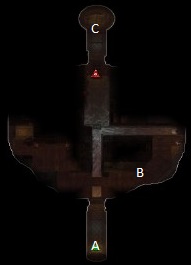
You enter the instance at A. As you advance, you will find your progress barred by a gate at C, which is opened by a lever at B. Advancing forward through C will take you down some stairs to...
Top level
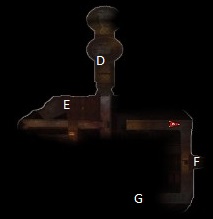
Advancing from C will take you to the top level of D. As you advance, then turn to the East, you will find your way cut off, but a metal drawbridge may be slid out from under the chute by a lever at E. As you progress forward, you will note a gate at F which you cannot open yet. Proceed forward and at G you will find a wheel on the left (which slides out half a metal drawbridge further down the stairs/ramps) across from a lever on the right (which opens the gate back at F). At least one person must remain at G to operate the lever while the other one or two people enter into F. There are two lizards there which may either be dispatched or run past -- after falling into a hole, swimming through some water, characters will be able to run forward and hit another lever which opens the other half of the metal drawbridge below G, allowing the character who was left behind to rejoin the group.
But first, the Unusual Plant can be found at the west end of this level behind a gate with two sleeping lizards. Someone needs to pull lever E to open the gate. This will also retract the drawbridge that allows them to get to the plant. One person can open the gate and the other two can defeat the lizards and collect the plant. Then, the two leave the room and the E-lever is pulled a second time (closing the gate and sliding the drawbridge back out). The E-lever person can then swap with one of the others so they can get the Unusual Plant.
Continuing towards D, players will find themselves presented with a few options. There are two stairs which go up, and one set of water-filled stairs going down. The first stair upwards goes to an otherwise empty room with the Large Plant, while the other (northernmost) goes to a lever which both opens a gate allowing swift access from C, and also drains the water-filled stairs. Heading back down all the stairs takes a character to the crossroads.
Crossroads; Spit-tail, and the Challenge

Starting at H, the players will find Spit-tail at I, along with two small lizards (they can be crowd controlled, Spit-tail cannot). If the fight takes a while, Spit-tail will periodically summon two more adds. To the East (don't go there yet) is a Caerog with two lizards who can be fought or run past. Before going there, though, characters have a choice of fighting mobs either to the West at J or the South at K for the Challenge (one or the other must be chosen, players may not choose both).
To open the gate at J, one player must run back up to the lever at E. Once that lever is pulled, another character (or two) may enter the gate at J, and use the lever on the opposite side of the gate to allow the runner entrance to J. The runner should then pull the lever at E a second time to reposition the drawbridge so that they may rejoin the group. There are 3 lesser Caerog in here which will all attack at the same time.
To open the gate at K, one player must run back up to the lever at G. Once that lever is pulled, another character (or two) may enter the gate at K, and use the lever found there to allow the runner entrance to K. The runner should then pull the lever at G a second time to reposition the drawbridge so that they may rejoin the group. There are 12 lesser Caerog in here, but only two will activate at any one time.
Once the mobs in either the West or South rooms are defeated, players should advance East and jump down the hole at L.
Final boss
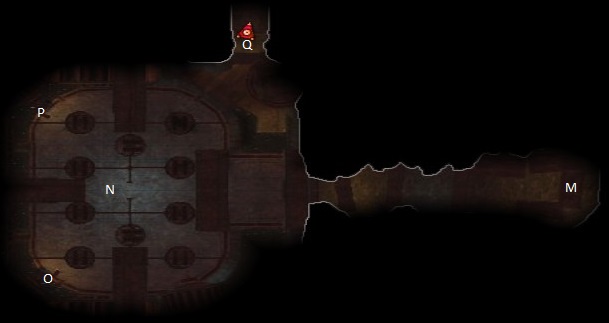
Characters will arrive at M and find the final boss, a Caerlûg, at N along with the big stone plungers which periodically crush down in the boss's room. There is a tall stone wall immediately behind the boss -- the tank should stand with a back to this wall (the boss will periodically knock back the tank). Occasionally the boss will issue a poison DoT which should be cleared. The boss will periodically stun everyone in his room (cannot be prevented by a Lore-master, hasn't been tested by a Warden yet), which will jam some plungers and stop them from activating, then run to either the North or South, curl up in a ball, and start healing himself. As soon as the stun wears off, one player should hit the appropriate lever at P or O to restart the plungers, disturbing the boss and stopping his self heal. Caerlûg also does a high damage 360 degree AOE attack which is easy to spot as he looks like he's getting enraged (unsure if this can be interrupted, but there is no induction circle). Due to the fact that the pillars and knockbacks make moving around to avoid this attack somewhat hazardous, positioning during the fight can be quite important. If you have ranged DPS you are probably best tanking Caerlûg in the small corner on the back wall created by the pillar that the chests are on, with the ranged DPS and healer standing in the associated far corner. Which side of the room you tank him on (after the initial engagement) will be determined by which side of the room he runs to to get healed. The group should then repeat this process (with the tank tanking against the wall behind N) until the boss is dead, at which point the group may swiftly exit the instance at Q.
Creatures
Click [+] to expand a list of mobs found within the instance.
Bosses
![]() Spit-tail
Spit-tail
![]() 3 or 12 Lesser Caeryg
3 or 12 Lesser Caeryg
![]() Caerlûg
Caerlûg
Loot
Gallery
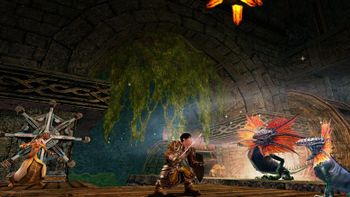
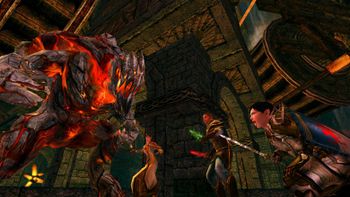
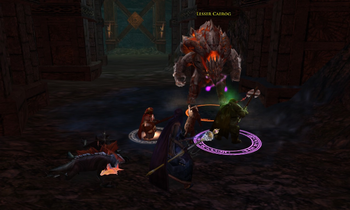
Note: Most of these in-game screen-shots are officially released and posted on Lotro.com
| Lothlórien Instances
| ||
|---|---|---|
| Small fellowship: | The Mirror-halls of Lumul-nar • The Water Wheels: Nalâ-dûm | |
| Fellowship: | Halls of Crafting | |
| Raid: | Dâr Narbugud | |
