Draigoch's Lair
| Level: | 75 |
| Size: | 12 or 24 person Raid |
| Cluster: | Rise of Isengard |
| Region: | Enedwaith |
| Area: | Thror's Coomb |
| Location: | [67.2S, 6.6W] |

"Welcome, Thieves. I can smell the dread in your sweat. I hear the whistle of fear in your breath and feel the fluttering of your little hearts as they race in your chests. But come now, why do you fear? There is plenty of treasure here... enough for all, and more to spare."
Location

The entrance to Draigoch's Lair is southeast from Nar's Peak. Once you've discovered the place, it will show as a grey dragon icon on your Enedwaith map.
Requirements
- You need to be at least level 75 to start the raid.
- Before you are able to enter, you need to have completed the quest chain beginning with There is Gold in the Hills, which starts from Ariene at the gate in Galtrev closest to the trainer's hall.
- These three quests appear in your quest log under "Rise of Isengard" and are marked as "Raid" Quests.
Deeds
The following deed can be obtained and completed by visiting this location (if you fit the requirements):
The following deed will open up when visiting this location:
Instance Overview

Draigoch's lair is a 24-person raid if done at tier 1. It's a fight in the lair of the huge red dragon Draigoch, requiring specific tactics. When you've killed him he drops the barter items for the helm and shoulders of a Rise of Isengard armour set. He also drops scales that can be used to craft special cloaks. If you decide to do it at Tier 2 you can choose to only bring 12 people and do the Challenge. You will then have better loot and a higher chance per member to win something.
Bosses
Quest Involvement
Layout
Overview
To enter the main section of Draigoch's Lair, you must first run back and forth through the south-east section without Draigoch spotting you. (If he sees you, he shoots a breath of fire that will kill you.) The location marked with an X is safe from his gaze, and is where groups gather before starting.
Once 6 people have stepped on to the platform at X, the floor gives way and you have access to all three levels of the outer ring. Stepping into the center while Draigoch is awake will instantly kill you. There is a chest at platform A. Interacting with the Platform A Chest starts the encounter.
Upper Level
The upper level has four platforms, A through D.

Each platform has two passageways going down, one on either side. On the right is a ramp that goes directly to the bottom floor:

On the left is a ramp that goes past two openings on the middle floor before arriving at the bottom floor:

Middle Level and Lower Level
Each of the four passageways that pass through the middle level have two openings into which Draigoch might put his front claws.
The lower level has four openings underneath each platform for a total of sixteen openings. In each set of four, two of them give access to Draigoch's claws if he is at that platform. Draigoch's claws cannot be attacked from the other two openings. You can go on and off the central floor through any of the openings.


During the battle with Draigoch, the DPS group will frequently travel between the four openings in a quadrant. Each quadrant has the same path, with slightly different decorations.
The ramps marked in red are the bottom end of the ramps that connect the upper level and lower lever directly. The DPS group will not use these, so avoid!

After each attack against Draigoch in the center, the DPS group should return to A1. Do this by running to the north-west section of the lower level, and look for the chest with two rubies at the bottom of a ramp. Run up this ramp and stop at the second window.
The bottom of each ramp is marked with a different gem:
Ramp for A openings:

Ramp for B openings:

Ramp for C openings:

Ramp for D openings:

Raid Locks
This raid has a raid lock which resets three times per week:
- Monday at 6:00 a.m. server time
- Thursday at 6:00 a.m. server time
- Saturday at 6:00 a.m. server time
Loot
Miscellaneous Items
![]()
![]()
![]()
![]()
![]()
![]()
![]()
Armour and Jewellery
![]()
![]()
![]()
![]()
![]()
![]()
![]()
![]()
![]()
![]()
![]()
![]()
![]()
![]()
![]()
![]()
![]()
![]()
![]()
Challenge Mode Drops
![]()
![]()
![]()
Gallery
- Views of Draigoch's Lair.
-
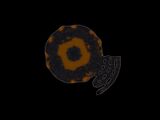 Map of Draigoch's Lair.
 -
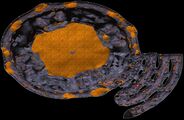 Map of Draigoch's Lair before he wakes.


![[67.2S, 6.6W]](/wiki/File:Enedwaith_map.jpg)
References
Guide to Draigoch Lair by Ten Ton Hammer
| Isengard Instances
| ||
|---|---|---|
| Small fellowship: | Dargnákh Unleashed • Pits of Isengard • Fangorn's Edge | |
| Fellowship: | The Foundry • Roots of Fangorn | |
| Raid: | Draigoch's Lair • The Tower of Orthanc | |