Category:Southern Barrow-downs Location Images
Jump to navigation
Jump to search
Media in category "Southern Barrow-downs Location Images"
The following 60 files are in this category, out of 60 total.
-
 Barrow-downs-middle.jpg 1,920 × 1,080; 491 KB
-
 Gaerdring & Gaerthel's Chamber.jpg 2,560 × 1,440; 731 KB
-
 GB Maze Final.jpg 2,560 × 1,440; 592 KB
-
 GB Maze Hall.jpg 2,560 × 1,440; 741 KB
-
 GB Maze Stairs.jpg 2,560 × 1,440; 792 KB
-
 GB Maze Urns.jpg 2,560 × 1,440; 801 KB
-
 GB Thadûr Hall.jpg 2,560 × 1,440; 675 KB
-
 GB Thadûr Main Chamber.jpg 2,560 × 1,440; 694 KB
-
 GB Thadûr Side Chamber.jpg 2,560 × 1,440; 700 KB
-
 Goetham Chamber.jpg 2,560 × 1,440; 726 KB
-
 Goetham Hallway.jpg 2,560 × 1,440; 715 KB
-
 Goetham Interior.jpg 2,560 × 1,440; 602 KB
-
 Goetham.jpg 1,920 × 1,080; 817 KB
-
 Great Barrow - Thadûr.jpg 2,560 × 1,440; 676 KB
-
 Great Barrow Night.jpg 2,560 × 1,440; 645 KB
-
 Great Barrow Sambrog.jpg 2,560 × 1,440; 571 KB
-
 Great Barrow The Maze.jpg 2,560 × 1,440; 653 KB
-
 Gwantham Entry.jpg 2,560 × 1,440; 594 KB
-
 Gwantham Interior.jpg 2,560 × 1,440; 766 KB
-
 Gwantham Pillars.jpg 2,560 × 1,440; 612 KB
-
 Gwantham Tomb.jpg 2,560 × 1,440; 617 KB
-
 Gwantham.jpg 1,920 × 1,080; 439 KB
-
 Haudh Iarchith Chamber.jpg 2,560 × 1,440; 675 KB
-
 Haudh Iarchith North Wing.jpg 2,560 × 1,440; 667 KB
-
 Haudh Iarchith South Wing.jpg 2,560 × 1,440; 578 KB
-
 Haudh Iarchith Stairway.jpg 2,560 × 1,440; 719 KB
-
 Haudh Iarchith Throne.jpg 2,560 × 1,440; 785 KB
-
 Haudh Iarchith Tombs.jpg 2,560 × 1,440; 667 KB
-
 Haudh Iarchith.jpg 2,560 × 1,440; 825 KB
-
 HaudhIarchith.jpg 1,920 × 1,080; 577 KB
-
 Ost Gorthad Flooded Platform.jpg 1,920 × 1,080; 632 KB
-
 Ost Gorthad Lower.jpg 1,920 × 1,080; 531 KB
-
 Ost Gorthad Portcullius.jpg 1,920 × 1,080; 623 KB
-
 Ost Gorthad Upper.jpg 1,920 × 1,080; 628 KB
-
 Ost Gorthad.jpg 1,920 × 1,080; 561 KB
-
 Sambrog Hallway.jpg 2,560 × 1,440; 596 KB
-
 Sambrog Pillars.jpg 2,560 × 1,440; 532 KB
-
 Sambrog Small Chamber.jpg 2,560 × 1,440; 713 KB
-
 Sambrog Third Chamber.jpg 2,560 × 1,440; 537 KB
-
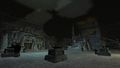
 Sambrog Urns.jpg 2,560 × 1,440; 857 KB
-
 Sambrog's Chamber.jpg 2,560 × 1,440; 633 KB
-
 Southern Barrow-downs Flooded Barrow.jpg 1,920 × 1,080; 478 KB
-
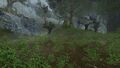
 Southern Barrow-downs Forest.jpg 1,920 × 1,080; 677 KB
-
 Southern Barrow-downs Pond.jpg 1,920 × 1,080; 636 KB
-
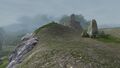
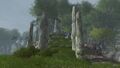 Southern Barrow-downs Rise.jpg 1,920 × 1,080; 600 KB
-
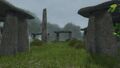 Southern Barrow-downs Standing Stones.jpg 1,920 × 1,080; 525 KB
-
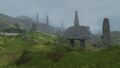 Southern Barrow-downs.jpg 1,920 × 1,080; 463 KB
-
 The Barrows of Haudh Iarchith.jpg 1,920 × 1,080; 572 KB
-
 The Great Barrow - Inside.jpg 2,560 × 1,440; 748 KB
-
 The Great Barrow Camp.jpg 1,920 × 1,080; 780 KB
-
 The Great Barrow Far.jpg 1,920 × 1,080; 659 KB
-
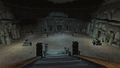
 The Great Barrow Hall.jpg 2,560 × 1,440; 981 KB
-
 The Great Barrow Interior 2.jpg 2,560 × 1,440; 553 KB
-
 The Great Barrow Tombs.jpg 2,560 × 1,440; 627 KB
-
 The Great Barrow.jpg 1,920 × 1,080; 611 KB
-
 Tom Bombadil Kill Sambrog.jpg 1,680 × 1,050; 379 KB
-
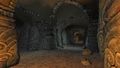
 Tomb of Maenadar Hallway.jpg 2,560 × 1,440; 707 KB
-
 Tomb of Maenadar Inner Entrance.jpg 2,560 × 1,440; 634 KB
-
 Tomb of Maenadar Interior.jpg 2,560 × 1,440; 721 KB
-
 Tomb of Maenadar.jpg 1,920 × 1,080; 615 KB


