"The Enemy's grip tightens on the defenders of Gondor as Gothmog seizes control of the armies of Mordor. Marching from the gates of Osgiliath, foes pour into the Pelennor Fields with a renewed vigour. In the wake of the Witch-king's defeat, vile sorcery looms over the field as the most powerful allies of the Dread Terror are summoned forth. If Gothmog spoke true of the fate he shares with Golodir, can victory yet be found?"
Description
The Throne of the Dread Terror is a multi-boss 12-man dungeon featuring six boss fights with trash mobs interspersed between them. It takes place during the Battle of Pelennor Fields, situated just before Éomer's Riders reach the Hillock (Rider's Stand) and just after completion of the the Foe Resurgent instance.
Raid Locks
The raid is set to only be playable at the current level cap.
"For Throne of the Dread Terror, Tier 1 has no locks, and thus, no progress-saving. However, that also means that you can run it as many times as you want in a week without the worry of being locked out. Tier 2, on the other hand, does use locks. Your progress will be saved during the course of the lock-cycle and you can only defeat each boss once per week."
Deeds
Click [+] to expand a list of deeds found within the instance.
When coming into the raid, you can choose between two boss encounters to start with. Either you take the left path to straightly confront the Gorthorog troll Rakothas. If you take the right path, you have to make your way through a few trash mobs to arrive to the three Mûmakils, named Set-Akaji, Arpong-Dokh and Ku-Nerpag.
Rakothas
Rakothas has a few mechanics that make it very difficult to handle him if you are not with many players in the raid. He has a skill that deals "distributed damage". This means that the damage will be distributed to all players who are near Rakothas' target (likely the tank). It is technically possible to take distance from Rakothas' target so you will not suffer damage yourself. This can be a tactical choice, but bear in mind this gives a higher penalty to the tank, lessening his chances of survival. This distributed damage is roughly 108,000 morale, which is very difficult to handle for a single player alone. Thus, a strategy you often see is that the members of a fellowship flock around their tank.
Another of Rakothas skills inflicts a heavy tiered damaging bleed called Haemorrhage. When a player already has the bleed present on them and Rakothas inflicts the effect on him again, the bleed is reapplied and increased one tier. As a consequence, if you hold aggro for a long time, you receive a bleed that is increasing in strength until it is unbearable. For this reason, players divide into two groups and split on both sides of Rakothas. When the Haemorrhage effect gets too strong, the other fellowship draws his attention. The group who is now relieved can recuperate by letting the haemorrhage effect expire. Haemorrhage has five tiers and Rakothas' attack that triggers this bleed is a frontal AoE attack, meaning that all members flocking around the tank suffer from this effect.
When Rakothas has 60% of his Morale left, adds will spawn every 20% of his Morale. These are mostly orcs.
Further walkthrough:WIP
Lore
After the fall of the Witch-king of Angmar at the hands of Éowyn and Merry, a new commander seizes control of the Morgul-host: Gothmog, the Dread Terror. Calling in reinforcements from Osgiliath, the fierce wraith is threatening to turn the tide of battle in favour of Mordor. He must be stopped if the Men of Gondor and Rohan are to survive this day.
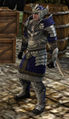
Prince Imrahil: 'Before we reached the Hillock, I saw our foes close on the breached gates of the City. I called off my men and bid farewell to Reeve Ingbert as he pressed on to the south. No sooner had we returned than Gothmog's forces began to rush towards the City from Osgiliath. That wraith's warning lingers in my thoughts still, my friend... we must repel Gothmog's forces if we are to find victory this day!'
What threats approach Minas Tirith?
Prince Imrahil: 'Too many foes close on the City, my friend...
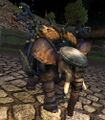
'Greatest among them is a tremendous Olog-hai. I thought him slain during the Enemy's assault on the walls, but no man, beast or siege has been able to fell him. He stalks the wreckage on the field just to the north, and revels in the slaughter of any in his path.
'Meanwhile, I have heard word that three Mûmakîl are being driven towards the gates from the east. They ferry many Southrons forth, and pose an immense threat to the folk within the City. For my own part, I would see them slain for what they did to Duinhir's sons... and the countless others who have met their doom under their heavy foot-falls.'
Where should the assault be pressed next?
Prince Imrahil: 'Many of the Enemy's forces press the attack along the road from Osgiliath to the north-east. Our riders have ridden out to meet them near the Causeway Forts, but we must hold our defence. Travel along the road towards the cross-roads and rout the Enemy's forces where you are able.'
What else lurks within the Morgul-host?
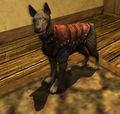
Prince Imrahil: 'I have heard troubling reports from some of our warriors on the field, my friend. Men of unusual stature from Minas Morgul have seemingly taken strange beasts as slaves and seek to wield them against us. I know not whence these beasts come, but I heard rumours of such creatures from the Men of Rohan who passed through the forest of the Wild Men. Could the Men of Minas Morgul have found these within the Land of Shadow?
'No matter their origin, we must repel these men and eliminate these monsters before they can be used to turn the battle against us!'
Where are the Enemy's forces coming from?
Prince Imrahil: 'Our foes now almost entirely issue forth from Osgiliath. We routed their incursions to the north and the battle has shifted to the centre of the field. It remains unclear how large the Morgul-host has grown, but unless we can reach the Causeway Forts, we cannot slow their advance.
'I do not doubt they guard the Causeway Forts with some of their mightiest forces... perhaps even the vile wraiths of the Enemy. Even so, we must fight to take back the forts. Go, my friend!'
Where is Gothmog?
Prince Imrahil: 'Gothmog is likely deep within his forces in Osgiliath. If the rumours of his connexion with the ranger Golodir are true, Gothmog cannot fall. I do not wish to believe it, but it may be so. If he was arrogant in life, Gothmog must now revel in this certainty of his fate. It is only a matter of time until he reveals himself on the field, but we must do what we can to weaken his forces. If we can defend against the Morgul-host, he shall still be only one against many!'


![[65.6S, 14.9W]](/wiki/File:Pelennor_map.jpg)


