The Vile Maw
| Level: | 58 |
| Size: | 12-person Raid |
| Cluster: | Mines of Moria |
| Region: | Moria |
| Area: | The Water-works |
| Location: | [17.6S, 116.9W] |

"Whither did the Watcher in the Water flee when it was driven from its lake? The Vile Maw would be my guess. Beneath the waters of the dark floos are ways which lead into the black depths of Moria..."
Location
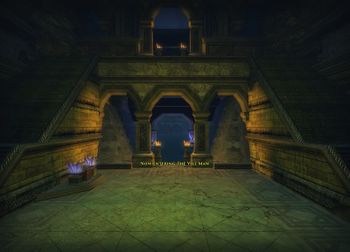
The Vile Maw is a location in the Water-works. Here the 12-man fight with the Watcher in the Water takes place. You can access the Vile Maw from Harâzgund at [17.6S, 116.9W]
- This raid can be done solo at level 115.
- This raid has a raid lock which resets daily at 6:00 a.m. server time.
Deeds
Click [-] to contract a list of deeds found within the instance.
Mobs
Click [-] to contract a list of mobs found within the instance.
Boss
Walkthrough
(Content derived/edited/rescued before Turbine's community forums/site change, originally credited to a kin that went defunct in 2010, The Preying Mantis)
It's suggested you turn off Post Processing effects to be able to see through the water more effectively (control-o for Options, Advanced Graphics, uncheck Post Processing).
Phase One
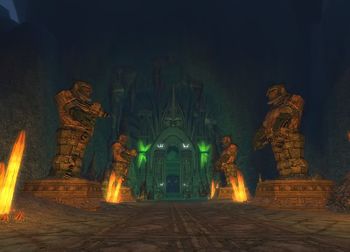
Everyone gather at the end of the hallway as the gate will close behind. Everyone will want to stay together as a tight group, give a countdown to all move forward together and be ready for...
Step 1 – The Vile Scream
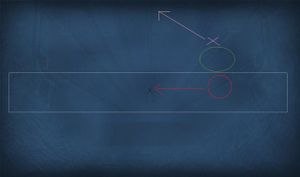
As soon as you activate the script you will be faced with the Watcher's first attack, called Vile Scream. Vile Screams are absolutely deadly (one-shot kill), and must be avoided. Dying to these screams is not an option, so don’t die to them! There is a script that cues the scream; "The Watcher Shakes with Anger" will appear in bold white text on your screen. At this point, The Watcher will face a member of the raid at random, and you have three seconds or so to get out of the way of where he will scream. Failure to do so will end up with you being one-shotted.
The easiest method to control these screams is to “snuggle up”, basically make sure your raid members are grouped together tightly, so that you can guarantee the direction of each scream. The screams come in 40 second intervals, so having someone with a timer or stopwatch can be a slight help during your first runs.
Step 2 – Wriggling Tentacles
To start the fight, have the entire raid all run up at the same time to kick off the encounter. As soon as you reach the edge of the deep water, you will get the first Vile Scream script. At this time, the raid members need to run to the side wall. Once the first Vile Scream has finished, you will see two Wriggling Tentacles spawn. You’re going to want to run up to the nearest one with your raid and quickly begin to burn it down. At this time, if you feel that another Vile Scream is about to occur, it's best to have the raid wait at that exact spot (where you just killed the first Wriggling Tentacle) and then run on to the far wall to avoid the second Vile Scream before proceeding to kill the second Wriggling Tentacle. If there is ANY doubt, remember that it's always best to wait. Nobody should ever die to Vile Scream. Period. With some practice, your raid should be able to kill the left Wriggling Tentacle and move on to the right Wriggling Tentacle before the second Vile Scream. So, assuming you’ve avoided the second Vile Scream, return to the remaining wriggling tentacle and kill it as quickly as possible. Once it’s dead, you won’t have to deal with another Vile Scream for the remainder of the raid.
Step 3 – Crushing and Squeezing Tentacles
Throughout the entire fight the watcher will spawn various different smaller tentacles. These tentacles come in three different forms, two of which only spawn in the “shallow water”, and one that only spawns in the “deep water”. The two that spawn in shallow water are called Crushing Tentacles and Squeezing Tentacles. Squeezing Tentacles root you in place until they are killed, while Crushing tentacles have a melee AoE which does a fair amount of damage as well as a ranged attack. It’s best to try to take care of these as quickly as possible. These tentacles spawn once a minute, if and only if you are in shallow water. They will not spawn further out in deep water.
Phase Two
So you have successfully defeated the first two Wriggling Tentacles, and are ready to begin Phase Two. It will begin with a bit of a splash, quite literally. The Watcher is going to reach up, and pull down the bridge that is above you, hitting everyone in the raid for ~1,000 points of damage. So make sure that you have everyone healed up!
Step 1 – Moving Out Into Deep Water
Once you have everyone healed up and freed of tentacles, you should notice two massive tentacles that have spawned out in deep water. You’re going to want to swim out to them to take them down, avoiding the sharks...
Step 2 – Avoid The Sharks
As you're moving out to the deep water, you'll notice that tentacles will spawn in the deep water, about mid-way between the edge of the shallow water and the fallen bridge. We refer to this type of tentacle as a "shark". Sharks follow a circular path in the deep water, and are perfectly harmless, provided you avoid running into them. If for any reason you get caught in the path of a shark, you will most likely die, as two hits from a shark is enough to kill anyone. Avoiding the sharks is a must!
Step 3 – The First Massive Tentacle
The Massive Tentacles are really nothing special. The basic idea is to have a champion, guardian or warden (Heavy-ish Armor) grab aggro on them and spin them around. The reason for doing this is because they have a frontal AoE attack, and you don't want everyone in the raid getting hit.
Step 4 – The Second Massive Tentacle
When this tentacle is dropped up to a dozen smaller tentacles will spawn where the raid members are, so everyone group up tightly. Burglar's triggering an all green Fellowship Maneuver halfway through it's morale can help prepare for all the impending incoming damage. Also perhaps wait for a strangling tentacle to have done it's thing so there's a minute before another could come and possibly incapacitate your healer.
Step 5 – Twelve Crushing Tentacles
Anyone squishy (light/medium armour) should move out of range (toward center) while everyone uses area of effect damage skills like crazy. Captains might use In Harms Way and Last Stand.
Step 6 – Preparing for the Watcher

The Watcher is on a roughly 15 second timer from the moment you kill the second Massive Tentacle, so regardless if you’ve killed all the crushing or not, he will spawn along with his two Shaking Tentacles, which can cause major problems if you’re not ready to handle them. The basic idea with this Phase transition is to always be one step ahead. At this time, all of your raid members move to the center of the fallen bridge, to be in position for The Watcher. You need to assign your hunters a tentacle to tank, have one grab the left, and other the right so they won’t be melee AoEing your raid. Also, during all of this, The Watcher is going to pop up, your tank needs to immediately grab aggro on him and face him away from the group. You’re going to want to start corruption removal immediately. Apply debuffs!
Phase Three – The Watcher

At this point, you should now have Ranged aggro on the shaking tentacles, corruption removals in place, The Watcher debuffed, and everyone snuggled up together.
Step 1 – The Shaking Tentacles
At this time, you can start to take down the Shaking Tentacles to around 8k a piece. Once you have both of your Shaking Tentacles down to 8k, stop DPS get healed up, then commence your Shaking Tentacle cycle.
Tentacle Cycle
Go ahead and kill a Shaking Tentacle, then interrupt, and only interrupt, the remaining Shaking Tentacle to stop the healing, at this time you can start to DPS The Watcher. Continue this until the new Shaking Tentacle spawns, and have your corresponding Hunter begin range tanking it to keep it from AoEing the group. Kill the lowest moral tentacle, and move to the new one, and start taking that one down to 8k, and stop DPS. Once you get to the point where DPS is stopped, you are free to start throwing some additional DPS into The Watcher, however soon as the next Shaking Tentacle spawns, you need to make sure you finish off your 8k Shaking Tentacles, and get going on the freshly spawned one to keep the cycle going.
In summary, drop one tentacle. Reduce the remaining one then DPS Watcher. When a new replacement tentacle spawns, drop the reduced one, then lower the morale of the remaining one but don't kill it. Return to DPSing the Watcher. Rinse and repeat.
Step 2 – The Terror of the Deep
This attack is a 360 degree AoE, however you can avoid this! During Phase 3, the white text appears again, however this time it doesn't signal The Vile Scream, instead its the trigger for, Terror of the Deep. This affects anyone that's swimming inside the ring, sunken structure, ruins, bridge, etc. So in order to avoid this attack everyone must move onto the ruins (which can be seen a few feet below the surface of the water) which surround the watcher. Humans and elves can stand on them, dwarves and hobbits will be swimming, but as long as they are over the ruins they will be fine. The attack hits for roughly 2,500 morale (to a heavy armor class). It needs to be avoided at all costs. Also of note, this attack has a chance to knock back anyone hit by it back to the shore where you will may be hit with a Crushing and Squeezing Tentacle.
Summary
- Everyone stays tightly together
- Move forward until text for Scream, turn and move to wall
- Drop big tentacles, moving to far wall if another Scream
- Free anyone caught by small tentacles
- Swim to nearest big tentacle, avoiding circling/moving "shark" tentacles
- Drop tentacle, get ready for spawns of a tentacle per person when second dropped
- Everyone position over middle of bridge except tanks
- Ranged tanks (hunters) pick up furthest tentacle from their side of group
- Main tank swims out and turns Watcher around when it comes up
- Drop one tentacle, lower other, remove corruptions from watcher, interrupt tentacle
- Get over bridgework when text comes onscreen
- Drop lowered tentacle when new one spawns, lower it then return DPS to Watcher
- Enjoy calamari
Loot
The Watcher drops one or more ![]() Platinum Coins of Spirit which can be traded for the head and shoulder pieces from the Moria armour sets, as well as relics, runes, and other non-set armour pieces.
Platinum Coins of Spirit which can be traded for the head and shoulder pieces from the Moria armour sets, as well as relics, runes, and other non-set armour pieces.
Gallery
External Links
| Mines of Moria Instances
| ||
|---|---|---|
| Fellowship: | Dark Delvings • Fil Gashan • Forges of Khazad-dûm • Forgotten Treasury • Skûmfil • The Grand Stair • The Sixteenth Hall | |
| Raid: | Filikul • The Vile Maw | |


