Throne of the Dread Terror
| Level: | 105 |
| Size: | 12-person Raid |
| Cluster: | The Battle of Pelennor |
| Region: | Old Anórien |
| Area: | Pelennor |
| Location: | [65.6S, 14.9W] |

"The Enemy's grip tightens on the defenders of Gondor as Gothmog seizes control of the armies of Mordor. Marching from the gates of Osgiliath, foes pour into the Pelennor Fields with a renewed vigour. In the wake of the Witch-king's defeat, vile sorcery looms over the field as the most powerful allies of the Dread Terror are summoned forth. If Gothmog spoke true of the fate he shares with Golodir, can victory yet be found?"
Description
The Throne of the Dread Terror is a multi-boss 12-man dungeon featuring six boss fights with trash mobs interspersed between them. It takes place during the Battle of Pelennor Fields, situated just before Éomer's Riders reach the Hillock (Rider's Stand) and just after completion of the the Foe Resurgent instance.
Raid Locks
- "For Throne of the Dread Terror, Tier 1 has no locks, and thus, no progress-saving. However, that also means that you can run it as many times as you want in a week without the worry of being locked out. Tier 2, on the other hand, does use locks. Your progress will be saved during the course of the lock-cycle and you can only defeat each boss once per week."
- The Tier 2 raid lock resets weekly on Thursday at 6:00 a.m. server time.
Deeds
Click [+] to expand a list of deeds found within the instance.
Quests
Click [+] to expand a list of quests found within the instance.
Bosses

- Rakothas
- Set-Akâji, Arpong-Dôkh & Kû-Nerpag
- Vadokhar
- The Unbroken One
- The Woe of Khand & The High Sorcerer of Harad
- Gothmog
Mobs
Click [+] to expand a list of mobs found within the instance.
Walkthrough
When coming into the raid, you can choose between two boss encounters to start with. Either you take the left path to straightly confront the Gorthorog troll Rakothas. If you take the right path, you have to make your way through a few trash mobs to arrive to the three Mûmakils, named Set-Akâji, Arpong-Dôkh and Kû-Nerpag.
Boss 1: Rakothas
Rakothas has a few mechanics that make it very difficult to handle him if you are not with many players in the raid. He has a skill that deals "distributed damage". This means that the damage will be distributed to all players who are near Rakothas' target (likely the tank). It is technically possible to take distance from Rakothas' target so you will not suffer damage yourself. This can be a tactical choice, but bear in mind this gives a higher penalty to the tank, lessening his chances of survival. This distributed damage is roughly 108,000 morale, which is very difficult to handle for a single player alone. Thus, a strategy you often see is that the members of a fellowship flock around their tank.
Another of Rakothas skills inflicts a heavy tiered damaging bleed called Haemorrhage. When a player already has the bleed present on them and Rakothas inflicts the effect on him again, the bleed is reapplied and increased one tier. As a consequence, if you hold aggro for a long time, you receive a bleed that is increasing in strength until it is unbearable. For this reason, players divide into two groups and split on both sides of Rakothas. When the Haemorrhage effect gets too strong, the other fellowship draws his attention. The group who is now relieved can recuperate by letting the haemorrhage effect expire. Haemorrhage has five tiers and Rakothas' attack that triggers this bleed is a frontal AoE attack, meaning that all members flocking around the tank suffer from this effect.
When Rakothas has 60% of his Morale left, adds will spawn every 20% of his Morale. These are mostly orcs.
Boss 2: Set-Akâji, Arpong-Dôkh and Kû-Nerpag
Boss 3: Vadokhar
The Boss doesn't do much damage but the adds and the AOEs he drops really hurt. Kite the boss around the area slowly to keep out of the AOE zones and have someone collect and destroy the fire and shadow adds. Killing the adds is a must. The fire mobs have an AOE damage aura thats always on and the shadow mobs have an dread AOE that will drop your max health. Keep a good stack of candles to add Hope points to counter the shadow.
Boss 4: The Unbroken One
Kill the first 3 named unbroken (Neghêbh, Skelghâd, and Dhâmiz) and the chain holders. Then jump into the cage and fight this boss with your back to the wall. He will try and throw you out a lot but with your back to the wall you should be fine. This is a corruption battle. The raid must remove 200 corruptions off the Boss. He can not ever be damaged so don't bother. While removing the bosses corruptions you MUST kill all the adds streaming into the cage. It will fill up pretty quick.
Eventually you will have to wade thru eternal waves of Easterners. Just walk along the edge to skip most of them. You will have to fight the stationary groups but avoid a war with the waves.
Boss 5: The Woe of Khand and the High Sorcerer of Harad
Split the raid into two groups and fight separately. When the bosses are close they give each other invulnerability and floating shields. Keep they FAR way from each other and they will go down.
Final Boss 6: Gothmog (Throne of the Dread Terror)
Multi-stage fight. Initial fight in the courtyard is quickly over once the Boss loses 20% of his health. He then says darkness take you and you enter stage 2 (the Breach of Terror), a dream to re-fight his dragon mount. Walk to stage 3 and fight with visions of Amarthiel and Mordrambor together. This fight is hard, make sure the raid is using corruption removal on both of them as they stack bonuses every 3 seconds or so. In addition this stage has the fire mobs that spawn around the furnace. These fire mobs REFLECT damage but are easy to kill if you can catch in between their REFLECTs.
Further walkthrough:WIP
Lore
- After the fall of the Witch-king of Angmar at the hands of Éowyn and Merry, a new commander seizes control of the Morgul-host: Gothmog, the Dread Terror. Calling in reinforcements from Osgiliath, the fierce wraith is threatening to turn the tide of battle in favour of Mordor. He must be stopped if the Men of Gondor and Rohan are to survive this day.
Dialogue
| Prince Imrahil |
|---|
|
| Rakothas |
|---|
|
Triggering Rakothas Fight:
During Rakothas Fight:
|
| Mûmakil |
|---|
|
Path to Mûmakil:
Triggering Mûmakil Fight:
|
| Vadokhar |
|---|
|
Path to Vadokhar:
Triggering Vadokhar Fight:
|
| The Unbroken One |
|---|
|
Path to The Unbroken One:
Triggering The Unbroken One Fight:
|
| Nazgûl |
|---|
|
Path to Nazgûl:
Triggering Nazgûl Fight:
During Nazgûl Fight:
Nazgûl Defeated:
|
| Gothmog |
|---|
|
Confronting Gothmog
End of First Gothmog Fight:
Entering the Breach of Terror
Path to Amarthiel & Mordrambor:
Path to Mordirith:
Triggering Mordirith Fight:
During Mordirith Fight:
Path to Third Gothmog Fight:
During Third Gothmog Fight:
End of Third Gothmog Fight:
Escaping the Breach of Terror
Start of Silmahtar & Calatúr Fight:
During Silmahtar & Calatúr Fight:
Silmahtar & Calatúr Defeated:
|
Loot
Tokens acquired from T1 and T2 chests can be bartered at Minas Tirith with the Master of Battle Lore NPCs:
- Master of Battle Lore (Pelennor Warrior's Gear Rewards Vendor)
- Master of Battle Lore (Pelennor Scout's Gear Rewards Vendor)
- Master of Battle Lore (Pelennor Sage's Gear Rewards Vendor)
- Master of Battle Lore (Pelennor Rewards Vendor)
T1
Jewellery Tokens
![]()
![]()
![]()
![]()
Armour Tokens
![]()
![]()
![]()
![]()
![]()
![]()
Other
![]()
![]()
![]()
![]()
Cosmetics, pets and furniture
![]()
![]()
![]()
![]()
![]()
![]()
T2
Jewellery Tokens
![]()
![]()
![]()
![]()
![]()
![]()
![]()
![]()
![]()
![]()
Armour Tokens
![]()
![]()
![]()
![]()
![]()
![]()
![]()
![]()
![]()
![]()
![]()
![]()
Other
![]()
![]()
![]()
![]()
![]()
![]()
![]()
Cosmetics, pets and furniture
![]()
![]()
![]()
![]()
![]()
![]()
![]()
![]()
![]()
![]()
-
Little Mûmak
-
Loyal Swan Knight
-
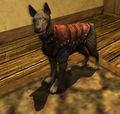
Tamed Variag Hound


![[65.6S, 14.9W]](/wiki/File:Pelennor_map.jpg)
Gallery
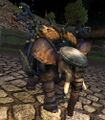
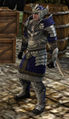
Bosses found in the Throne of the Dread Terror


- 3 Mûmakîl


Map


Developer Diary
"The Return of the Raid" - https://www.lotro.com/en/game/articles/return-raid
| Bosses of Throne of the Dread Terror
| ||
|---|---|---|
| Rakothas • Set-Akâji, Arpong-Dôkh & Kû-Nerpag • Vadokhar • The Unbroken One • The Woe of Khand & The High Sorcerer of Harad • Gothmog |
| The Battle of Pelennor Instances
| ||
|---|---|---|
| Small fellowship: | Blood of the Black Serpent • The Quays of the Harlond | |
| Fellowship: | The Silent Street | |
| Raid: | Throne of the Dread Terror | |