Ost Dunhoth
| Level: | 65 - 150 |
| Size: | 12-person Raid |
| Cluster: | In Their Absence |
| Region: | Enedwaith |
| Area: | Lich Bluffs |
| Location: | [75.1S, 19.7W] |
.jpg)
"From behind the walls of Ost Dunhoth, a terrible foe sends his malice out into Middle-earth. Gortheron, greatest of the Gaunt-lords, must be defeated before his plans can come to fruition..."
Location
Ost Dunhoth (Sindarin for Fortress of the Western Host) ("OD") is a 12-man raid in the Lich Bluffs of Enedwaith at [75.1S, 19.7W].
It was once a fortress of Gondor but has been long abandoned. Following the arrival of the Grey Company in Enedwaith, Gortheron the Doom-Caller raised his fallen brothers and sent them all to different places throughout Eriador to once again attempt to destroy the Free Peoples of Eriador. Ivar the Bloodhand sent his minions to sack the town of Stoneheight in North Downs where he was successful although he himself stayed with Gortheron. Ferndur fled to the far reaches of the Trollshaws to an abandoned Temple where he conjured up some foul sickness. Drugoth journeyed to the northern wastes of Forochel where he lies in wait, hindering the Lossoth in their frozen home. And Thadur, ever hating the Hobbits, seized the Northcotton Farms and began his plans to poison the Shire's water source.
The fortress of Ost Dunhoth is very visible throughout Enedwaith and attracted the attention of the Grey Company. Sending Rangers to investigate, they soon discovered that the undead roamed within its closed gates. All attempts to open failed until just before the disaster at the Forsaken Road. Túgonn the Ranger managed to open the gates of Ost Dunhoth and infiltrate the fortress. Their worst nightmares were confirmed: Gortheron, fleeing the Lich Bluffs, has raised a terrible power with Ost Dunhoth that only the bravest of Middle Earth can defeat.
There are 4 Wings and 5 locks that you must complete in order to reach Gortheron:
- Wound Wing - mechanics require at least 6 players
- Fear Wing
- Disease Wing
- Poison Wing
- Battle with Ivar
Quests
Click [-] to contract a list of quests found within the instance.
Deeds
Click [-] to contract a list of deeds found within the instance.
Bosses
Ost Dunhoth is broken out into 3 wings: A, B, and C wing. Each wing has 2 bosses.
| Level | Name | Difficulty | Species | Morale Tier 1 / Tier 2 | Wing |
|---|---|---|---|---|---|
| 67 | Dungarth, Vark and Kaveran | Elite Master | Gauradan | 56,280 / 61.908 | Wound/Fear Wing |
| 68 | Durin's Bane (Illusion only) | Arch-nemesis | Ancient Evil | 750.400 / 825.440 | Wound/Fear Wing |
| 67 | Baleleaf & Dourbark | Arch-nemesis | Huorn | 201.746 / 221.921 | Disease Wing |
| 67 | Frothmar | Arch-nemesis | Giant-kind | ? / 790.400 | Poison Wing |
| 67 | Ivar (Matumáth, Matúrz-olog, Narslaug and Dúngorth) |
Arch-nemesis | Ancient Evil | 426.790 / 469.469 | |
| 67 | Gortheron | Arch-nemesis | Gaunt Man | 718.545 / 790.400 |
Creatures
Click [+] to expand a list of mobs found within the instance.
Walkthrough
Tier 1
Following is a walkthrough for tier 1. A walkthrough for Tier 2 is still pending.
Wound Wing
The mechanics of this wing require at least 6 players. Wound wing starts off with a race of sorts. Split your group into 3 separate groups, healing and DPS are vital. Have each group line up with one of the "lanes" When there is a person in each of the platforms that glow when stepped on the game will begin. The three mammoth/elephants will be released and will slowly follow each group, You MUST NOT let them catch your group, your group will be killed instantly and everyone will fail. As you race down the lane there will be levers and gates. The levers open gates for the other groups and must be pulled asap, the catch is often times you have to kill a group of mobs (usually 2 elites) before activating the lever and before the group's mammoth reaches them. Each group has to have adequate DPS to kill the adds and adequate healing to stay alive through this gauntlet.
You will encounter the following types of adds (pulls vary based on which side you're on):
- ~10k wights which go down quickly
- ~15k wolves which have corruptions which increase incoming damage by 90% (and maybe something else?) and DoT wounds
- ~20k wights that cause diseases, drop poison clouds. They do a big breath attack which is interruptable.
- ~30k wight renewers which have a healing corruption, an interruptible AoE heal, and cause wounds which yield AoE stuns on expiration if not cured
When you get to the end of the hall you fight the mammoth and a couple of adds in a small room. At a certain health level (not sure exactly) the mammoth will burst through the wall into a massive room where all three groups converge for the boss fight.
Wound Boss (Lock 1)
The boss fight starts off with the 3 mammoths and all 3 player groups together again. Each mammoth will summon 3 waves of adds at a set Morale point; 9 in total. (42k, 22k, 11k). Each wave includes adds which consists of the 3 types of wights listed above. If you DPS all 3 mammoths equally you'll receive 3 first waves etc. First wave per mammoth summons a Renewer and adds. The second wave has a Warden and adds. 3rd wave has a Warden, a Renewer and adds. Wardens have the new anger buff (can be CCed with two attempts). Immediately upon appearing, they will begin an induction which summons 3 additional Stalwarts. This induction should be interrupted. Failing that, these Stalwarts always appear in-front-of the closed gate opposite where the groups enter the room at the beginning. They also have an aura which greatly decreases incoming damage to nearby mobs, so they should be dealt with ASAP. The renewer comes with a corruption that greatly increases outgoing damage, so this should be removed immediately (at the same take as the Warden's corruption in 3rd wave). Additionally, the renewer is able to heal the mammoths. The renewer spawns near the middle of the room but closer to where you enter with the mammoths originally. Wardens should always be killed, followed by renewers for their AoE heals. However, allowing the renewers to heal the mammoths to some extent can ease the pace of the fight. Letting the renewer heal the mammoths can help avoid the unintentional triggering of add waves by pushing their health back up and away from the associated HP triggering threshold.
The challenge for this on tier 2 is to complete the entire wing (start of the gauntlet til death of last add) in 7 minutes.
Fear Wing
There are three trash pulls on the way up to the boss. Gandalf's voice will speak when you're coming to another trash pull. There are three types of mobs here. The morroval can be safely CCed any way you like. They apply fear-based DoTs that can be potted. There are drakelings with a cold-based DoT aura (not large damage on tier 1). These can be killed quickly. The last type of trash mob is a large troll. The trolls should generally be tanked while the raid deals with the easier-to-kill mobs. The trolls have a buff on them: on any damage there is a chance to root the damager in place for a few seconds. The trash is very easy on tier 1 if the merrevail are kept CCed.
Fear Boss (Lock 2)
The boss for this wing is Durin's Bane. There are no adds to worry about, but the boss has a very large amount of health (750k on tier 1). The boss has a special ability called Execute. If six player deaths occur during the fight, the raid will be instantly wiped. This is not if 6 people die, but 6 deaths total - be careful with rezzes and where they are located. It is possible to rez someone and have the rez spot be over a fire area, so the person will almost certainly die again instantly, meaning another death out of the 5 you can have. The boss also has 7 dread so a token will be required in all circumstances since radiance is gone. He is permanently immune to all forms of CC, including FMs.
Since Durin's Bane is classified as Ancient Evil, he is slightly more susceptible to Beleriand damage.
He has a periodic debuff that is applied to anyone with aggro (tanks), so two tanks should be used to switch off when the debuff is called out. It is not said in Black Speech: "Búrzum lázatlat, <name>". The tanks should immediately switch when this is called out. This goes on throughout the fight.
- The first phase is simple - the tank ability will be called out. Anyone who gets and stays below a certain morale threshold (around 15-20%) can be one-shotted throughout this fight if they also get a callout from the boss.
- Somewhere between 600-700k he will switch to the second phase. This starts with a distributed damage attack/AoE which does large damage if the whole group isn't together. He will start using another special ability during this phase which will continue throughout the fight. He calls out "Ufurizish lat, <name>?" and a random player without aggro will be punted through the boss. The person also gets a large curable fear DoT. On tier 2 the player will also lay a fire pool where they were standing and another about 1 second after they land, which stays for a while. After the punt and fear is applied, the boss will typically call out "Dorozg ufum-u, <name>!". If the punted player's morale is below whatever the threshold is, they are one-shotted. The fear should be immediately potted and heals should focus on the punted player.
- At about 75% morale he will start doing several AoEs. These include a frontal AoE(all players but tanks should be behind boss) plus knockback, this can happen while moving out of a firepool and if not careful half the team can be kicked off the edge very easily; a full 360 AoE that cannot be avoided and one that leaves a fire pattern on the ground for a few seconds, players should not stand in the fire on the ground.
- At about 40% morale a new special is introduced. Gortheron will call out "Face Durin's Bane and be destroyed!" After this the raid has a very short time (~1-2 seconds or so?) to turn away. Anyone turned away from the boss gets hit with a small amount of fire damage. Anyone turned towards the boss gets hit with a large amount of shadow damage (~2600 on tier 1 with ~2k shadow mitigation). All players should turn away - if anyone gets hit and stays below the morale threshold, the boss will execute (one-shot) them. The challenge condition on tier 2 is to face him every time this attack occurs (and is one of the more difficult challenges in the raid) but nobody should face him on tier 1. Continue through the last couple hundred thousand of his morale, healing up everyone so they stay above the execute threshold, and claim your armour token, deed, and loot.
Note: It has been noticed that Fear Wing final boss is particularly damaging against melee players, who are more likely to get hit with the Balrog's AOEs. A group with almost entirely ranged (RK, Hunter) DPS will significantly reduce the strain on the healers.
Disease Wing
Grodbog deep-worker (elite-master): kite these, they do lots of damage but move slow (really slow!) Unlike regular gredbyg, their shields do not break, so it's usually best to leave these for last.
Bone-Gnawers (nemesis): these do large amounts of damage, including frequent distributed damage. They have the new anger buff (looks like red shields). Any CC attempt will be applied and then immediately removed along with anger. After breaking the shield they can be CCed as normal (beasts, so bring an LM). Breaking anger will not break current CC so can be safely broken. After 50sec the anger reapplies will come back up. While anger is dispeled another debuff will show with a timer till anger is reapplied.
Grodbog-queen (elite-master): these do damaging ranged attacks when not in melee range. They cannot be CCed in any way. Randomly inflicts people with a disease, yellow eye, and the yellow vial above the players head. If not cured quickly (5s) will summon 3 sig-level grodbog adds.
Glow-worms (elite) : These place acid pools down on the ground around random players. They can be CCed any way you like but die quickly (~20k morale on tier 1) so are usually best to kill first in their pulls.
Disease Boss (Lock 3)
Two trees:
Baleleaf (Arch-Nemesis) about 200k morale (white tree)
Dourbark (Arch-Nemesis) about 200k morale (red tree)
Each tree has three Birch-hounds (elite, ~19k) which have a sap buff. If you hit a white-colored one without having red sap on you, you will be hit for 25% of your max morale for each hit. Be sure that your sap color is different than the color of the hound you're attacking. They also have an anti-kiting/CC buff and must be tanked/killed while alive. While the adds are alive the tree of the same color is protected, and will take virtually no damage.
You can choose the color of your sap by attacking one of the tree bosses.
To defeat the bosses, split the group in half, have each half go to a different tree and acquire the sap. After doing this swap sides and kill the hounds (don't hit opposite tree as you will lose the appropriate sap - careful with AoEs). The first wave of hounds all can be killed except the last on each side, kill them as close together has possible. The following waves of adds all 3 have to be killed at the same time otherwise they respawn. The timer for the next wave of adds only starts once the wave is dead, so time can be used to re-power up or wait for crucial skills to come off cooldown. After the last hound falls you have a limited amount of time to DPS the trees before the hounds respawn, so you want the trees to fall at about the same time. When the hounds respawn switch sides and kill the hounds in the same manner, and then beat on the tree (opposite of one you started on). Every round of hounds respawning adds a damage buff (25%) to the trees. They do both melee and ranged attacks (which do less damage), including large distributed damage attacks, and have AoE stuns. Repeat until trees are dead. Enjoy the loot!
Tier 2 is basicly the same but you want to kill both trees at the same time. Once you kill one tree you have under 10 (5?) seconds to kill the other. Failing that will heal the surviving tree for around 100k.
The challenge mode condition on tier 2 is to not switch sap colors during the fight nor hit adds with the opposite sap and to kill maximum of 12 adds. This tier 2 challenge mode is perhaps the easiest of the six in Ost Dunhoth. All you have to do is to find the right position for the two groups so that you can pull the adds easily and after killing them have a short trip to the tree you're going to damage. You have 3 (4) phases to damage the tree (the initial damaging phase before first set of adds isn't very long). Basicly if both trees are around 130-140k after the first adds and under 70k after the second adds - you're going to make it! Just don't panic and carefully bring them down when they're near 10k to kill them at the same time.
Poison Wing
There are two large trash pulls in this wing. The mob types are the following:
- Pale folk who give poisons like most others in the game
- Trolls who do frontal AoEs. These have the anger buff which is not visible at the start but is present. The buff will show up with the normal floating red shields after it reapplies.
- Giant darkwater type wraiths who will continuously summon smaller wraiths, a maximum of 2 per darkwater are up at a time. These wraiths drop poison pool when they die. These also have the anger buff after the fight starts.
Throughout this wing there is a DoT acid water mechanic with platforms. The first trash pull/room has a constant DoT while in the water (like Vile Maw) which is small and easy to deal with. The second pull/room it increases. There are square platforms in the water. If more than two players stand on a platform at one time, the platform will collapse and cannot be recovered. The floors on the edges of the room are safe to stack on. Killing the giant darkwaters will reduce the acid damage down to almost nothing.
Poison Boss (Lock 4)
The boss is a giant. There are four platforms that are the same as in the trash pulls (any more than two, or two on one platform for more than five seconds, and they collapse). They will also collapse if the boss hits someone on them with a melee attack, so the tank cannot be on a platform through the fight. Periodically the boss will call darkwater adds (about 9k each) to destroy an individual platform. These should be killed ASAP. Throughout the fight people will be randomly rooted, via a 4k morale root, anyone standing near one will be rooted as well. This will target people standing on the platforms as well, leading to situations where two people are rooted on the platform and it breaks.
The water in the room is different from elsewhere. It does cause a DoT while standing in it. It also provides a bonus to damage (higher bonus to melee than ranged and tactical). The DoT and buff will both tier up as you stand in the water indefinitely. They can both be reset by standing on a platform for a four to five seconds. You will see a yellow marker at your feet when it resets.
The boss also has called out punts. Anyone will be punted who:
- Is not standing on a platform when the attack begins
- Is standing near the person called
- Is between 15 and 80 meters from the boss (not in melee range basicly)
You can be punted back on to a platform. If a player is not on a platform when the attack is called out but moves on to one before the punt, they will still be punted.
On tier 1 there is a 15 minute time limit (the boss get a +400% damage buff with other buffs). On tier 2 this time limit is 10 minutes.
The challenge mode condition in Tier 2 is to keep at least one player on each platform throughout the fight while also keeping any of the platforms from being destroyed.
There are a couple of methods too doing the Challenge mode successfully. The original method(back at 65) was to rotate people through the platforms after the rock was thrown. Place a hunter(or other ranged DPS with High Tact Mit+morale) near the doorway so he/she always takes the rock. After its thrown have people jump on to the platform and then get off when their debuff is cleared. MAKE SURE that there is always 1 person on the platform meaning that the original person gets back on before the swapee jumps off. Repeat until boss is dead.
It's been discovered that with the scaling you can just burn the boss without clearing anyone's debuff. So everyone sits in the water except for the platform people and you burn the boss. You may end up with only the tank and the 4 platform holders alive at the end, but is much simpler then trying to swap around and much faster.
Ivar
There are two trash pulls before Ivar. Four types of mobs are in the two pulls in different numbers.
- Blood-Hand Stalwart (wights) - roughly 4k morale, they spam interrupts, die fast
- Wargs - roughly 21k, should be taken down next. Will fill in specials later
- Wardens - they have the anger buff. They can also cast a protection buff on other mobs which redirects any damage on the other mob to the warden, and set a shield on themselves so they take very little direct damage (a la SG Brutes). The shield can be broken with an FM
- Blood-Hand Thralls - can be mezzed in any way (for the dead). They give an eyeball effect - while in effect three purple pools will be dropped over time dealing small amount shadow damage to anyone standing in them. They should be kept mezzed till ready to deal with them. They don't last very long.
The pulls are in small rooms so there isn't much room to drop the purple clouds. The first pull has 2 each of Stalwarts, Wargs, Wardens, and Thralls. The second pull has 6 Stalwarts, 3 Wardens, and 3 Thralls.
Ivar boss fight (Lock 5)
This fight actually has customization. There are four minibosses to kill before Ivar enters the fight. The troll has around 180k, the others have 90k. Each has some special attacks. Periodically, a corruption will come up on each miniboss and stay up for 15-30 seconds before going down for a minute or so.

- Warg-Rider (Matumáth). His special is an armour rend - this is not a wound, so can't be removed. It increases incoming damage by 25%. He also places a removable Fear dot on his target. His other ability he gives to Ivar reduces incoming healing greatly. While his corruption is active any damage will cause the person to be knocked back.

- Troll (Matúrz-olog). He does AoEs and small knockbacks. His ability he gives to Ivar is a large AoE. While his corruption is active his health will regen 5% (10k morale) for every bit of damage he takes. Bleeds, dots, reflects included.

- Angmarim (Dúngorth). He roots people and gives removable Disease effect that, if not cured, cause AoE stuns. They show up like little grenades over head and the debuff icon is an eye (Note: When Ivar uses this it is a Wound effect). His other ability to Ivar is a large shadow damage AoE. While his corruption is active anyone who damages him gets a stacking 25% incoming damage debuff. As he randomly targets people, he likes going after people who are debuffed, which can easily result in getting one-shotted.
- Defiler (Narslaug). He casts damage buffs on the others while he is alive. He also will cause large green heal over time circles to appear centered on several players. These heal him and his allies for about 1k every 4 seconds on tier 1. While his corruption is active he reflects damage.
All four must be killed before Ivar activates. The order that you kill them matters greatly. Ivar will receive the special abilities of all four - the order determines the initial tier of each. At certain morale thresholds (~210k. needs to be confirmed) the abilities all tier up. The first miniboss killed will give Ivar a tier 4 ability initially, while the last one killed gives him a tier 1 ability. The effects change with tiers some.


- Warg's ability - very dangerous if killed first or second. On low tiers only the tank will get the incoming damage (rend) increase. As the tiers increases other players around Ivar will get it also. At tier 3 players also get a -50% incoming healing debuff, and at tier 4 it increases to -100% incoming healing (as in you will absorb heals cast on you). He should be killed last while learning the fight for this reason.
- Troll's ability - causes large shadow damage AoEs to the entire raid (not position-based) that do large damage as they tier up.
- Angmarim's ability - casts the removable wound effects which cause AoE stuns if not removed. As it tiers up he also gains another large shadow damage AoE which appears to be raid-wide.
- Defiler's ability - casts the green HoT circles. The defiler's were very large and cast on a few people, while Ivar's version is smaller but cast on everyone. As this tiers up it will heal him more. At tier 4 the heal is around 2k every 2 seconds. The heals stack, so if Ivar stands over 3 circles he gets 3 times the healing.
All the abilities will be present but the raid can choose which will tier up throughout the fight by changing the kill order on the minibosses. The warg should be killed last while learning the fight to avoid having the huge incoming healing penalty throughout. The defiler's is generally easiest to deal with at a high tier. All ranged should be in the middle of the room. The tank and melee will fight him around the edge, moving him out of the healing circles when they spawn. With good movement the defiler should be killed first. The AoEs from the other two bosses hit for quite a lot of damage when fully tiered up, so they should be in the middle. The troll's seemed to hit harder so he should probably be killed 3rd, with the man 2nd, while learning the fight. Debuffs are very important for the raid-wide AoEs in this fight - multiple burgs are very helpful. Everyone should also have a stack of multiple types of pot (the AoE stun is disease during the miniboss fight and changes to wound with Ivar). The end of the fight, when more abilities have tiered up higher, is basicly a DPS race to burn him as quickly as possible. IHW+LS should be saved for about the last 120k.


The challenge mode condition for Ivar is to kill him and his sub-bosses without removing any of their Corruptions. There is also an unrelated deed associated with this fight that requires Ivar to be defeated in all possible combinations of the sub-bosses.
Gortheron
There is no annoying trash after Ivar, it leads straight into Gortheron (Lock 6).
On tier 1 he is actually probably the easiest of the 6 bosses in the raid. This fight has many, many adds. After some speech Gortheron will take the form of a large troll. At the beginning of the fight he will break down one wall and call for adds from the Shire. At different morale thresholds throughout the fight he will go green for a moment, walk over, and break down another wall, calling for adds from a different area. Adds will respawn indefinitely until Gortheron is DPSed down to the next phase switch. They are:
- (~720k) Shire - goblins and boars (~10k and 20k)
- (~610k) North Downs - wargs and defilers
- (~470k) Trollshaws - trolls and worms
- (~330k) Forochel - caeryg and kilpa-kita tigers
- (~180k) All four at once (one of each) + wights
- (35k) Cutscene
Gortheron has different special abilities during the different phases. In the Shire phase he will use +25% incoming damage debuffs on the tank (these can stack to at least 3). Throughout he will use uncurable DoT wounds to the tank, stacking up to at least 3. In the Forochel phase he also gains a frost damage DoT. With reasonable debuffs he does not hit hard at all on tier 1 unless the tank gets several +25% incoming damage debuffs - he is easily Fervour-tanked for all but the damage debuff phase. Instead of killing the endlessly respawning adds the group should designate off-tank to tank them while the rest of the group burns Gortheron down to his next morale threshold phase. When Gortheron greens out everyone should be focusing on the remaining adds and the off-tank should be ready to aggro new set of adds. When he gets very low, a cutscene starts...and I won't spoil the surprise for those who haven't done it. After the cutscene burning the last hit points off the Gaunt-Lord should be peace of cake.
Gortheron is a very easy fight on tier 1, surprisingly so - but he is much, much harder on tier 2. Gorthoron has a buff which increases his damage dealt. Every 8 seconds Gortheron's buff goes up 1 rank. Starting at 1 up to 50. Each add you kill reduces the buff by 1 rank. Challenge mode is to not drop his buff below 50 once he gets there. He continues to gain "virtual" ranks after 50 but they are not displayed. So once he gets to 50 you can only kill 1 add every 8 seconds. So 40 seconds after he gets to 50 he'll have "55" so you are able to kill 5 adds.
Loot
Dungarth, Vark, and Kaveran
![]()
![]()
![]()
![]()
![]()
![]()
![]()
![]()
![]()
![]()
![]()
![]()
![]()
![]()
![]()
Durin's Bane
![]()
![]()
![]()
![]()
![]()
![]()
![]()
![]()
![]()
![]()
![]()
![]()
![]()
![]()
![]()
![]()
![]()
![]()
![]()
Baleleaf and Dourbark
![]()
![]()
![]()
![]()
![]()
![]()
![]()
![]()
![]()
![]()
![]()
![]()
![]()
![]()
![]()
![]()
![]()
Frothmar
![]()
![]()
![]()
![]()
![]()
![]()
![]()
![]()
![]()
![]()
![]()
![]()
![]()
![]()
![]()
![]()
Ivar
![]()
![]()
![]()
![]()
![]()
![]()
![]()
![]()
![]()
![]()
![]()
![]()
![]()
![]()
![]()
Gortheron
![]()
![]()
![]()
![]()
![]()
![]()
![]()
![]()
![]()
![]()
![]()
![]()
![]()
![]()
![]()
![]()
![]()
Gallery
-
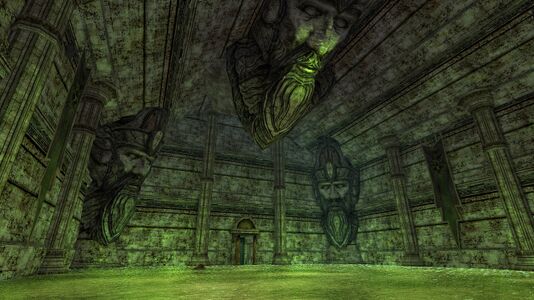
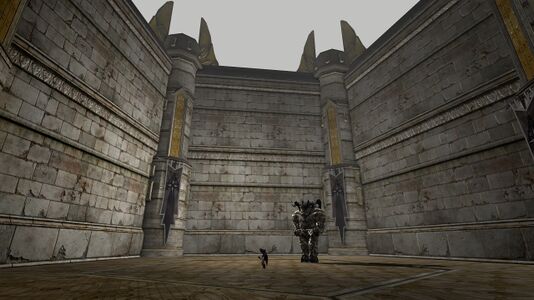
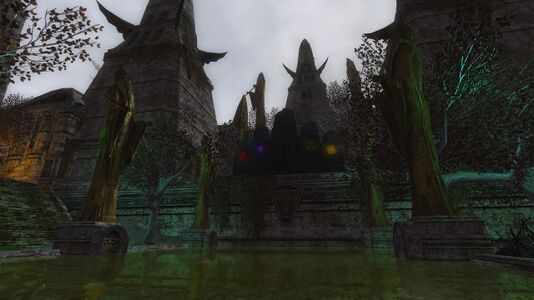 Entrance Courtyard, with the five Gaunt-lord sigils above.
 -
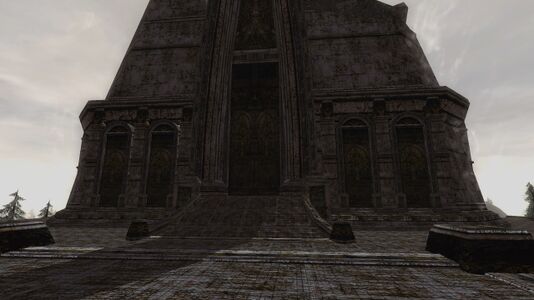 Entrance to the Interior
 -
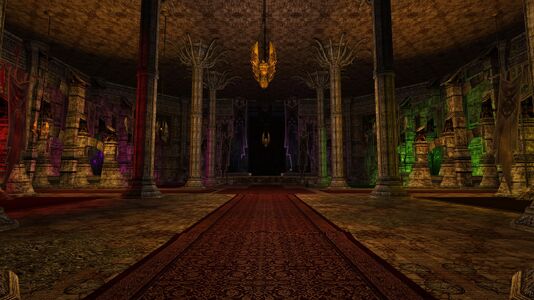 Entrance-hall
 -
 Start of the Wound Wing
 -
 Large hall of the Wound Wing
 -
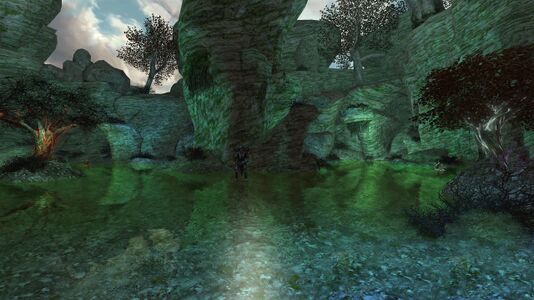 The glade of Dourbark and Baleleaf
 -
 Waterways of the Poison Wing
 -
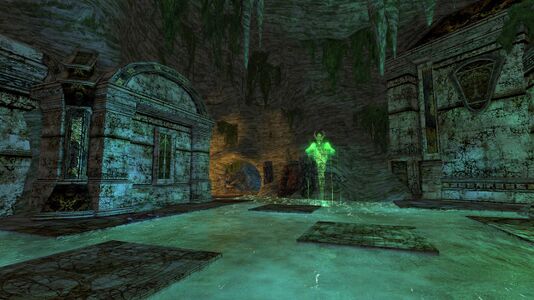
 Frothmar's Lair
 -
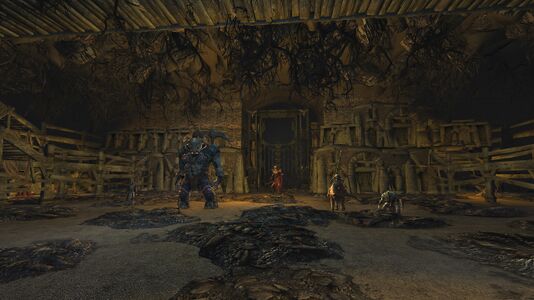 Ivar and his champions await
 -
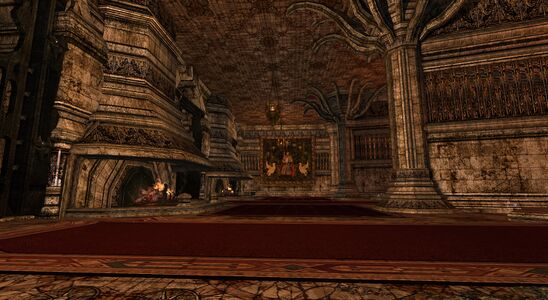
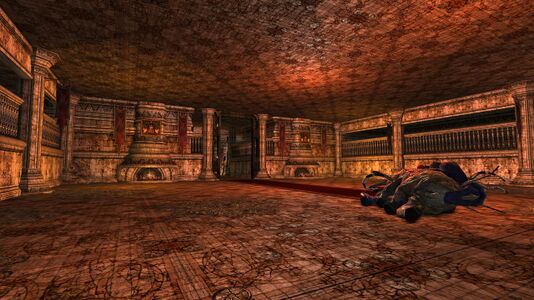
 Gortheron's Chamber
.jpg)


![[75.1S, 19.7W]](/wiki/File:Enedwaith_map.jpg)
See Also