Fornost
| Region: | North Downs |
| Instance(s): | Wraith of Earth Wraith of Fire Wraith of Shadow Wraith of Water |
| Dungeon(s): | Barad Eithel Barad Harn Barad Narthan Minas Erain |
| Connecting Area(s): |
Fields of Fornost |

Fornost is an area within the North Downs, in the north-western region.
North of the Fields of Fornost lies Fornost (Sindarin for Northern Fortress), also known as "Deadmen's Dike" among Men. Once this was a major Númenórean city. It was the last city of the Northern Kingdom to fall to the Witch-king of Angmar, more than a thousand years before current times. (See "Lore" for more historical detail.) For centuries these ruins were peacefully covered with grass, but recently Fornost was overrun by enemies from Angmar. Who knows what they are seeking and what fuels their hatred?
The section outside of the instances, north of the Fields, is unofficially called "Fornost City" and many quests given at the Treasure Hunters' Camp the unfold there, while other quests relate to the Fornost instances. Notice that the four instances must be done in order and within each a certain deed must be completed which unlocks the next instance. They are, in order: Water, Earth, Fire, and Shadow.
Just outside the entrance to the instances is a Camp Site Fire. The nearest stable-master is at Amon Raith, and the nearest services are provided at the Treasure Hunters' Camp.
Services
.jpg)
.jpg)
.jpg)
.jpg)
Quests
See "starting quests" and the instances for more quests
Starting:
- [26] Stopping the Siege
Involving:
- [6] Instance: Free Range - Session Play
- [26] Eliminating the Beasts
- [26] Pre-emptive Measures
- [26] Rock-worms
- [26] Seeking the Source
- [26] Ending the Elder - Small Fellowship
- [26] Stopping the Siege
- [26] Stem the Invasion
Deeds – Instances
Creatures
The following creatures are found within the area (outside instances):
- Ancient Field-bear
- Ancient Hoar-mantle
- Blogmal Defiler
- Blogmal Guard
- Blogmal Pillager
- Blogmal Raider
- Blogmal Sapper
- Blogmal Spear-master
- Blogmal Warlord
- Fearsome Rock-worm
- Field-bear Cub
- Gajarpan
- Great Hoar-mantle
- Sickly Razortooth
 Lore
Lore

Shorter version
Fornost flourished as the last capital of the fallen North Kingdom until it was destroyed by the Witch-king of Angmar. A year later Eärnur, last king of Gondor, along with Glorfindel and forces from Rivendell, defeated the Witch-king and drove his forces off. However, the city soon fell into decay and ruin. For roughly a thousand years now, it has become the haunt of orcs and fell things, and men call it "Deadman's Dike".
Longer version
"Located in the north-west of the North Downs, where the Greenway leads, stands the city of Fornost, broken long ago by the armies of Angmar. It once served as the seat of kings. When it fell, so did the North Kingdom of the Dúnedain - Arnor."Arnor was the northern kingdom of the noble-blooded Dúnedain, founded late in the Second Age by Elendil, who later died at the hands of Sauron. In those days, the capital of Arnor sat in the city of Annúminas, on Lake Evendim, west of the North Downs.
"Generations later, in a dispute over succession, Arnor was broken into three realms, and the North Downs became the dominion of a new kingdom called Arthedain. Here Amlaith – the first king of Arthedain, and a direct descendant of Isildur and Elendil – made Fornost his capital.
"For more than eleven hundred years, the Dúnedain kings of Arthedain ruled from Fornost. It was a king of Arthedain that bestowed the lands of the Shire to Hobbits from Bree. The Hobbits called Fornost the "King’s Norbury," a translation of the city’s formal Elvish title of Fornost Erain (literally, "northern fortress of kings"). The folk of the North Downs use all these names today. Some Men also call the lands of Fornost "the Deadman’s Dike," for today the city and its fields are a bleak ruin.
"Almost a thousand years ago, the hordes of Angmar swept across Nan Amlug and overran Fornost as part of the Witch-king’s stratagem to conquer the North Kingdom. The city fell. (Some say that traitors bewitched by Amarthiel — a champion of Angmar — betrayed the proud city from within.) Routed Dúnedain lords fled the land and king Arvedui, escaped to the frozen north but was lost at sea. So ended the kingdom of Arthedain.
"The Witch-king held the city of Fornost for a year, until an army made of Men from Gondor under Eärnur, the last king of Gondor, along with Elves from Lindon and Rivendell, and rallied remnants of the northern Dúnedain, arrived on the Fields of Fornost. The battle that followed ravaged the land and destroyed the army of Angmar. The Witch-king fled east to Carn Dûm, but his mark forever stained Fornost and its fields.
"The ruined city of Fornost seems forever blighted by the treachery and brutality of its defeat. Once a place of kings, it is now befouled by Orcs and haunted by Oathbreakers and fell spirits. Do not venture here alone. — Hero's Guide
Maps
-
 Map of North Downs
 -
 Topographic map of North Downs
 -
 Areas of Middle-earth


Gallery
-
 Orc huts in eastern Fornost
 -
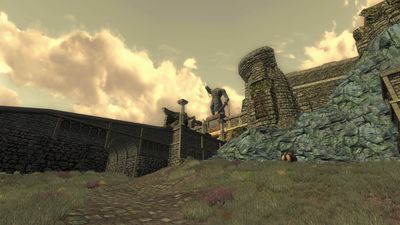 Road running under the ramp to the upper city
 -
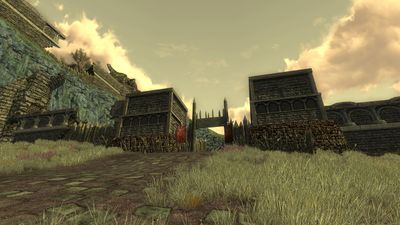 A makeshift entrance to the Orc camp
 -
 Diseased wildlife grazing in western Fornost
 -
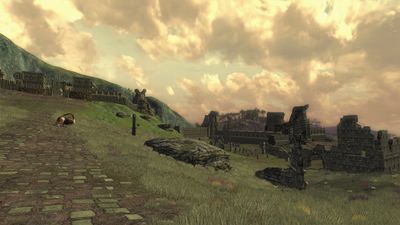
 Orcs have a stranglehold on the southeastern ruins
 -
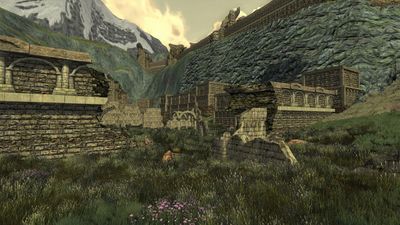 Worms occupy some flooded ruins in northwest Fornost
 -
 Entrance to the inner city
 -
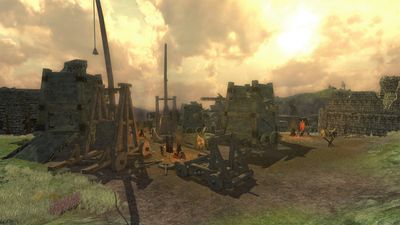 Siege equipment in the orc encampment


