Forgotten Treasury
| Level: | 54 |
| Size: | Fellowship |
| Cluster: | Mines of Moria |
| Region: | Moria |
| Area: | The Silvertine Lodes |
| Location: | [11.1S, 112.6W] |


The Forgotten Treasury is a level 54, full fellowship instance within the Silvertine Lodes of Moria.
Lore
With greed comes fear, and fortunes won by such means must be protected. The Dwarves who dug this vault sought to protect their wealth, it’s true, but they were also brilliant artists and crafters with vision.
Even in the rough remains of these old mines, the grand works of long-vanished architects await rediscovery. Some of these forgotten Dwarf-works push the boundaries between craftsmanship and magic.
The Forgotten Treasury stands draped in wafting webs. Rubble crowds the floor. The rotting remains of dead Dwarves lie scattered where they fell at the feet of berserk Orcs. It is a vault, but also a tomb and a battleground now. Those who venture into this instance face fierce and crazed foes.
But the battle will be fought under the mystifying lights of a bright crystal, beneath the eyes of grand statues with glowing axes, and at the feet of a proud Dwarf-lord. This vault’s greatest treasure may be the details of its own construction. Let any would-be savior of Moria who laments the greed of Khazad-dûm during a dark walk through the Silvertine Lodes also remember the Dwarves’ vision and majesty. They took great wealth from the earth, but they treasured it too. [1]
Location
Moria: Silvertine Lodes Coordinates: [11.1S, 112.6W]
Quests
- [56] Dark Defilers
- [56] Depleted Crystals
- [56] Skûm and Urauth
- [56] Relics and Coins
Deeds
- Defilers of the Forgotten Treasury - Defeat 6 sub-bosses within the Forgotten Treasury
- Defilers of the Forgotten Treasury (Advanced) - Defeat 3 bosses within the Forgotten Treasury
- Title: Keeper of the Forgotten Treasury
- Virtue XP: +2000
- Intruders in the Vault - Defeat 30 enemies within the Forgotten Treasury
- Title: Custodian of the Forgotten Treasury
- Intruders in the Vault (Advanced) - Defeat 60 enemies within the Forgotten Treasury
- Virtue XP: +2000
- Treasures of the Silvertine Lodes - Find pieces of treasure within the Forgotten Treasury
- Title: Treasure Hunter
- Curator of the Forgotten Treasury - Complete all deeds within the Forgotten Treasury
- Title: Curator of the Forgotten Treasury
Mobs
Overview
This instance is made up of two large rooms. Upon following a narrow hallway that leads into a large, circular, arena-like room, the Orc Wraith Morhûn shouts out a threat and retreats into the inner treasury chamber, locking the door behind him in the process. The six dwarf statues positioned around the room then rotate in a certain order, and the lights go out. The reverse of the order in which the lights go out is the key to opening Morhûn's inner chamber after dealing with the mobs in the large, outer room. With you standing at the 12 o' clock position the statues are located at 1, 3, 5, 7, 9 & 11 o'clock.
Step 1
To get into Morhûn's room, the fellowship will need to get onto the ledges of the room. They can choose to go to the left, or to the right. Around the ledges are six mini-bosses which must be defeated to enter Morhûn's chamber. There are four sets of mobs around the room, including Dark Orc Berserkers, Dark Orc Defilers, and Lesser Spirits. It is recommended you kill the mobs before starting the bosses. Each mini-boss will drop either a purple or a yellow gem shard depending on the colour of the shard on his chest when he dies. Depending on the composition of your fellowship, you should try to acquire gem shards which will switch Orc Wraiths to the form that favours your damage type.
Step 2
Upon defeating the six mini-bosses, you must station each member of the fellowship at a dwarf statue. Attached to each statue is a wheel that must be turned. When the wheel is turned in its correct sequence the dwarf statue spins around and shines a golden reflection into the center of the room. Turning a wheel in the wrong sequence results in acid being poured onto the member who turned it doing damage over time. The order is different each time the instance is run. The order to turn them to reactivate them is related to the order they follow when they "spin down" upon entering the instance. Watch the order when you enter and use the reverse order to spin them up again.
Step 3
Morhûn waits inside the sealed treasury room. You will need wound and fear potions to cure his DoTs. This is where the Yellow and Purple Shards come in. When the shard on his chest turns purple, pop a yellow shard. When the shard on his chest turns yellow, pop a purple shard. Upon his defeat, you can loot the three chests in his room.
Step 4
When ready, process back into the main chamber and make sure everyone leaves Morhûn's room at the same time, otherwise they'll be locked in. As the fellowship tries to leave the instance, Skûm and Urauth enter the circular room. They are massive troll twins who share incoming damage to one another and take advantage of their strength when in close proximity to one another, so it is suggested to have two tanks pull them apart. If you manage to defeat them, the chest in the center of the room can be looted.
Bosses
| Level | Name | Difficulty | Species | Dread | Morale |
|---|---|---|---|---|---|
| 56 | Darûkûrz | Elite Master | Orc-kind | 1 | 31,000 |
| 56 | Frûzgûl | Elite Master | Orc-Kind | 1 | 31,000 |
| 56 | Lorzgûl | Elite Master | Orc-kind | 1 | 31,000 |
| 56 | Mokza | Elite Master | Orc-kind | 1 | 31,000 |
| 56 | Nardurgûl | Elite Master | Orc-kind | 1 | 31,000 |
| 56 | Narghug | Elite Master | Orc-kind | 1 | 31,000 |
| 56 | Morhûn | Nemesis | Orc-kind | 3 | 62,000 |
| 54 | Skûm and Urauth | Elite Master | Troll-kind | 2 | 45,000 each |
Loot
Morhûn![]()
![]()
![]()
![]()
![]()
![]()
![]()
![]()
![]()
![]()
![]()
![]()
![]()
Skûm and Urauth![]()
![]()
![]()
![]()
![]()
![]()
![]()
Gallery
-
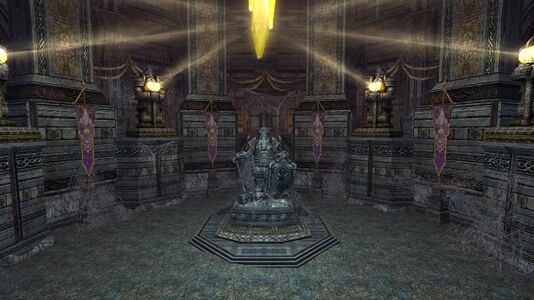
Central Court
-
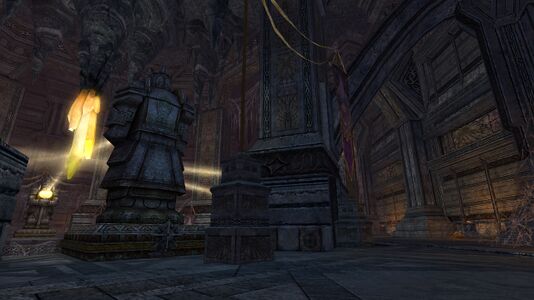
Walkway
-
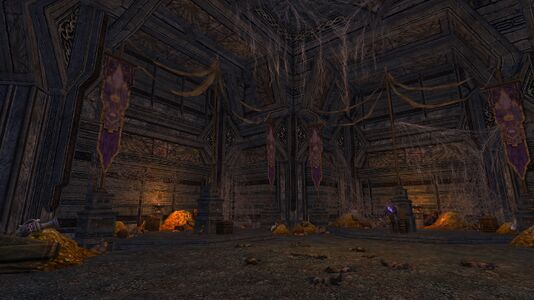
Vaul Interior


![[11.1S, 112.6W]](/wiki/File:Silvertine_Lodes_map.jpg)
| Settlements and Landmarks of The Silvertine Lodes
| ||
|---|---|---|
| Settlements: | The Deep Descent | |
| Landmarks: | Gamil Filik • The Heart of Fire • Menem-berej • Menem-munz • The Stone Council • The Way of Smiths | |
| Dungeons: | The Old Silvertine City | |
| Instances: | Forgotten Treasury | |
| Mines of Moria Instances
| ||
|---|---|---|
| Fellowship: | Dark Delvings • Fil Gashan • Forges of Khazad-dûm • Forgotten Treasury • Skûmfil • The Grand Stair • The Sixteenth Hall | |
| Raid: | Filikul • The Vile Maw | |