Fil Gashan
| Level: | 58 |
| Size: | Fellowship |
| Cluster: | Mines of Moria |
| Region: | Moria |
| Area: | The Flaming Deeps |
| Location: | [17.1S, 109.6W] |

Lore
- Fil Gashan is the stronghold of Talug, right hand of Mazog, Lord of Moria. Here, the Orc-general musters an army to make a futile assault upon Lothlórien. Here, he also breeds Orc-warriors of a most deadly skill...
Description

Fil Gashan is a landmark within the Flaming Deeps in Moria. [17.1S, 109.6W]
This is the location for a level 60, 6-man instance. The entrance to Fil Gashan is located near Hudnul-meden in the southern region of The Flaming Deeps.
Deeds
The following deeds can be obtained by visiting this location:
Quests
Mobs
The following creatures are found within this area:
Bosses
| Level | Name | Difficulty | Species | Dread | |
|---|---|---|---|---|---|
| 60 | Nemesis | Orc | |||
| 60 | Nemesis | Uruk | 0 | ||
| 61 | Nemesis | Uruk |
Instance Overview
The instance is set up such that there are sentries patrolling the area and watching for intruders. If they become alerted, they run to the nearest alarm bell and ring for reinforcements.
Hard mode for Fil Gashan requires the fellowship to sneak past every sentry, assuring that no more than 2 sentries are killed. To do this the fellowship must disguise themselves in uniforms pilfered from Chief Guards on the first floor and Lieutenants on the second. Burglars can also sneak past sentries and by using Share the Fun can also take another fellowship member with them.
All other mobs in the instance are fair game for killing: fighters, skirmishers, chief guards and lieutenants.
Uniforms
- The Chief Guard's Uniforms are found on the first floor of Fil Gashan. They are obtained either by a drop from Chief Guard or looted from a randomly spawned strongbox. These uniforms, when worn, can fool any sentry that resides on the first floor.
- The Lieutenant's Uniforms are necessary for the second floor of Fil Gashan, as the orcs are alerted to the presence of intruders posing as chief guards. They are obtained either as a drop from a Lieutenant or looted from a randomly spawned strongbox. These uniforms, when worn, can fool any guard that resides on the first or second floor.
- When uniforms are looted, they first appear as a wrapped uniform. Opening the wrapped uniform will bind the uniform and allow you to use it. Wrapped uniforms are tradeable, but the unwrapped uniforms are not.
- When you equip a uniform, you get a buff that will tell you which types of mobs (unaware, watchful, alert, etc.) you can fool using the uniform. The uniform lasts for 5 minutes. You cannot reapply the uniform within the 5 minutes that you have it on.
- When sneaking past guards, you must remain mobile at all times if you want them to remain unaware. If you remain still for too long, the guards will notice you and aggro.
- As soon as you take damage, your uniform (and uniform buff) is removed and you can therefore be spotted by any mob. You must reapply the uniform after every time you took damage when you want to sneak around afterwards.
- Uniforms are removed from the inventory if a player leaves the instance.
First Floor
Upon entering Fil Gashan, the first sentry watches from his post right in front of the first alarm bell. These sentries must be avoided if the fellowship is to complete challenge mode.
To retrieve the first uniform, pull the mobs behind the sentry back to the front corridor. Soon after a Chief Guard will join the fight. Keep in mind that the first two people to get uniforms should probably be a healer and tank, or a healer and DPS duo, so that they can bring down another chief guard for his uniform.
Once the first person has her Chief Guard's uniform, she can equip it and begin to sneak around and look for the second uniform. Everyone else should wait in the front hallway.
To get to the second uniform, sneak past the alarm bell and take a left down the hallway at the four-way intersection. Find a uniform in a strongbox in the room at the end of the corridor and hand it out to someone at the entrance.
From here, these two people should roam around the first floor (with the exception of the mess hall located north of the crossroads) and spy the layout of the first floor. The Chief Guards and the strongboxes spawn at different locations each time throughout the instance. Find the easiest fight for two people so that they can obtain a third uniform.
A rule of thumb is to try and avoid any fights where there is a roaming Chief Guard. The stationary Chief Guards are less risky to take down, without pulling massive amounts of mobs.
The uniform wearers should go to the locations one at a time. If they walk past a sentry together, they'll fail. One good trick is, when the first person is at the fight location and is waiting for the second uniformed person to arrive, that first person should keep moving around in that little section of the map. This will throw off the guards long enough for the next person to arrive. Make sure there aren't any sentries nearby, or they could get suspicious and ring a bell.
Once the Chief Guard is down and his uniform looted, one person should ferry the wrapped uniform back to the front of the instance and hand it out to one of the patient fellows. The second person can remain behind and look for the next fight.
Continue this process without alerting any of the sentries until everyone has a Chief Guard's uniform.
Everyone should equip their uniforms and walk north, one at a time, through the mess hall to the back, and wait for them to finish eating.
Vrarz the Cook
Vrarz the Cook first sends out several adds to take care of the fellowship and after a while will join the fight himself while his remaining adds cheer him on. After a while, his adds will rejoin and the fellowship will have to take down both him and the rest of his adds.
Once Vrarz the Cook is dead, a door opens up on the northwest corner of the room that leads to a hallway. At the end of the hallway, there's a gate with an alert sentry standing in front of an alarm bell. This is the only alarm bell that must be rung during the entire instance. The sentry will summon several guards and a Lieutenant who will drop a new type of uniform that is effective against mobs on the second floor. The Chief Guard uniforms will not work on the second floor.
Captain's Class Quest
The trigger for the Captain Class Quest In Harm's Way (Optional) lies in the mess hall, and once it is activated will summon seemingly endless waves of adds that the fellowship must dispatch.
Second Floor
The first person to get a lieutenant's uniform should equip it and head up to the second floor. Running past the first set of mobs and across the mess hall balcony, the player will find himself in another set of corridors and closed rooms containing Lieutenants and strongboxes.
Again, the Lieutenants and strongboxes spawn at random in these rooms, so the basic idea is to find an empty room adjacent to one with a lieutenant in it. Time the patrolling of the sentries so that when they turn the corner and are at their southern-most point on the map, hop out of the room, range-pull the lieutenant and run back toward the waiting fellowship.
Be careful not to get hit or risk losing your disguise making it impossible to run past the other orcs without alerting them. If necessary, jump from the balcony in to the mess hall then attack them with the rest of the fellowship.
A blinding flash or a riddle can incapacitate the lieutenant, preventing him from starting a warband maneuver. Repeat this process until everyone has a Lieutenant uniform but watch out for respawns.
Commander Greb
The fellowship should safely sneak their into way to Commander Greb's room, which has its entrance on the eastern side leading to the interior of the corridor.
There are 3 phases to defeating Greb.
- Phase 1: Poisoned blades
- At the beginning, Greb will pull out his poisoned blade and apply a curable poison to a fellowship member.
- Phase 2: Fire Axe
- In the second phase he might apply wounds, and he may also gain a buff that will reflect melee damage.
- TIP: When he yells "I'll return your puny damage", do *NOT* hit him. Instead, just kite him around the room until this buff wears off.
- Phase 3: Final Fight
- At about 20k morale, he will call his two Lieutenants to his side and proceed to stun players making them vulnerable to their warband maneuvers. A Lore-master should apply stun protection to everyone to prevent warband maneuvers.
Third Floor
The second boss drops the key to open up a door on the third floor.
Wait for the sentry to path back to the right and once the coast is clear, everyone can jump down to the mess hall with the exception of the key-holder who will proceed across the balcony and back up the stairs and unlock the door at the top. The boss room lies past several sentries and alarm bells.
General Talug
Once again, General Talug is fought in three phases.
- In the first phase his archer adds will place traps on the ground which, if General Talug is lured into a trap, will make him vulnerable to damage.
- In the second phase, a fire-fist will enter the battle and if defeated near the boss, will apply a heavy wound on the general.
- After this is done a couple of times, General Talug will shed his shield and become vulnerable to direct damage.
A more in depth breakdown of this fight can be found on the General Talug page.
Gallery
-
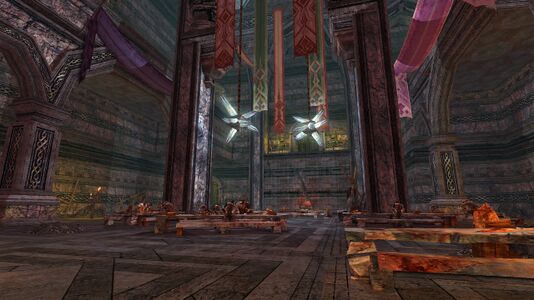 Dining Hall
 -
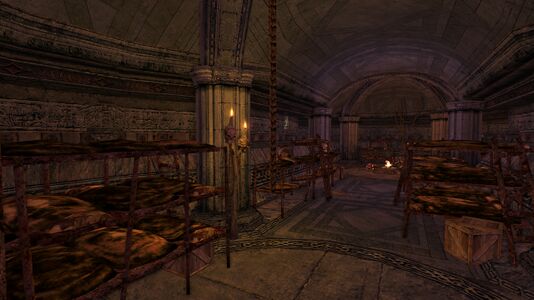 Barracks
 -
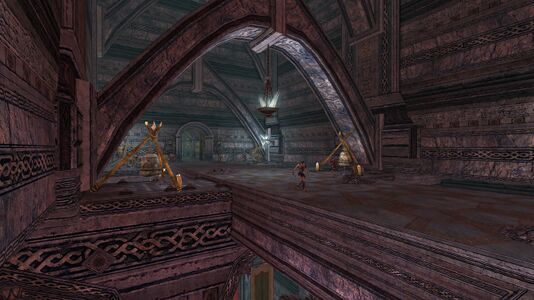 Upper Walkway
 -
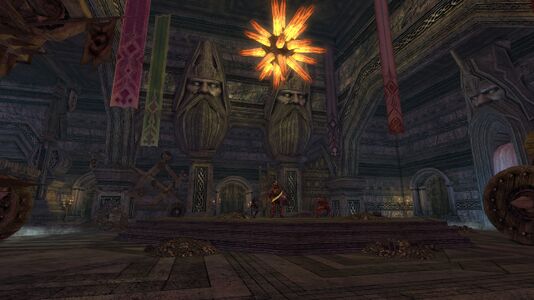 General Talug's Room


![[17.1S, 109.6W]](/wiki/File:Flaming_Deeps_map.jpg)
| Settlements and Landmarks of the Flaming Deeps
| ||
|---|---|---|
| Settlements: | Anazârmekhem • The Crossroads of Ash | |
| Landmarks: | Ânghumu-ru • Bhraf-ru • The Burning Stair • Durin's Court • Gate of the Seven Fathers • Hadâd-mezer • Hudnul-meden • Hurmulkezer • Tanunshush • Umukh-ghâr | |
| Instances: | Fil Gashan • Halls of Crafting • The Forges of Khazad-dûm | |
| Mines of Moria Instances
| ||
|---|---|---|
| Fellowship: | Dark Delvings • Fil Gashan • Forges of Khazad-dûm • Forgotten Treasury • Skûmfil • The Grand Stair • The Sixteenth Hall | |
| Raid: | Filikul • The Vile Maw | |