Dark Delvings
| Level: | 58 |
| Size: | Fellowship |
| Cluster: | Mines of Moria |
| Region: | Moria |
| Area: | Foundations of Stone |
| Location: | [15.8S, 97.3W] |

- "In the deepest delvings of Moria dwell nameless things which shun the light and feed on the darkness. The Elves of Lórien strive to constrain the evil creatures, but led by the evil Gurvand, they may be too strong to hold back forever..."
Dark Delvings is a level 58, 6-man instance in the Foundations of Stone of Moria.
Lore
This area is a bizarre and surreal place of ancient evils, shimmering vines resembling glowing entrails, and the remnants of some dwarf expedition long since destroyed. The less said about these horrid halls, the better. Unless you have the bearing and resolve to brave these insane places, it is best not to dwell overlong on them.
Location
The entrance to Dark Delvings is in the Foundations of Stone [15.8S, 97.3W]. There is a campsite nearby at [15.4S, 97.4W].
Quests
Click [+] to expand a list of quests found within the instance.
Deeds
Click [+] to expand a list of deeds found within the instance.
Overview
Needed:
- 1 Champion or Warden: Interrupt frequently
- 1 Minstrel: Heal a lot
- 1 Guardian: Traited for holding aggro and well geared
- 1 Hunter or Rune-keeper: Max DPS
- Fistfuls of level 65 wound pots
Suggested:
- Captain: Healing and buffs (I thought about putting this in "needed")
- Lore-master: Roots, healing, wound removal (this is STRONGLY suggested)
- Burglar: Fellowship Maneuvers and debuffs (I'm not sure if bosses are conjunction-able)
And as much shadow mitigation as you can possibly get
All monsters in this instance deal shadow damage in one form or another, and shadow mitigation DOES help. Seriously. So if you've got rift armor, wear it. If you've got rift pots, bring them. If you have a Lore-master, try to convince them to pull out their raven. Shadow mitigation helps.
Also, this instance wasn't called the Dark Delvings for nothing. There are runsetones throughout the instance that are the only source of light.
- While standing in the darkness, you will receive +50% attack duration, +50% all inductions, and -50% run speed.
- While standing in the darkness, all mobs receive -50% attack duration, -50% inductions and +50% run speed
- While standing in the light, players receive no penalty.
- While standing in the light, mobs will receive +50% attack duration, +50% all inductions, and -50% run speed
There is also another debuff that you need to avoid. It's called ![]() Gurvand's Challenge, but I will call it the challenge debuff. Every now and then, you will get a message that "Gurvand screams loudly and the darkness shrinks in." A few seconds later, it will tell you that a "gust of vile wind sweeps through the tunnels," and that "the runestones are unaffected." If you are standing in the dark when it happens, you get the challenge debuff lvl 1.
Gurvand's Challenge, but I will call it the challenge debuff. Every now and then, you will get a message that "Gurvand screams loudly and the darkness shrinks in." A few seconds later, it will tell you that a "gust of vile wind sweeps through the tunnels," and that "the runestones are unaffected." If you are standing in the dark when it happens, you get the challenge debuff lvl 1.
This times out quickly, but if you are caught in the dark when it happens again, you get lvl 2, and over again up to lvl 5. It cannot be dispelled by any skills from any classes.
The easy way to avoid this is to stand in the light. If you see "Gurvand screams," get to the light. If you have to go AFK, do so in the light. As you progress towards the final boss, he will put out this challenge debuff more and more often, until he is doing it every 1-2 minutes or so. DO NOT let this stack up on anyone.
- Lvl 1 = +20% damage from all sources, 1 minute duration
- Lvl 2 = +40% damage from all sources, 2 minute duration
- Lvl 3 = +60% damage from all sources, 3 minute duration
- Lvl 4 = +80% damage from all sources, 5 minute duration
- Lvl 5 = +100% damage from all sources, 10 minute duration
Now, an overview of what you will meet in the Dark Delvings. Most mobs in the Dark Delvings are immune to stuns and dazes. No distraction, no stuns, no Lore-master dazes. There are reports that Rune-keeper's shocking touch works on most mobs though. Lore-master stuns in the corridors between the bosses do work and is very useful. Apart from that use roots which will make things MUCH easier.
[[Dark-maw Master (Dark Delvings)}Dark-maw Master]]:
- Frontal AOE damage
- summons a howling overseer
- Melee attack (shadow damage?)
- AoE shadow damage attack
Howling Overseer:
- 7,464 health
- Ranged shadow attack
- Spawns some lashing, slowing, distracting tentacles
- Single target attacks, no AoE
- Surround knockback
- Can put a DoT wound on target
- Very slow moving
- Have AoE drains
- Rumored to heal surrounding mobs.
- Usually 2-3 at the same time
- Come in groups of 3-4
- Spawn whenever you touch the hanging goo
Now, lets got down to business. When you enter the Dark Delvings, you will be standing by a runestone, and there will be one path in front of you. Patrolling this path will be your first mob, a single Dark-maw Master. Remember his frontal AoE, bring him into the light and take him down (deal with his add last IF he spawns it). Then move forward to the next runestone.
The next pull is 4 mobs: 1 Master, and 3 overseers (2 howling,1 snarling). I strongly suggest a root-pull, but if you want to take them all at once, make sure you target through your Champion to take them down 1 at a time quickly. Priorities should be Master, Howling, then the two Snarling. Go forward to the next light, and pull another Master Patrol, then you have a second group just like the first. Note that there are 3 patrolling mobs in this instance, and they are the only mobs that re-spawn. Re-spawns occur about an hour after they are killed.
Boss Fight 1 Void-eater
- Wait until the vile gust of wind to draw the boss. If the fight goes long, you don't want the challenge debuff to stack quickly on your party
- Have tank draw boss and stick to him for the entire fight. Tank may get trapped by glow worm stickiness in the first few seconds, but this shouldn't be a huge problem.
- Boss has knockback - if you get knocked off, climb back up and continue the fight. Standing with you backs to the Runestone should prevent this from becoming a problem.
- Boss puts nasty wounds on your party (mainly your tank). Either have your Lore-master on the ready to remove these wounds, or have your tank ready with wound pots. I recommend the first because sometimes the boss chains his wounds and outpaces the pot cooldowns.
- Once you get this fight under control, its goes pretty quickly.
After the battle is over, you can move about the room. Only one of the stones in the room can be turned on at one time, so don't waste your time trying to turn them all on. Loot the chest (it usually has a silver or bronze coin) and then step into the light to continue the instance
The next pull is 2 Dark-maw masters. This might seem easy, and I would caution you 2 masters at the same time is no picnic. Try a root pull, and have the tank pick both of them up once the root wears off, if possible. You can offtank one if you like, but the key to surviving long enough to kill them is to watch for the AoE damage and try to stop the masters form summoning their adds.
Move to the next light and turn it on. In front of you will be 2 darklings and a world eater. The World-eater is a pushover with a big health bar, so take down the darklings first and watch for wounds on you tank.
Boss Fight 2 Doom-speaker
- Some people feel that this is the hardest fight in the instance. I disagree, but I understand where people would get this idea. This is as far as some groups ever come in the Dark Delvings. Without strategy, this boss is a brick wall.
- Again, wait for the vile gust to come before you start this fight. My group has survived for 20+ minutes in combat with this guy, but once the challenge debuff begins to build, things start to fall apart.
- This boss has 4 sets of adds which he can summon during the battle. The set he chooses will be random. He will summon once to start the fight, and then he summons again at each third of his health bar (I think).
- He may summon:
- 6-8 Darklings. Boss receives Melee immunity
- 3 Howling Overseers. Boss receives Ranged Immunity
- 2 Dark-maw Masters. Boss receives Tactical immunity
- 1 World-eater. Boss receives +20% all damage, but tries to fully heal himself (so interrupt!)
- The tank will start the fight, and only one runestone will remain lit in the room. Tank the boss and run to the light to deal with his first adds. You can also send the tank to kite the boss around in the dark while you deal with the adds.
- Periodically he will turn off a rune-light and summon a new round of adds. The random nature of the adds can make this fight very difficult or borderline easy.
- This boss uses wounds constantly. Potions are probably not going to be enough; bring a Lore-master.
- The boss does a shadow AoE attack that multiplies as your challenge debuff increases. This attack is linked to a corruption effect on him that looks like a gray rune with a light blue border. Dispel it. Everyone should know what skill your class can use to dispel corruptions. Also, inform your Minstrel, Captain and Lore-master that the AoE might happen, so they can be ready to heal the fellowship if it does.
- The boss will try to heal himself with a glowing green induction. Clobber this, interrupt it somehow. If he gets it off, its a FULL heal. If you miss your interrupt, settle in for a long fight. The time I mentioned before when we survived for 20+ minutes against this boss, it was because we could not interrupt him fast enough without a Champion. Never stop interrupting.
- Stay on top of this fight, try to predict roughly when the boss will try to summon, heal, or AoE, and you will be done in no time.
Once you beat the boss, all five lights will come on and you can loot that second chest. This one usually contains a coin, too. Then move onward to the next light.
You're standing directly in front of a Dark-maw World-eater and an overseer. Plus, there are two little darklings patrolling up and down the corridor which you will have to deal with as well. Root pull, or tank the World-eater while you torch the overseer, then finish him off. The next pull down the corridor is a World-eater and a master. Again, root-pull or off-tank the World-eater while you tackle the master. Then turn on the light and prepare yourselves for
Boss Fight 3 Gurvand
- This boss is less technical than the last one, but significantly harder nonetheless. No tricks to defeating this boss, but you CANNOT turn on the lights in the room if you want the teal coin for armor.
- Again, make sure the vile gust passes just before you start the fight. This is the fight where you can really see the challenge start to take effect and if you aren't smart and fast about getting him down, you will see +100% damage on your tank (by
 Gurvand's Challenge). And you will hate it.
- You will want to tank this boss against a runestone, but don't light it if you are trying for the helm. Everyone else can stand behind the boss, or 10 meters away down the platform. Only the tank needs his back pressed to the rune. This boss has a knockback and its on an induction, so if you see the glowing circle around him, make sure you aren't in a position to get knocked off, you can also run through the boss so that his induction fails due to LOS. IF you do get knocked off, you're dead. Cannot be revived, cannot come back in (the door locks at the start of the fight), and the loss of a team member means its probably a wipe. If your tank falls, it IS a wipe. Just run to the door and die and let the Minstrel feign death and revive everyone.
- There are some overseer adds in this fight, which respawn periodically as well. If you do get adds, burn them quick while the tank focuses on the boss and the Minstrel heals the tank. It may help to stagger killing them to make respawns more manageable.
- The Minstrel needs to chain-heal the tank. If the tank doesn't look like he needs healing, he will in like 3 seconds, which is a little longer than the Minstrel's heal takes to cast in the dark. So your Minstrel, your Lore-master, your cap, all need to focus on chain-healing the tank. This boss does bad DPS at the start of the fight, and by the end his DPS is wicked.
- This boss deals only shadow damage. He will shout at you for shadow damage. He will slap your face for shadow damage. He will "shut your mouth!" for shadow damage. Shadow mitigation is way helpful in this fight.
- Controlling aggro is key to this fight. He attacks only one person at a time for massive damage. This basically means that if the tank loses aggro or dies, it's probably a wipe. I say probably, because the boss usually targets the Minstrel, and even if someone gets him off the Minstrel, he still deals way too much damage for anyone but your guard to stand up. Minstrel can also feign death to remove himself as a target, but that is one less healer and leaves the captain as the main target and the only person available to resurrect your guardian.
- There are times when you should NOT attack this boss. He will put a buff called
 Bleeding Ears on himself every 1-2 minutes that gives 200% damage reflection, which means any time you hit him, he takes no damage and you get twice as much back on your own dang self. Watch for this and shout it out! Don't let your teammates miss it, and quickly hit F1 on your keyboard to target yourself. Have someone watch the buff and give the all clear when it expires.
- The boss has a strong group AoE that he will use every 1-2 minutes of the battle. At first, this is a nuisance (1200-1600 shadow to everyone), but as the challenge stacks up, it eventually becomes 2400-3200. Be prepared for this. Triumphant spirit, song of aid, and call of greatness can help keep everyone alive and can allow the cap and Lore-master to contribute to the group healing. Save "Fellowship's Heart," though.
- During the last 20K of this boss battle, Gurvand turns himself into Crazy-go-nuts-McGee and suddenly becomes superman. Point is, burn hot at this point. Pull Fellowship's Heart and waste yourself. Pull out all the stops and use everything you can. Have the Captain do "in harms way" with the "last stand" and bust a move on this boss.
Then you can kill the adds, loot the chest, pick up runes and get that second-rate helm that you've worked so hard for. Because you get the helmet to your armor set from the watcher, not from the Dark Delvings. You can exit from behind the boss, and you will find that it brings you back around to the entrance and you can leave.
Alternate Tactics for Quest to Defeat Gurvand
If you just want to defeat Gurvand for the quest, use Easy Mode not the Challenge Mode. After about ten failed tries using the tactics given above, my group developed the following approach. It worked on the very first try and was almost too easy,... almost.
Have everyone, especially the minstrel, standing near the stone at the start. Everyone will stay right there for the entire fight, except the guardian.
Before the fighting starts, have the guardian explore the area to locate the outermost position at which the light from the stone still protects him. The guardian will fight from that approximate location (or a little closer to the light).
The guardian goes and gets the boss (Gurvand) and brings him over into the light of the stone and then turns him to face him away from the stone. The guard should position himself in line with the boss and with the walkways on the platform. That way, if Gurvand does a knock-back, the guardian is not knocked off the platform.
The minstrel heals the guardian - always!
Got it? Guardian tanks the boss; minstrel heals the guardian.
Your group's #1 priority is to keep the adds off of the minstrel! Luckily, the adds are fairly weak and easily defeated.
Champions and guardians need to interrupt Gurvand's inductions (red circle around his feet) to prevent the knock-back.
When not fighting adds or interrupting, your group beats down the boss from behind.
Note to the group - when the guardian first attacks the boss, the lights go out and an add drops down from above. Have one person re-activate the stone (right click it). Everyone else take out the add(s), then get on the boss (from behind).
Your group never has to move because the light from the first stone never goes out - Gurvand is facing away from the stone and never hits it.
That's it. It is much easier and almost fool-proof. It worked the first time we tried it. It might even work for Challenge mode but we did not try that.
DO NOT HIT GURVAND WHEN HE HAS ![]() Bleeding Ears ON. Watch for it. Call it out when it comes on. Call it out when it goes away and then wail on him.
Bleeding Ears ON. Watch for it. Call it out when it comes on. Call it out when it goes away and then wail on him.
Class Quest
The warden class quest is found in the same room as the second boss, right click the altar to summon.
Mobs
Click [+] to expand a list of mobs found within the instance.
Bosses
| Level | Name | Difficulty | Species | Dread |
|---|---|---|---|---|
| 62 | Void-eater | Nemesis | Nameless | |
| 62 | Doom-speaker | Nemesis | Nameless | 0 |
| 63 | Gurvand | Nemesis | Nameless |
Loot
![]()
![]()
![]()
![]()
![]()
![]()
![]()
![]()
![]()
Maps
Gallery
-
 Rune-lit Path
 -
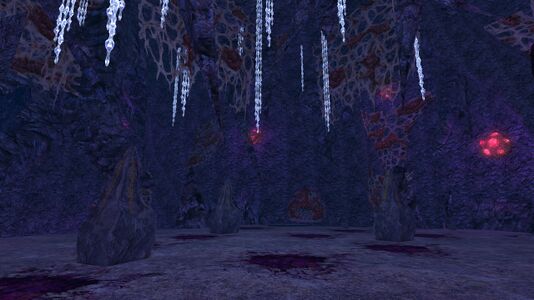 Void-eater's Room
 -
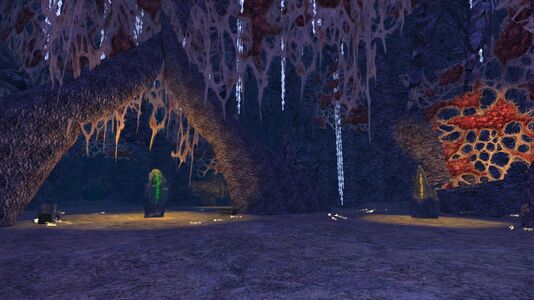 Doom-speaker's Room
 -
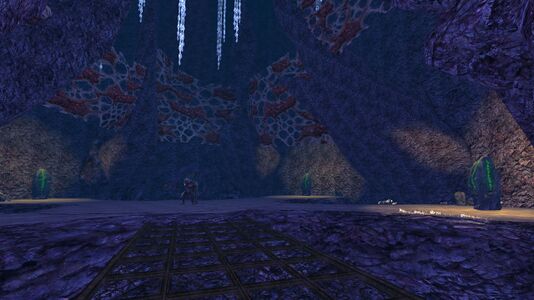 Gurvand's Room


![[15.8S, 97.3W]](/wiki/File:Foundations_of_Stone_map.jpg)
| Settlements, Areas and Landmarks of The Foundations of Stone
| ||
|---|---|---|
| Areas: | The Shadowed Cave | |
| Settlements: | The Shadowed Refuge | |
| Landmarks: | Dalgum-ru • The Endless Stair • The Bridge-shard • Tunzelgund • Zabad-fakâk | |
| Interiors: | Gwathrendath • The Crown Chamber | |
| Instances: | Askâd-mazal • Dark Delvings • Dâr Narbugud • Skûmfil | |
| Mines of Moria Instances
| ||
|---|---|---|
| Fellowship: | Dark Delvings • Fil Gashan • Forges of Khazad-dûm • Forgotten Treasury • Skûmfil • The Grand Stair • The Sixteenth Hall | |
| Raid: | Filikul • The Vile Maw | |